• Facebook
  • Instagram
  • Mail
  • Youtube
Call 1-800-8-HUMMEL
  • 0Shopping Cart
Lägler North America
  • Machines
    • SURFACE
      • HUMMEL
      • SUPERHUMMEL
    • FINE SANDING
      • TRIO
      • SINGLE
    • EDGE/STAIRS/CORNER
      • FLIP
      • ELAN
      • UNICO
  • Machine Parts
    • HUMMEL
    • SUPERHUMMEL
    • TRIO
    • FLIP
    • ELAN
    • SINGLE
    • UNICO
  • ABRASIVES
    • Buy Abrasives
  • Blog
  • PST®
  • Newsletter
    • Lägler Direkt Archive
    • Subscribe | Email Newsletter
  • Warranty
  • Contact
    • Info Request Form
    • Submit Photo | #LaglerOfTheDay
  • News & Events
  • Fly & Sand 2021
  • Menu Menu
You are here: Home1 / Blog2 / Machine Maintenance

Posts

How to Replace the Lägler FLIP® V-Belt

November 29, 2017/in Lägler /by webmaster

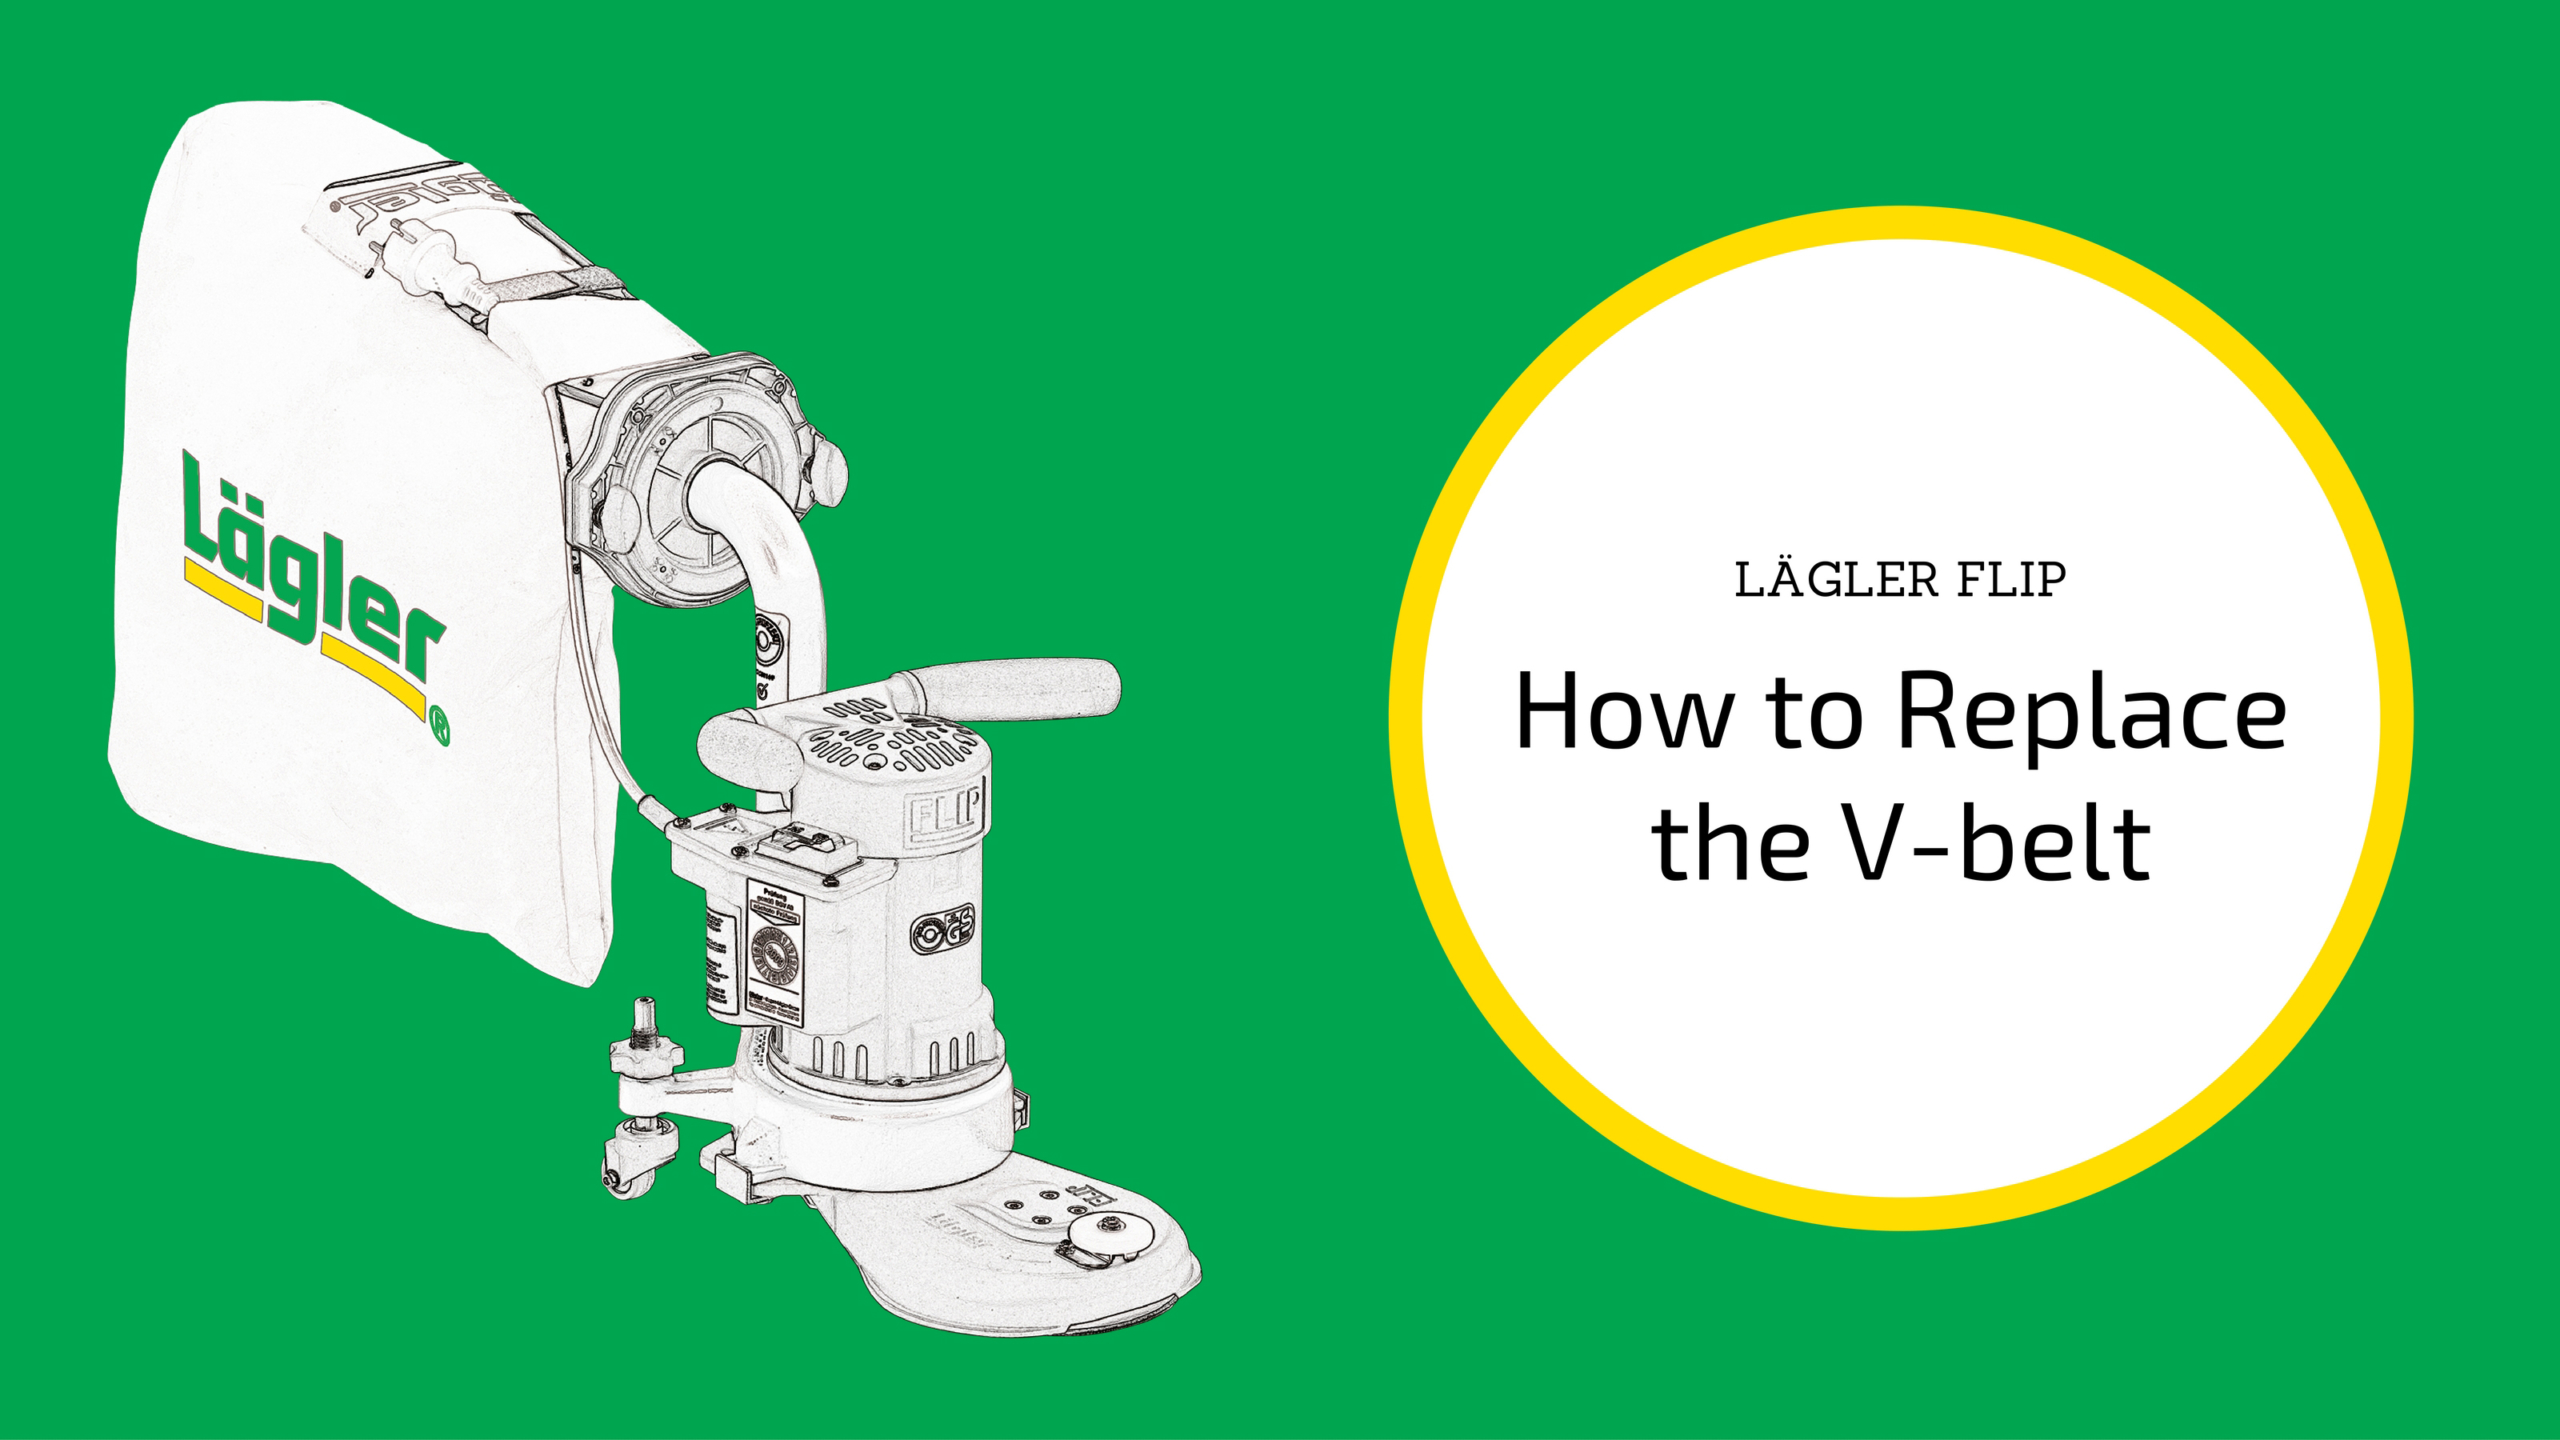
Have you noticed your Lägler FLIP® acting a bit different lately? Maybe you’re having a tough time starting it or the working speed has decreased.
Maybe it feels like it isn’t running as smoothly as usual or the noise has gotten louder. The FLIP might be losing its steam to suck dust. It’s maintenance
time.

All machines need a hug from time to time, and parts need to be replaced. It’s no different than routinely changing the oil on your truck. New oil, smooth
ride.

New V-belt, new edger.

Over time, residue accumulates in the pulleys and in the attachment. The issues mentioned above start happening and you know it’s time to take a look under
the hood and replace the V-belt. While you’re there, check whether the fan housing and blades to see if there is buildup there that needs to be dealt
with too.

The V-belt must be replaced, at the latest, when it cannot be retightened because the screws for connecting the attachment are at the end of the holes.

Special note: The V-belt should run without touching the ground of the pulley. The belt’s left and right edges should rest against the inner edges
of the pulley.

Step-by-step instructions for removing and installing the V-belt for the Lägler FLIP edger are listed below. They also are shown in the video above, using
the illustrations from the Lägler FLIP Operations Manual.

How to Remove the V-Belt on the Lägler FLIP

Assuming you’ve already turned off and unplugged the FLIP:

1. Lay the machine on its side or with the motor housing on a table. Avoid damages to the floor or table and the machine.

2. Undo the screw of the belt tightening plate (at the back of the attachment) with the universal spanner, the special T-grip driver (P1230 | 000.91.40.001) that comes with the purchase of a new FLIP.

How to Remove the Lagler FLIP V-Belt

3. Turn the belt tightening plate away from the attachment and re-tighten the screw of the belt tightening plate.

4. Use the universal spanner to remove the two screws that connect the attachment, along with the washers and the guide angles. Place these parts to the
side.

5. Remove the attachment from the machine and put down the attachment with the sanding disc facing upward.

How to Remove the Lagler FLIP V-Belt

6. Use the universal spanner to undo the fixing screws of the attachment cover and remove this from the attachment.

7. Turn the attachment over.

8. Use the universal spanner to undo the four fixing screws of the complete sanding disc.

9. Remove the attachment from the complete sanding disc.

How to Remove the Lagler FLIP V-Belt

10. Dispose of the worn-out V-belt.

11. Check whether the sanding plate pulley or the motor pulley are worn-out. Replace these parts if necessary. If one pulley appears to be worn out, then
both will be. Here are two signs of a worn out pulley:

  • The edges of the belt slip down into the groove of the pulley.
  • The pulley groove is polished from the belt running directly on it.

12. Clean the two pulleys and the attachment. Wear a respiratory protective mask if necessary.

How to Install the V-Belt on the Lägler FLIP

1. Place the new V-belt on the complete sanding plate pulley.

2. Insert the complete sanding plate with V-belt in the attachment. Ensure that the holes of the complete sanding plate are aligned with the holes in the
attachment.

How to Install the Lagler FLIP V-Belt

3. Make sure the sanding plate can be turned by hand and the V-belt is correctly placed in the attachment.

4. Turn the attachment over and tighten the four screws for attaching the complete sanding plate using the universal spanner.

5. Push the attachment over the motor pulley and insert the V-belt into the motor pulley.

6. Put on the attachment cover.

How to Install the Lagler FLIP V-Belt

7. Tighten the two screws for connecting the attachment, placing a washer and guide angle in the respective threads of the fan housing. Do not tighten the screws all the way yet.

Make sure the belt tightening plate is not located between the attachment and the fan housing. Otherwise, a significant amount of dust will escape
from this area during sanding.

8. Tighten the V-belt. (See the “How to Tighten the Lägler FLIP V-Belt” section below.)

After a few days’ use to break-in the new belt, check the belt tension. Tighten again as necessary.

How to Tighten the Lägler FLIP V-Belt

1. Lay the machine on its side or with the motor housing on a table. Avoid damages to the floor or table and the machine.

2. Use the universal spanner to loosen the two screws that connect the attachment to the fan housing.

3. Use the universal spanner to loosen the screw that attaches the belt tightening plate.

4. Hold the FLIP® by the fan housing and press the belt tightening plate forward toward the attachment at the same time with your thumb. Use
your other hand and the universal spanner to retighten the three screws.

Learn more about maintaining and getting the most out of your Lägler FLIP and
other Lägler sanding machines by subscribing to the Lägler North America monthly email newsletter,
and by following us on Instagram, Facebook and Twitter.

Related Blog Posts

How to Adjust Lägler FLIP Sanding Pressure

How to Replace Lägler FLIP Carbon Brushes

https://www.laglernorthamerica.com/wp-content/uploads/2020/02/FLIP-Change-V-Belt-scaled.jpg 1440 2560 webmaster https://www.laglernorthamerica.com/wp-content/uploads/2020/02/logo2-300x90.png webmaster2017-11-29 18:19:032020-02-29 18:26:10How to Replace the Lägler FLIP® V-Belt

NWFA Sand + Finish Training at Lägler N.A.

September 12, 2017/in Lägler /by webmaster

Guest Post by Brett Miller, NWFA VP of Education & Certification

For those of you who think you don’t have time for training, think again. Certainly, there is no better feeling than being “too busy” to take time off
for career development, but what if you could learn new skills that could make you more efficient, more valuable to your customers, and most of all,
more profitable? All of that is possible with National Wood Flooring Association (NWFA) training.

NWFA offers the most well-rounded, unbiased training available for wood flooring professionals. NWFA training provides attendees with the opportunity to
try a wide variety of products and equipment in a risk-free environment. Lägler North America will host the NWFA’s Intermediate Sand & Finish class
October 3-5 at its training facility in Denver.

NWFA Sand + Finish Training at Lägler North America

This three-day event provides extensive hands-on sand & finish training for those with at least one year of experience. Attendees will learn:

  • How to approach different situations in the sanding process
  • How to refine scratch patterns
  • How and why it is important to produce a profile on the flooring surface adequate for the finish being used
  • Proper use and maintenance of tools
  • Repair techniques
  • Maintenance coats on existing floors
  • Select finishing techniques that will yield top-quality results

Other specific techniques will include board replacements, hand-scraping, repairing finish imperfections, and recoating/refinishing factory finished floors.
Techniques for working with the arid environmental conditions unique to areas like Denver, which impact the finishing process will be one of the unique
features of this class as well.

If you want to step up your game even further, and have the opportunity to be ranked at the top of our consumer website search, NWFA Certified Professionals Sand & Finish Certification
will be offered as well. Earning NWFA Sand & Finish Certification requires a hands-on test and a written test, as well as three years of sand &
finish experience.

[NWFA Sand & Finish Certification can be doubled with Lägler Premium Sanding Technology (PST) Certification,
in the same hands-on test.]

NWFA member Joe Avila, owner of Huggins Wood Floor Specialist in Westfield, NJ, shared the value of his NWFACP certification: “Many customers say they
found me on the NWFA Find-a-Professional search feature and hired me because of my certifications.”

Take the next step in your wood flooring career. Get hands-on with NWFA at Lägler North America. Space is limited. Sign up today.

Related Blog Posts

Sanding with a Big Machine

Big Machine Sanding Direction, Speed + Pressure

How to Minimize Sanding Efforts + Maximize Business Profits

https://www.laglernorthamerica.com/wp-content/uploads/2020/02/NWFASandFinishSchool.jpg 338 600 webmaster https://www.laglernorthamerica.com/wp-content/uploads/2020/02/logo2-300x90.png webmaster2017-09-12 03:46:542020-02-26 03:51:35NWFA Sand + Finish Training at Lägler N.A.

Lägler Micro-Innovations Make the Difference

April 25, 2017/in Lägler /by webmaster

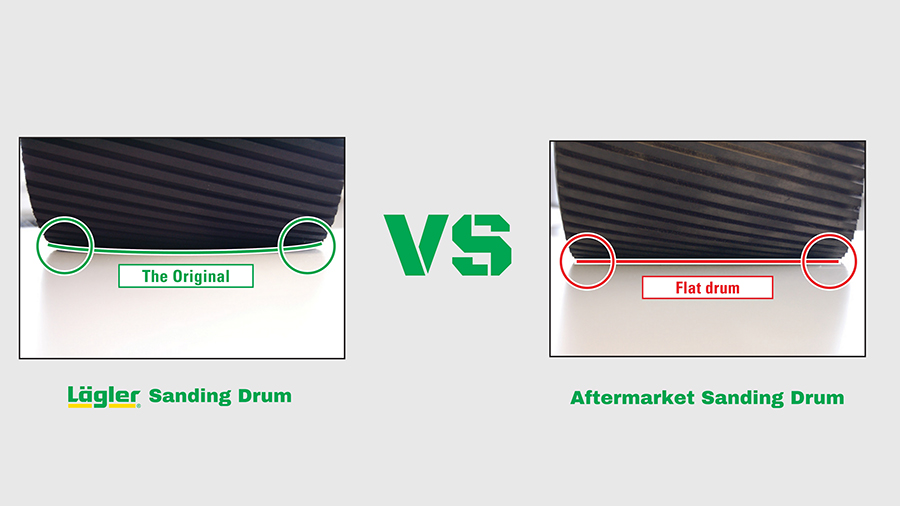
Have you ever compared a decades-old Lägler HUMMEL and a new one, and wondered what’s changed? We get it. At first glance, they look a lot alike. Two things:

1. Don’t change what ain’t broken …

2. … unless you can make it even better.

For Lägler, better happens in micro-innovations, the little refinements that become possible with new technologies and materials. And, improvements happen
with feedback from all you pros using the machines on floors around the world.

Why Lägler Micro-Innovates

Why does Lägler micro-innovate instead of putting out a whole new belt sander beast every so many years? Stop us if you’ve heard this one. The answer is
consistency, for Lägler and for you. (We’ve mentioned consistent quality many times on this blog and social media as a key to success.)

We assume you would like to keep your big machine running, and not feel like you have to replace it to stay on top of your game.

[Video] Meet the Men Who Hand-Build the Lägler HUMMEL | Lägler North America Blog

If you have a HUMMEL (and maintain it properly), or if you talk with someone who does, how many HUMMELs have they had to replace over the years?

A better question is: How many decades have they used their HUMMEL, grinding floors on a daily basis, and not had to replace it?

Like we say, “You buy a new HUMMEL because your business is growing up, not because it’s breaking down.”

Lägler assures compatibility of new parts with existing machines. All new parts work with older models. That’s why the overall look of
Lägler machines has been consistent, despite all the technical refinements every key part of it has received along the way.

Micro-innovations enable you to never be cut off from the parts you need to keep your machine running just like you need
it, for as long as you need it.

A few examples of Lägler micro-innovations are below.

Lägler Parts Compatibility Through Micro-Innovations

Lägler HUMMEL’s Lateral Wheels

Lägler HUMMEL Later Wheel Micro-Innovations | Lägler North America Blog

Micro-innovations mean new-and-improved parts function on older machine models, like the new lateral wheels shown above with a 1983 HUMMEL.

The original lateral wheel design for the HUMMEL had a sheet-metal side wall. The old wheels had considerably more components, too.

The synthetic wheel facing was grouted onto the wheel hub, making it difficult to change out the wheel.

Today’s lateral wheel (P147/P149W),
which is made of lower-wear material is more durable and less likely to leave wheel marks on the floor. It also can be replaced easily without needing
to disassemble the whole wheel unit.

Why this helps you? One step is all it takes now to take off a worn lateral wheel and be able to replace it with a new one: Remove the
one screw and washer set.

Bonus Tip: Lägler recommends cleaning your wheels before every sanding job, and to consider keeping an older set of wheels to put on the
HUMMEL for first passes on tough finish removal. Swap out the wheels again in less than a minute, and you’re set for smooth final cuts.

Lägler HUMMEL’s Upper Roller Unit

Lägler HUMMEL Upper Roller Innovations | Lägler North America Blog

The Lägler HUMMEL upper roller unit is one example of micro-innovation at the company. The current version is on the left.

The upper roller unit originally
was steel. Since 1990, it’s been aluminum.

This material change makes production easier. It takes welding out of the process. The aluminum body of the unit can be made in one cast.

Why this helps you? The aluminum upper roller enables more precise belt control and better tracking adjustment.

Lägler HUMMEL’s Fan

Lägler HUMMEL Fan Insert Innovation | Lägler North America Blog

The Lägler HUMMEL fan insert has been refined over the years. For example, on the early 1990s fan in the photo above (right), the space between the blades
is solid aluminum. The current model (left) benefits from a micro-innovation designed to remove some of that material.

In the beginning, the fan blades were mounted with tongue-and-groove joints. Now, fans are cast as one piece.

The blades originally were symmetrical. They were reworked in 1990, increasing airflow by using an asymmetrical blade design. The cavity between the blades
was increased during a 1997 design upgrade. (P169, Fan Insert Complete)

How these micro-innovations help you? The lifespan of the fan blades increased significantly. Production processes became easier. Overall
quality got better.

All in All: Lägler Micro-Innovations Save You Money

Got a 50-year-old HUMMEL? No problem. Older HUMMEL sanders can be upgraded with the current versions of all parts. Your HUMMEL, no matter its age, will
not be obsolete.

Save money. Don’t replace the sander. Just maintain, replace parts, as needed, and grind on. Then, pass your Lägler down to the next generation when you
retire.

Related Blog Posts

6 Things You Need to Know About Sanding Drums

Sanding Drums: Lägler vs. Aftermarket

#HUMMELtip: Why You Should Sand at Angles and Left to Right

https://www.laglernorthamerica.com/wp-content/uploads/2020/02/Micro-Innovations-Title.jpg 506 900 webmaster https://www.laglernorthamerica.com/wp-content/uploads/2020/02/logo2-300x90.png webmaster2017-04-25 00:31:012020-02-29 00:37:12Lägler Micro-Innovations Make the Difference

6 Things You Need to Know About Sanding Drums

March 28, 2017/in Lägler /by webmaster

HUMMEL owners, tell us: How easy is it to remove and replace your HUMMEL sanding drum? Yeah, easy-easy. DIY in the shop, at your trailer, on the jobsite
floor, right? No need to waste time or money for someone else to do it.

If you haven’t swapped out sanding drums yet, we have a one-minute “How to Replace a HUMMEL Sanding Drum” demo
video on our Lägler North America YouTube channel.

Know Why, How + When to Replace a Sanding Drum

Damaged sanding drums lead to damaged floors. Damaged floors lead to customer complaints, callbacks, re-sanding, and a lot of expense on your part. Needless
to say, it’s far cheaper to pay a little attention to the condition of your drum and replace it, when needed.

When you replace a worn or moderately damaged drum, save it. It’s still of use for first cuts when sanding especially rough floors or decks.

Below are photos of damaged drums and the consequences of continuing to use them when sanding wood floors.

Perpendicular Cuts Through the Drum Rubber

These unwanted cuts in the drum’s rubber come from nails, staples or other sharp objects protruding from the subfloor. Careful subfloor prep avoids this
type damage to a sanding drum.

When sanding with a drum that has this damage, you’ll see “streaks” appear on the floor as you sand. Those lines are raised marks that happen because of
the nail-torn grooves left in the drum not making proper contact with the sanding surface.

A drum with this type of damage needs to be replaced.

Sanding Drum Damaged by Nails or Sharp Objects in Subfloor Wood Floor Streaks Caused by a Damaged Sanding Drum
Material Embedded in Drum Rubber

Loose nails, staples or other debris can stick into the rubber and hold on for the ride. Obviously, that leads to an uneven drum and sanding result. The
debris can damage the drum and belt abrasive. It also leads to gouging the sanding surface.

You might be able to remove the debris from the rubber without leaving or causing damage to the drum. But we recommend you think twice. The slightest damage
can transfer to the floor and, like we’ve said, that becomes way more costly to you.

The safest move is to replace the sanding drum. But save the old drum for special uses, like using it on extra-rough first cuts. That can spare your new
drum some wear, and allow you to put on the new drum for finer cuts.

Sanding Drum Damaged by Sharp Objects Gouges Cut in a Wood Floor by a Damaged Sanding Drum
Unbalanced Sanding Drum

A drum that is out of balance makes uneven contact with the sanding surface, causing chatter (photo below). Poor balance is common with aftermarket drums.
Lägler balances its drums using a specially designed machine at the factory in Germany. It’s not unlike how a mechanic shop balances your truck’s wheels.
And the weight tolerance in Lägler’s process is extremely tight [Read “Sanding Drums: Lägler vs Aftermarket”
to learn how tight, and other stuff].

An unbalanced sanding drum needs to be replaced.

Wood Floor Chatter Can Be Caused by an Unbalanced Sanding Drum

Aged or Worn Out Sanding Drum

The rubber layers of sanding drums age, stiffen and wear out much like car tires do. The shape and flexibility of the rubber changes over time, regardless
of the amount of use. If you are using a “new” drum that sat for years waiting to get into the game but in reality is six to eight years old, it absolutely
is due for replacement, no ifs, ands or buts. Just like with car tires, there is a shelf life on the rubber’s usefulness.

Old, worn out drums tend to cut harder on the edges. Lägler drums are designed to have a “football” shape that feathers toward the edges and avoids those
hard edge-cut lines in the floor. As a drum loses its shape over time, it fails to retain that design.

How long does a drum last? The sanding drum you are using daily should be changed every three years. If you sand somewhat regularly, but
not daily, Lägler recommends replacement every five years. To minimize problems with your sanding drum and get the most out of its performance, keep
it clean between uses and check its condition on a regular basis.

Plan for regular replacement, just like you would plan for regular maintenance for your truck or van. It’s part of the investment for consistent, top-notch
performance of a machine your business relies on.

Old, Worn Out Sanding Drums Cause Poor Floor Sanding Results Marks Left in Wood Floor by Old, Worn Sanding Drum
Dirty Sanding Drum

Dust and debris collect in the aluminum drum cylinder, throwing the balance off. That causes chatter in the floor.

This is easy to avoid with regular cleaning. At least once every month, remove the drum and vacuum out the cylinder. While you’re doing it, look over the
drum’s condition and tend to any maintenance that’s needed.

Sanding Drum Clogged with Dust and Debris Causes Poor Performance

Uneven Floor Caused by Knotty Wood

This is not a sanding drum issue, but a situation that can be fixed with the right use of a sanding drum. Most common on pine and softwood, the knots are
harder and do not sand as well, similar to end-grain or inlays of different species.

For these situations, use Lägler’s hard drum (recognized by its reddish-colored rubber). It is less flexible and cuts more aggressively, the way you need
for the knots.

Knotty Wood Flooring Is Extra-Tough to Sand Lagler's Red Drum Is Designed to be More Aggressive on Knotty Wood Floors

Learn more about Lägler how-to. Subscribe to the Lägler North America newsletter and join us on social media: Instagram, Facebook, Twitter and YouTube.

Related Web Pages

HUMMEL Parts Online Catalog

The Showdown: Lägler TRIO vs Multi-Disc Attachments

HUMMEL. The Icon Builders. [Video]

https://www.laglernorthamerica.com/wp-content/uploads/2020/02/DrumDamage-title.jpg 563 1000 webmaster https://www.laglernorthamerica.com/wp-content/uploads/2020/02/logo2-300x90.png webmaster2017-03-28 00:46:062020-02-29 00:57:476 Things You Need to Know About Sanding Drums

Sanding Drums: Lägler vs. Aftermarket

March 14, 2017/in Lägler /by webmaster

There are a lot of parts to care about with a “big machine” like Lägler’s HUMMEL. But even if you keep it purring, clean and rolling smoothly, it won’t
do you any good if you use a sanding drum that mars the floor with edge marks, waves and chatter.

You can see where we’re headed here, right? We recommend the Lägler sanding drum, of course. But, like everything with Lägler, there is a reason behind
the design. There are reasons we recommend the Lägler drum, and only the Lägler drum.

It simply isn’t the apples-to-apples trade with aftermarket versions like you might think.

In this post, we explain why Lägler recommends not using aftermarket or recycled drums, and how you can know whether a drum you are buying is an authentic
Lägler drum.

The Importance of the Sanding Drum

The quality and condition of your sanding drum is crucial for sanding success. It transfers the machine’s performance to the sand paper, which then impacts
the floor.

If a drum – the aluminum core, weight and outer layers of rubber – is older than four years, visibly worn out or damaged, or the rubber has hardened, it
needs to be replaced. We can promise a drum past its quality of life will give you sanding results your clients will not appreciate.

Lägler HUMMEL Sanding Drum vs Aftermarket Sanding Drum

The “Football” Shape of Lägler Sanding Drums

When looking at a new Lägler sanding drum, it is easy to miss seeing that the drum’s diameter is larger in the middle than it is at the edges. But this
shape is crucial to the quality of a sanded surface. It also is why you do not need to dress a Lägler drum.

Non-Lägler sanding drums have a flat shape, touching the floor from edge to edge of the drum. While overlapping sanding paths, a small change in elevation
occurs. That leads to a flat sanding drum leaving marks where its edges cut the floor.

Lägler removes this risk of edge-cuts with its drums by decreasing the drum’s diameter from the middle to the outside. That slightly oblong shape, kind
of like a football, is exactly what’s needed for feathering at the edges while sanding.

Lägler drums focus sanding pressure evenly in the center portion of the drum, assuming you have leveled your HUMMEL wheels (extremely easy to do; watch
our one-minute video). You will be able to see that by the wear pattern on the abrasive belt.

Edge Marks from Aftermarket Sanding Drum

Known Problems with Aftermarket + Recycled Sanding Drums

The market offers aftermarket and recycled sanding drums that fit on the Lägler HUMMEL, but they are not equal replacements for a Lägler original drum.
They cause damage to floors.

That damage leads to call-backs and more expense on your part as the sanding professional to fix the issues with the floor and to replace the faulty drum
so it doesn’t continue to cause problems.

On occasion, Lägler receives warranty claims for drums, and they are rejected. Virtually all these claims are based on problems that come from using non-Lägler
drum.

Problems that occur with aftermarket and recycled drums are:

  • Improper balancing, which leads to waves and/or chatter in the floor.
  • Vibrations caused by waves and chatter transfer throughout the HUMMEL, leading to damage to the machine.
  • The flat design of aftermarket drums does not provide the same predictable pressure per square inch, causing less-aggressive sanding results.
  • Flat-shaped drums cut the floor at their edges, leaving marks and causing uneven sanding throughout the project.
  • Non-Lägler drums often have a damaged or imprecise core; this also leads to damaging the floor during sanding.

Aftermarket Sanding Drum -- Worn Out Core

4 Visible Signs of Aftermarket Drums

Sanding drums that are not Lägler originals manufactured at Lägler headquarters in Germany have a few tell-tale signs. Here are four clear ways to see
that a sanding drum is an aftermarket drum.

Overlapping rubber layers. There are two layers of rubber on a drum. Aftermarket drums overlap, creating a hardened spot that will cause
vibrations that lead to waves. Lägler drums have rubber layers of even thickness, with the outer layer applied evenly on top of the inner layer, no
overlap.

No “football” shape. Adding to what’s been described in the section about football shape above, the larger contact area of non-Lägler
drums reduces aggression by up to 20 percent.

Worn out bore. Lägler does not reuse old sanding drums. The bore where the drum slides on and off the drum shaft gets worn out. To reuse
a drum, each bore would have to be replaced to be able to guarantee the refurbished drum is properly balanced. The cost of that effort makes recycled
drums too expensive.

Out of balance. Lägler uses special screws as balancing weights on the sanding drum core’s lid. Those weights are new for each drum. Lägler
has perfected its balancing act, keeping each end of the drum within less than 4/100 of an ounce. Sanding drums being recycled for resale need to be
re-balanced because of new rubber being applied, but drums that try to reuse old cores and old weights can’t be properly balanced.

Aftermarket Sanding Drum -- Rubber Layers Overlap

The Bottom Line of Using Aftermarket Sanding Drum on You HUMMEL

The issues laid out above not only lead to poor sanding results, they cause more frequent sanding drum replacements. That costs you more money.

We’re sure you’ve heard, “You get what you pay for.” You probably have said that to a hesitant client or two over the years, too, when they are considering
hiring your competitor with a lower estimate, right?

Think about all we’ve said in this blog post, and it’s easy to understand the importance of a just-right drum to the livelihood of Lägler as a company.
Bad drums lead to bad experiences and bad sanding results with Lägler’s HUMMEL; that would lead to a loss of sanding pros’ confidence in Lägler in
142 countries worldwide. A big deal.

If you have questions about Lägler sanding drums, or anything else Lägler, comment below or call us at 800-8-HUMMEL (800-848-6635) during
weekday business hours.

Other ways to learn more are:

  • Lägler N.A.’s blog
  • Lägler N.A.’s monthly email newsletter
  • Lägler N.A.’s Instagram, Facebook and YouTube pages
https://www.laglernorthamerica.com/wp-content/uploads/2020/02/SandingDrum.jpg 506 900 webmaster https://www.laglernorthamerica.com/wp-content/uploads/2020/02/logo2-300x90.png webmaster2017-03-14 00:58:182020-02-29 01:03:47Sanding Drums: Lägler vs. Aftermarket

How to Mount the Lägler TRIO V-Belt

February 14, 2017/in Lägler /by webmaster

How to Mount the Lägler TRIO V-Belt

In our previous blog post, we gave step-by-step instructions for removing the Lägler TRIO V-belt.
Here are the steps for putting a new V-belt on the TRIO.

First, if your TRIO was manufactured in 1994 or earlier, you will need to keep in mind these two notes:

1. Before placing the motor, make sure the tooth belt tensioner has not fallen out of its guides.

2. The tooth belt tensioner cannot be installed with the motor in place.

Step-by-Step Instructions: How to Mount the TRIO V-Belt

1. Loop the new V-belt around the motor pulley.

2. With the new V-belt in place, lower the motor vertically onto the machine housing. Make sure the V-belt does not slide off the motor pulley and get
jammed between the motor and the machine housing. The belt must be passed through the two recesses on the machine housing.

3. Attach the motor to the machine housing by using the four fixing screws.

Mounting Lägler TRIO V-belt

4. Use the wrench to push the tensioner back against the spring, and place the V-belt into the pulleys of the ventilator and tensioner. When the V-belt
has been inserted, you can release the tensioner into its regular position.

Mounting the Lägler TRIO V-belt

5. Insert the V-belt guard into the slot at the motor and push it toward the motor.

6. Insert the fixing screw for the V-belt guard and tighten it again.

7. Reassemble the machine:

a. Roll the chassis into the attachment position and tighten the two fasteners.

b. Remove the on/off switch from the motor switch box and hook it into the holder on the chassis.

c. Insert the cable plug of the sensor into the on/off switch. Make sure the nose of the cable plug is inserted into the groove of the socket. Lock this
connection by turning the ring nut clockwise. Note: The machine will not start if the cable plug of the sensor is disconnected.

d. Mount the suction hose to the neck of the upper part of the separator.

Mounting Lägler TRIO V-belt

8. While holding onto the handle, tilt the machine backward to a horizontal position. Make sure the machine rests on the guide tube and two protective
rubber pads in a stable position on a flat surface.

9. Mount the tooth belt (Instructions: “How to Change the Tooth Belt”).

That’s it. Sand on.

Learn More, Earn More

To learn more about Lägler #MaintenanceMatters and keeping your machines ready to rock, subscribe to the Lägler North America newsletter and join us on Instagram, Facebook, Twitter and YouTube.

Also, we teach some basics of maintenance in our one-day training and certification course here in Denver: Lägler Premium Sanding Technology (PST®).
Pick a day that works for you and/or your crew to do the training. Get it on the books by calling us at 800-8-HUMMEL (800-848-6635) or emailing [email protected]

Related Web Pages

Lägler TRIO Parts Catalog

How to Change the TRIO Tooth Belt

How to Extend the Life of Abrasives on the TRIO

https://www.laglernorthamerica.com/wp-content/uploads/2020/02/TRIORemoveV-Belt-scaled.jpg 1440 2560 webmaster https://www.laglernorthamerica.com/wp-content/uploads/2020/02/logo2-300x90.png webmaster2017-02-14 01:10:362020-02-29 01:14:15How to Mount the Lägler TRIO V-Belt

How to Remove the Lägler TRIO V-Belt

January 31, 2017/in Lägler /by webmaster

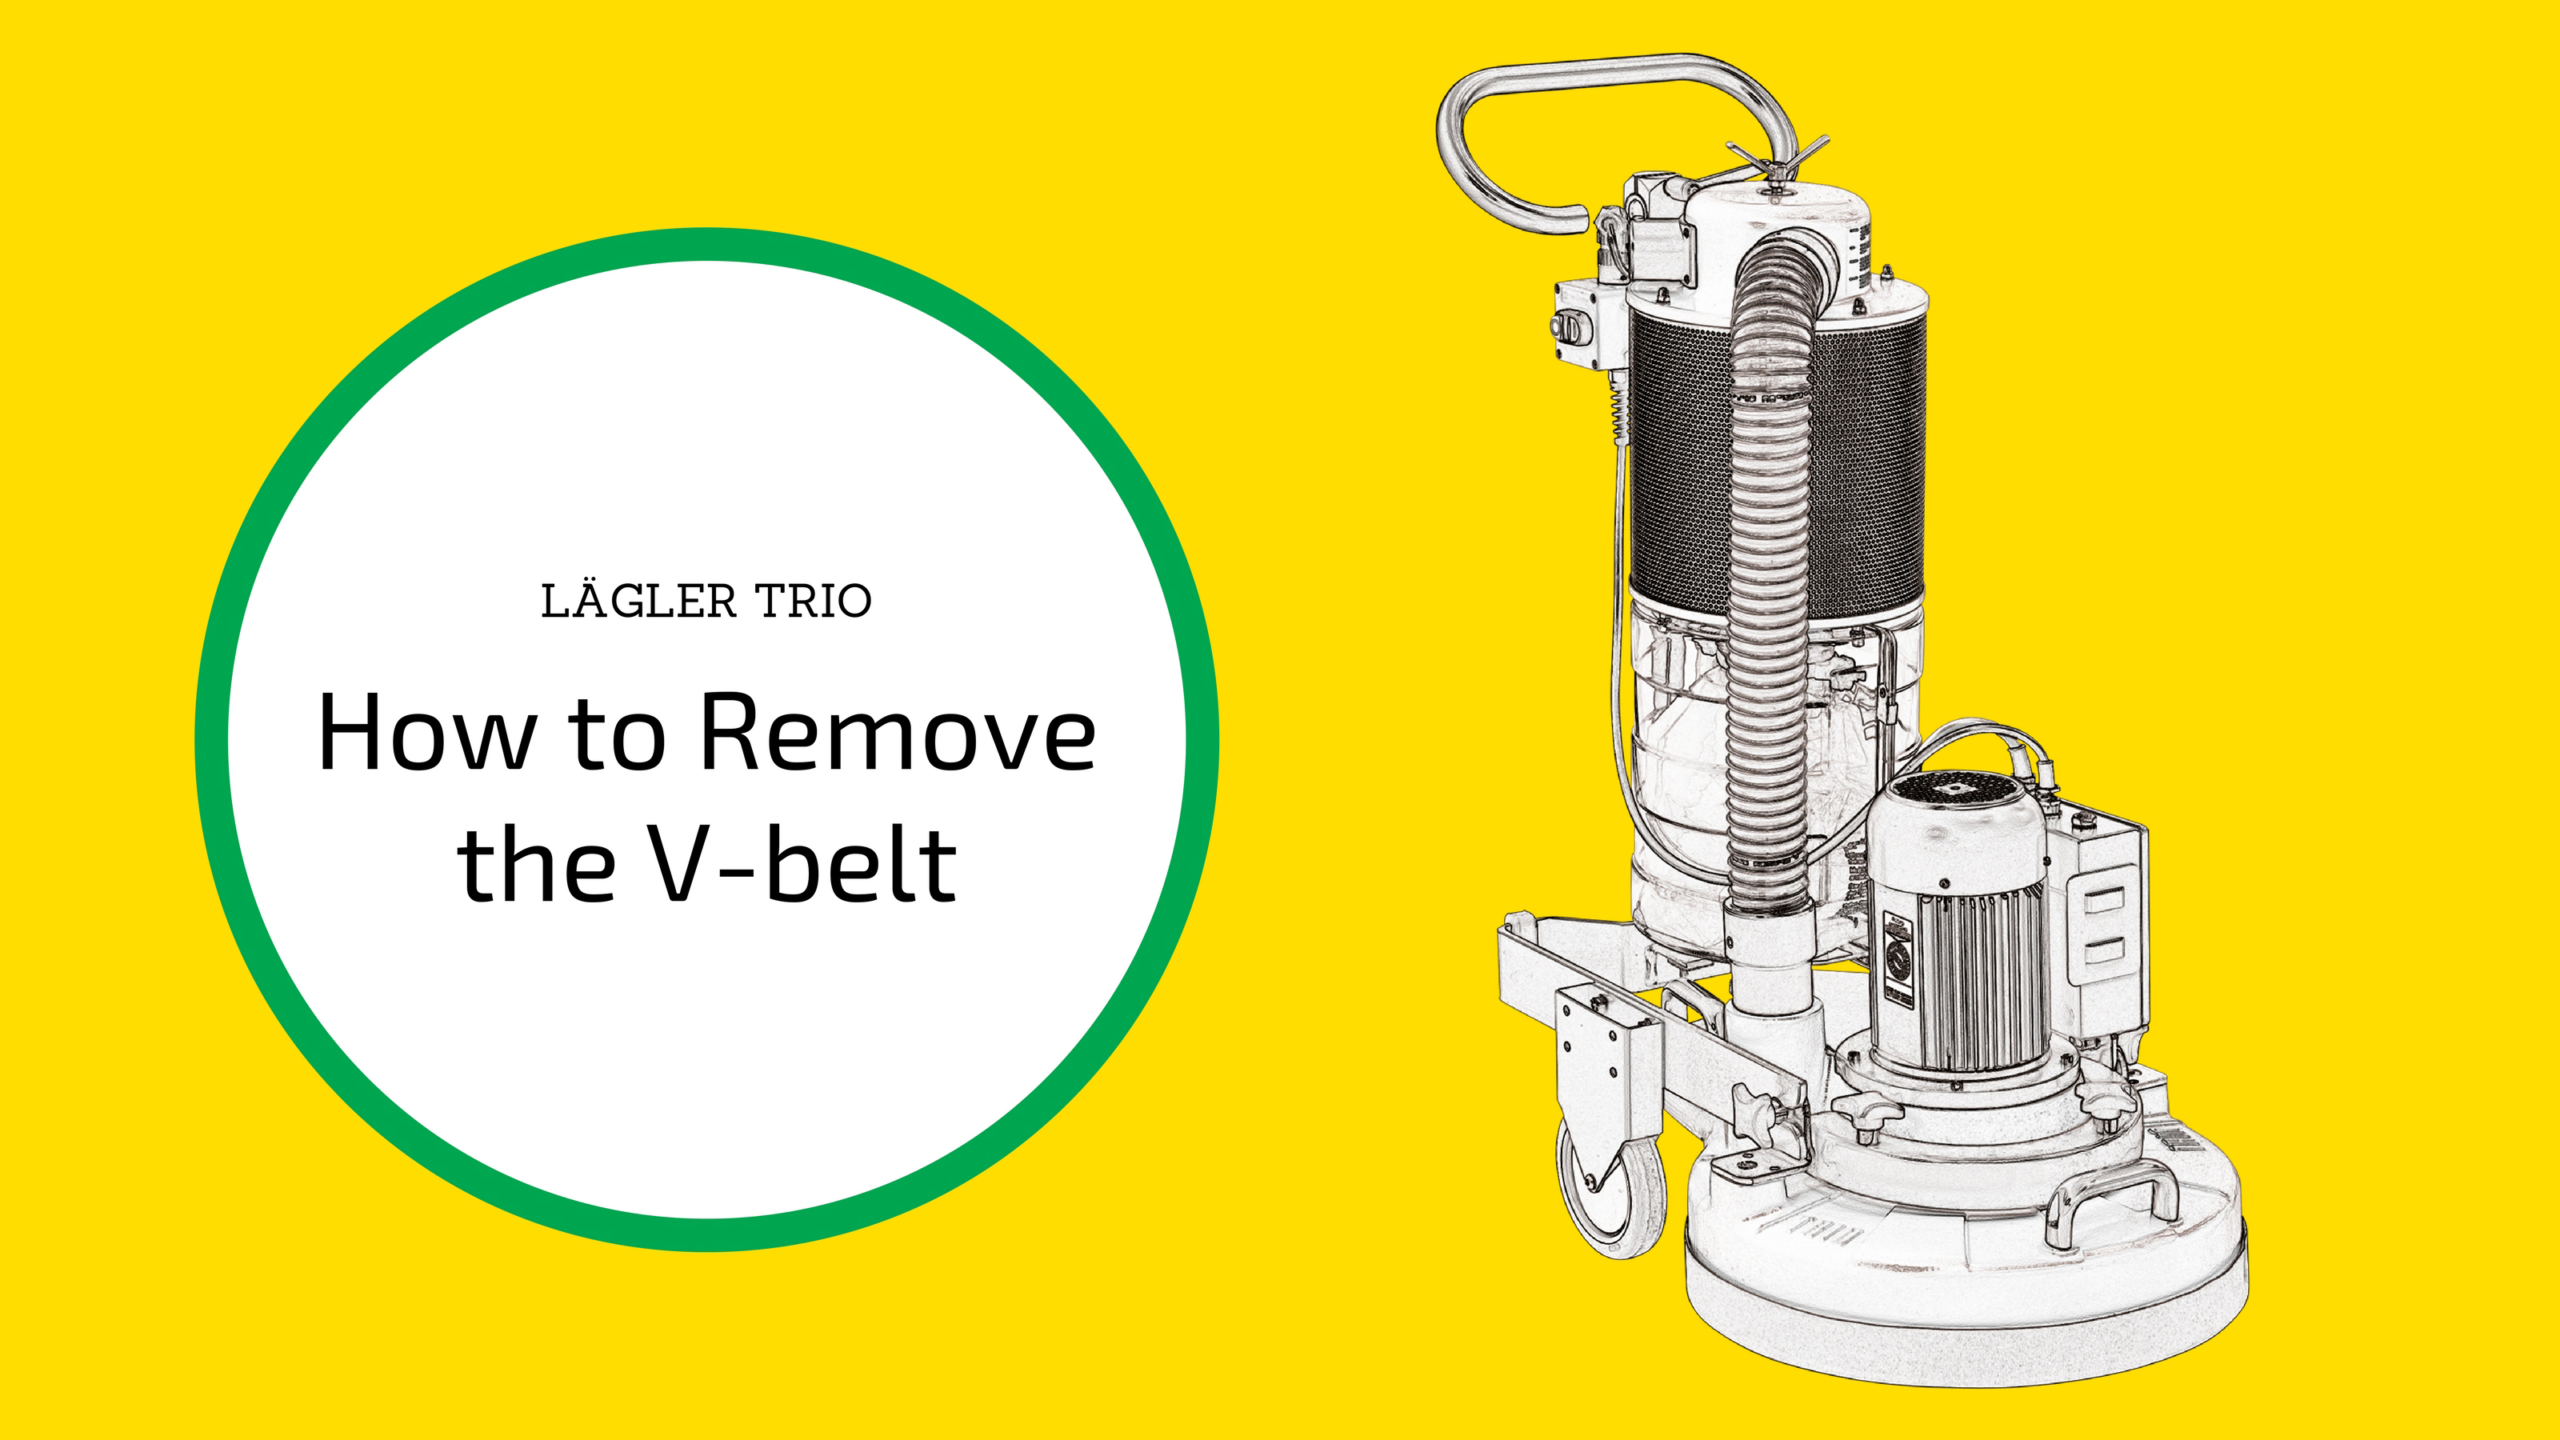
How to Remove the Lägler TRIO V-Belt

Our how-to blog posts like this one are all about helping you to solve your maintenance questions, especially when you’ve got a tight schedule and need
to keep running. But to do that, the first thing you need to know is how to tell when a part needs repair or replacement.

When to Replace the Lägler TRIO V-Belt

As much as we’d love to be able to put out a maintenance schedule that follows exact amounts of usage or length of time for certain parts, you know there
are too many variables for us to do that. Especially with rubber parts like the V-belt.

With the Lägler TRIO V-belt, if it shows signs of wear and tear, replace it. You don’t want to nitpick over squeezing out another job with a worn belt
and end up with lost time on a job site because you pushed too far. Our recommendation is to keep a spare V-belt on-hand, especially if you think the
amount of wear is questionable.

Now, on to our step-by-step instructions for how to remove the TRIO’s V-belt.

How to Remove the Lägler TRIO V-Belt

With the TRIO turned off and unplugged, follow these steps:

1. Remove the tooth belt. (Need help? Read our step-by-step instructions: “How to Change the Tooth Belt.”)

How to Remove the Lägler TRIO V-Belt

2. Bring the machine back into its upright position.

3. Loosen the cable plug of the sensor on the on/off switch by turning the ring nut counterclockwise, and pull off the cable plug off.

4. Remove the on/off switch from the chassis and hook it into the transport holder on motor switch box.

5. Pull the suction hose from the neck of the upper part of the separator.

6. Loosen the two cross-grip fasteners at the side by which the chassis is attached to machine housing and move the chassis backwards.

7. Remove the screw that fixes the V-belt guard to the fan insert.

Lägler TRIO V-Belt

8. Pull V-belt guard from its slot at the motor and put it aside.

9. Release the tension of the V-belt by carefully moving the V-belt tensioner using cranked closed-mouth wrench. The V-belt can now be disengaged from
the pulleys and the belt tensioner.

10. Release the tensioner to its regular position.

Lägler TRIO V-Belt

11. Remove the four screws that fix the motor to the machine housing and lift the motor off, keeping it in a vertical position. The V-belt now can be removed.

12. Use a vacuum to remove dust and dirt.

To get your TRIO back in action read, “How to Mount the Lägler TRIO V-Belt.”

Learn More, Earn More

Our recommendation when using any Lägler machines and parts is to maintain regularly. Nothing else will prolong the life of machine parts like being cleaned
and cared for. It will save you time and money, and help you achieve better floor sanding results.

To learn more about keeping your machines money-making ready, subscribe to the Lägler North America newsletter and join us on Instagram, Facebook, Twitter and YouTube.

Also, we teach maintenance basics during our Lägler Premium Sanding Technology (PST®) certification training here in Denver. To setup training for you and/or your crew when it fits into your schedule, call us at 800-8-HUMMEL (800-848-6635)
or email [email protected]

Related Web Pages

Lägler TRIO Parts Catalog

How to Change the TRIO Tooth Belt

How to Clean the TRIO Filter

https://www.laglernorthamerica.com/wp-content/uploads/2020/02/TRIO-RemoveV-Belt-scaled.jpg 1440 2560 webmaster https://www.laglernorthamerica.com/wp-content/uploads/2020/02/logo2-300x90.png webmaster2017-01-31 01:14:312020-02-29 01:17:55How to Remove the Lägler TRIO V-Belt

How (and Why) to Level the Wheels of the Lägler HUMMEL®

January 3, 2017/in Lägler /by webmaster

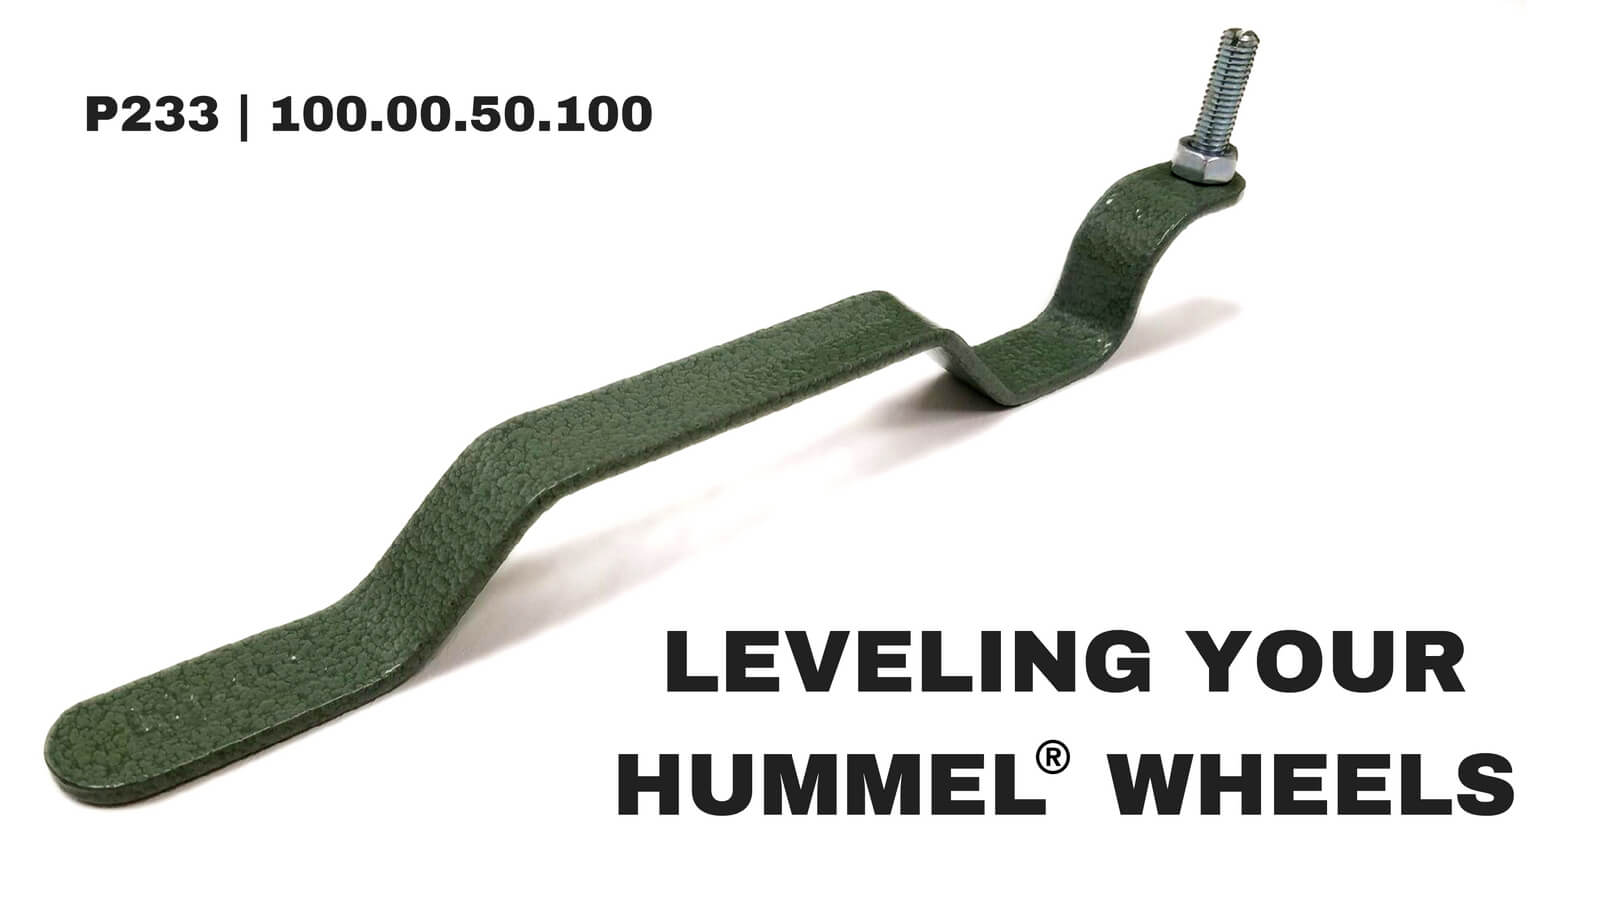
How to Level the Wheels of the Lägler HUMMEL®

OK, so you’re on your way into the house, carrying your HUMMEL. It gets dropped. It takes a lot to throw out of whack the wheel setting on your Lägler
HUMMEL® but it can happen in a moment like this. Seeing and fixing the misalignment is super-easy once you’re in the house and ready to
fire up.

Top Two Things You Need to Know

1. How to know your Lägler HUMMEL wheels are not level with each other

2. How to realign the wheels of the Lägler HUMMEL for best sanding


How to Know If Your HUMMEL Wheels Are Aligned

If the wheels are not set at the same height, the machine will lean slightly. That will cause uneven wear on the abrasive that will be obviously visible
on the belt. And an off-center mark will be obvious if you tap a footprint on the floor to test the cut. An uneven machine will leave an uneven mark
on the floor.

When the wheels are set properly, the center of the drum is where the cutting happens, so you will see a symmetrical sanding footprint on the floor and
even wear on the sanding belt. [Note: This is why you should not dress a Lägler drum. It is designed for cutting from the high spot of the drum to
improve sand paper tracking. It also prevents the edges of the paper making contact with the floor and leaving lines.]

The short video above shows the difference between an uneven sanding mark and one that is nicely balanced at the center of the drum.

/_photos/WheelLeveling-drawing.JPGHow to Level the Wheels of the Lägler HUMMEL

How to Adjust HUMMEL Wheels for Best Sanding

Like basic maintenance with all Lägler machines, there is a simple Lägler tool for the job. And, if you bought your HUMMEL new, the tool for leveling the
wheels came with the machine. Don’t have the tool? Check with your area Lägler dealer or on our website using these part numbers: P233 (Lägler N.A.) and 100.00.50.100 (manufacturer). You also will need a 13mm wrench for loosening the tension screw of the adjustable wheel (one comes
with buying a new HUMMEL).

The wheel on the belt-guard side is fixed in position with a screw. The wheel on the other side is adjustable, and the tension screw for that is marked
on the machine with a black arrow. Your goal is to move the adjustable wheel up or down as needed to set it at the same height as the position of the
fixed wheel.

The video above is a quick how-to demonstration for setting your HUMMEL wheels at the same height.

2 Tips for Leveling the Wheels of Your HUMMEL

If you are cutting more heavily to the left, the adjustable wheel will need to be lowered toward the floor, taking it a little further down out of the
“wheel well.” (See A and B in drawing below.)

If you are cutting more heavily to the right, or belt-guard, side, the adjustable wheel will need to be raised, sliding it a bit further up into the wheel
well of the machine housing. (See C and D in drawing below.)

How to Adjust Lägler HUMMEL Wheels

Learn about best uses and maintenance of the Lägler HUMMEL, TRIO and FLIP on the Lägler North America blog, and by participating
in Lägler’s Premium Sanding Technology (PST®) one-day certification training course.

Floor sanding professionals in North America can call us at 1-800-8-HUMMEL (1-800-848-6635) for answers to technical and sales questions, and to schedule
PST certification training.

Related Blog Posts

#HUMMELtip: Why You Should Sand at Angles + Left to Right

How to Remove the HUMMEL Motor (for Lighter Carrying)

How to Replace the HUMMEL Sanding Drum

https://www.laglernorthamerica.com/wp-content/uploads/2020/02/LEVELING20YOUR20HUMMEL20WHEELS.jpg 900 1600 webmaster https://www.laglernorthamerica.com/wp-content/uploads/2020/02/logo2-300x90.png webmaster2017-01-03 01:22:082020-02-29 01:25:37How (and Why) to Level the Wheels of the Lägler HUMMEL®

The Most Popular, Most Helpful Lägler N.A. Content of 2016

December 27, 2016/in Lägler /by webmaster

We’re doing what people do at the end of one year, beginning of another. We look back at what we did well and what we can improve. We always want to keep
doing better.

That runs from machine designs and production at the factory in Germany to customer service, certification training and every way we connect with you pros
online here in North America.

We kicked off a new, mobile-friendly website in 2016. With it came a blog, and we started social media pages on Instagram, Facebook,
Twitter and YouTube. We started making videos and answering top questions you have about using and
maintaining Lägler machines.

Added up, you all spent about five work weeks of the year learning from the content on our blog. That’s a great start, and we aim to build on that in the
coming year.

Here’s a recap, highlighting the most popular how-to topics and just plain fun social media posts.

What is Lägler Premium Sanding Technology (PST) Certification Training?

TOP BLOG CONTENT

Lägler Certification: What is Lägler PST?

Our most viewed blog page. Like we say in that post, our training program is about two things:

1. Building relationships with contractors, letting them know we are the true resource about Lägler machines and we’re ready to help.

2. Helping contractors to maximize success with their sanding and finishing businesses.

In this post, we describe the Lägler process that gets you the most out of every floor while taking the least time on the job. Greatest efficiency for
the flattest floors. We tell what the one-day certification course costs and why we offer it at a financial loss to ourselves.

Nothing builds trust like truth and, of course, quality machines you can count on for many years. That’s what we bank on every day.

Read the full post, “Lägler Certification: What is Lägler PST?”

TOP HUMMEL® BLOG POSTS

Not surprisingly, HUMMEL blog posts are a favorite among all our topics. It’s the most popular Lägler machine in North America, and is used by many thousands
across the world.

How to Replace a Lägler HUMMEL Sanding Drum

This post tells the two most important things to know about the HUMMEL drum. It also includes step-by-step instructions.

The video in this post shows proof that the HUMMEL design maintains its nearly 50 years of original engineering while also taking on all the parts that
have been refined along those many years. New parts on, say, a 1983 machine? No problem. Maintain and roll on.

Read the full post, “How to Replace a Lägler HUMMEL Sanding Drum.”

Why You Should Sand Wood Floors at an Angle and Left to Right | Lägler North America Blog

Why You Should Sand Wood Floors at an Angle + Left to Right

We’ve refined our thinking on sanding at an angle. For example, we used to recommend cutting at an angle for the first pass, and then with the direction
of a straight-laid floor for finer grits.

Now, we recommend using at least a slight angle for each pass. It’s all about getting the flattest results.

We also explain why to sand left to right as you move across the field of a room, and why you should not sand right to left, if you want to achieve the
best results.

Read the full post, “Why You Should Sand Wood Floors at an Angle + Left to Right.”

4 Reasons Not to Use a Wire-Brush Drum with a Lägler HUMMEL

We know the wire-brushed look is especially cool with current trends in wood flooring. But we also know the reasons you don’t want to throw a wire-brush
drum on your HUMMEL for that job.

What did we say about truth above? Truth builds trust, and trust us when we say we are focused on quality floors and offering the best information we have
to you.

Read the full post, “4 Reasons Not to Use a Wire-Brush Drum with a Lägler HUMMEL.”

Do you have Lägler HUMMEL questions and helpful content ideas? Use the Contact link in the menu heading above to submit your suggestions.
We want to tackle all the information that will be helpful to you in the field with future blog and video posts.

TOP FLIP® BLOG POSTS

The FLIP edger finally is getting its due in North America. The machine was launched in 2001 in Germany, and now is becoming much more widely known and
used here. Search #LaglerFLIP on
Instagram to see photos and videos from some of the guys who are using it — and bragging about it — across the land.

How to Use the Lägler FLIP Corner Attachment | Lägler North America Blog

How to Use the Lägler FLIP Corner Attachment

How do you handle room corners, around pipes, and between railing balusters? You could scrape. You could use an orbital sander in some of those spots.
But the FLIP corner attachment is the high-speed tool that knocks it all out the cleanest and quickest.

The FLIP is sold with the short and corner attachments, and this blog post includes tips for using both.

Read the full post, “How to Use the FLIP Corner Attachment.”

How to Adjust Lägler FLIP Sanding Pressure

Like everything with Lägler machines, the engineers have lightened the pro’s load on the job. With the FLIP, don’t burn out your shoulders to add a touch
of pressure here or there. Just use as recommended.

This blog post gives step-by-step instructions for making sure the FLIP is cutting as expected. It tells how to set the pressure based on which attachment
you’re using, and in only of seconds of effort on the job.

The CAD drawings in this post also show what goes wrong when you’re edger is running on off-kilter settings like an old sea captain with an uneven peg
leg.

Read the full post, “How to Adjust FLIP Sanding Pressure.”

What Lägler FLIP questions and helpful content ideas do you have? Tell us, using the Contact link in the menu heading above. We want to
turn those questions into useful blog and video posts to help everyone #LearnMoreEarnMore.

TOP TRIO BLOG POSTS

What is a surefire way to know when a floor sanding guy doesn’t own a TRIO and hasn’t participated in Lägler’s Premium Sanding Technology (PST®)
certification training? He calls the machine a buffer and thinks it slows down the process.

For those who know better, we’re building our how-to TRIO content. For those who want to test-drive a TRIO and see why so many others swear by it, read,
“What is Lägler PST?”
and get in touch with us.

How the Lägler TRIO Sanding Disc Arrows Help You to Extend the Life of Your Abrasives | Lägler North America Blog

Lägler TRIO: Sanding Disc Arrows + Abrasives

Let’s veer off the path for a minute. Have you ever noticed on the gas gauge in your truck that arrow next to the little silhouette of the gas pump that
either points left or right? It’s a reminder, showing you on which side of the vehicle your gas tank is when you pull up to the pump at the gas station.

Well, the TRIO has a similar reminder on its three sanding discs. This blog post tells why the arrows cast in the plate are there and how that plays a
part in extending the life of your abrasives.

The post also talks hard plates and donuts. Getting hungry? Read the full post, “Lägler TRIO: Sanding Disc Arrows + Abrasives.”

How to Clean the Lägler TRIO Filter

What are the three things you need to know about cleaning the TRIO filter? What is the one thing you really shouldn’t ever do and, we’re willing to bet,
you or someone on your crew has done?

This post includes a super-short video and the three simple steps you should use to clean your filter in only seconds.

Read the full post, “How to Clean the Lägler TRIO Filter.”

How to Dismantle and Reassemble the Lägler TRIO Filter Unite | Lägler North America Blog

How to Dismantle + Reassemble the TRIO Filter Unit

Right off the top, this post tells three signals it’s time to get into your filter unit for some basic maintenance.

Don’t push the TRIO to the side, because you aren’t sure what’s wrong. And don’t use time and money to have someone else handle it. You’ve got this.

Step-by-step instructions in this post lay out exactly what you need to know. It’s also good to keep your manual handy. Read when in need.

Read the full blog post, “How to Dismantle + Reassemble the Lägler TRIO Filter Unit.”

What Lägler TRIO questions and blog/video ideas do you have? The Contact link in the menu heading above is your path to telling us. We
can turn your question – which likely is a common question many others have – into helpful blog content for everyone.

TOP VIDEO CONTENT

We started a YouTube channel this past year. It’s great for embedding videos in our blog posts. If you watch as much on YouTube as you do on TV, like your kids do, look us up and
subscribe.

But we also post our videos on Instagram and Facebook, where these videos (mostly how-to) add up many times more views. (If you aren’t promoting your business
on social media and want to learn, give these blog posts a look: “Social Media for Wood Flooring Pros”
and “Interview with a Contractor: Social Media Success.”)

So view our videos using whatever app you favor. Below is one of our most popular, “How to Replace a HUMMEL Sanding Drum.”

Follow Lägler North America Content

Follow our blog and more content through our monthly email newsletter and our Facebook, Instagram, Twitter and YouTube social media
pages.

Share your content suggestions using our contact page.

And make 2017 your biggest yet. We’ll be here.

https://www.laglernorthamerica.com/wp-content/uploads/2020/02/Content-Year-in-Review-scaled.jpg 1440 2560 webmaster https://www.laglernorthamerica.com/wp-content/uploads/2020/02/logo2-300x90.png webmaster2016-12-27 01:25:502020-02-29 01:35:30The Most Popular, Most Helpful Lägler N.A. Content of 2016

Lägler TRIO: How to Change the Tooth Belt

November 2, 2016/in Lägler /by webmaster

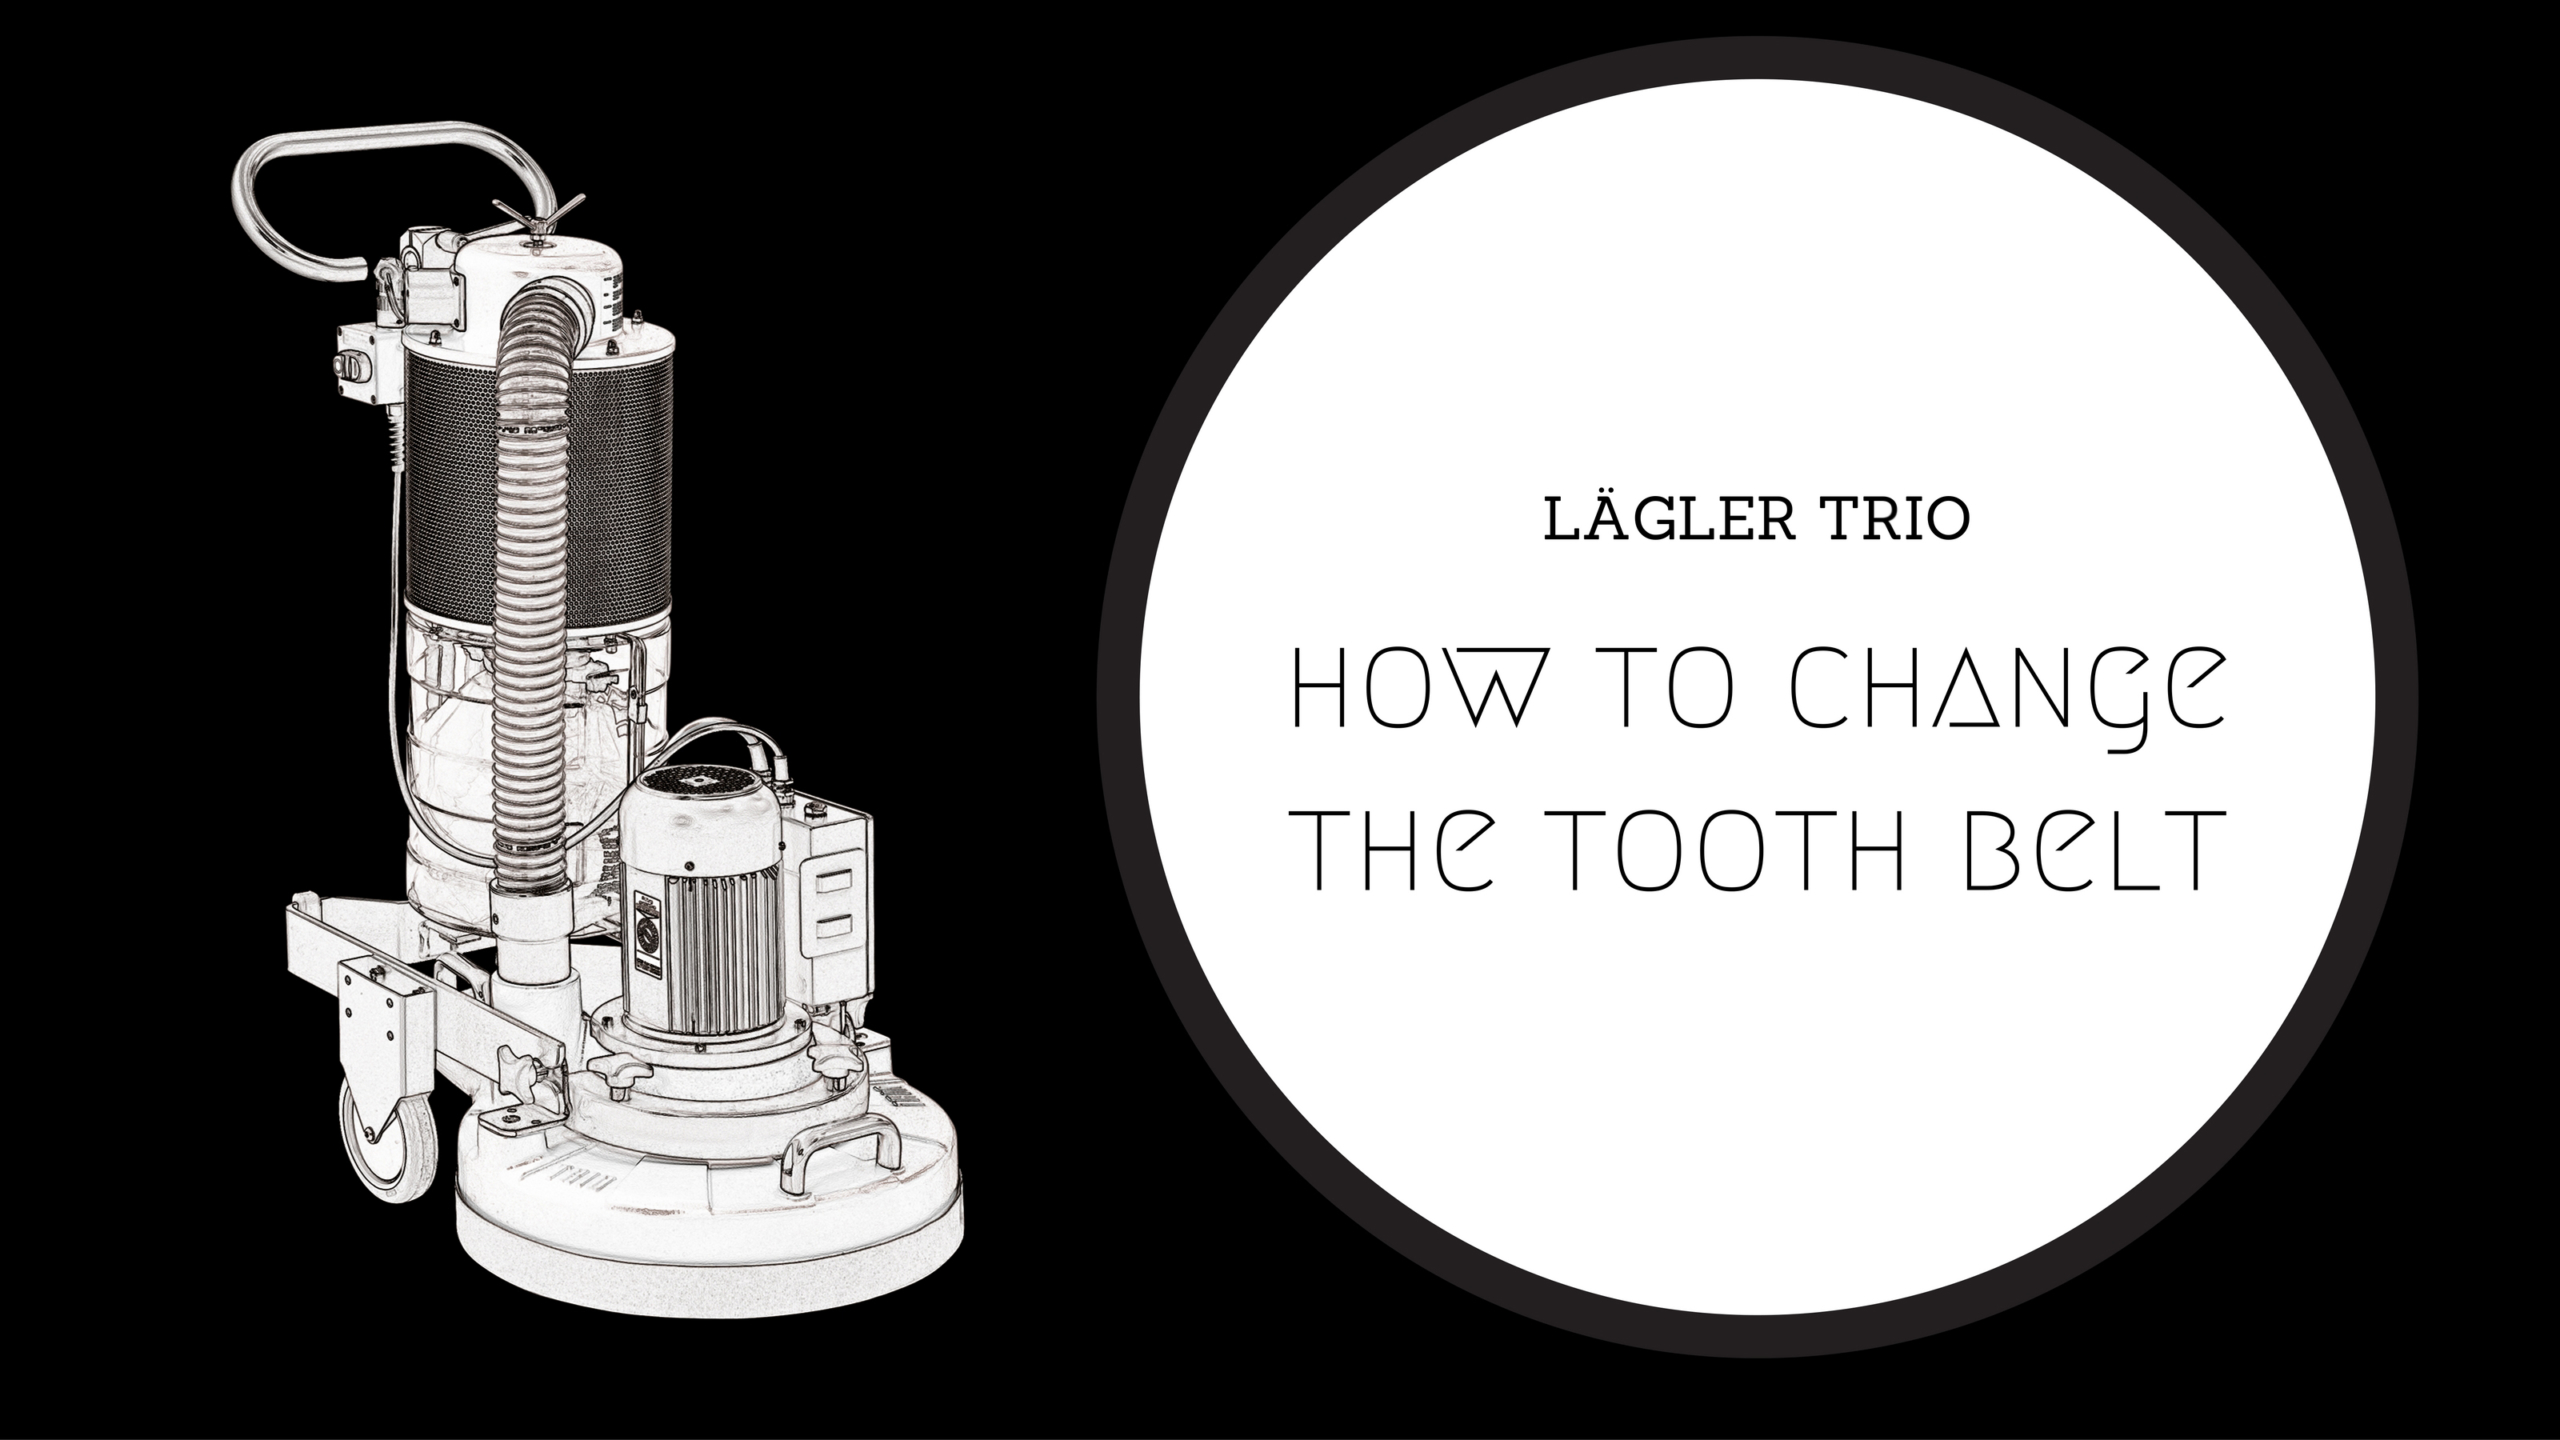
Good condition of the tooth belt, or the belt that turns the three sanding plates (discs) of the Lägler TRIO fine sanding machine, is critical. No belt,
no sanding. It’s that simple.

In this post, and the video below, we give step-by-step instructions for removing the current belt and replacing it with a new belt.

How to Know When the Tooth Belt Needs to Be Changed

It can be difficult to know when to change the belt, unless it’s the most obvious situation: a three- or four-year-old belt that has dried and become brittle,
and then breaks. In that case, the sanding discs will not turn.

Otherwise, a common way to recognize when the tooth belt needs to be changed is to notice decreased RPMs and less dust filling the dust bag.


How to Remove the Tooth Belt

Starting with the machine turned off and unplugged from power:

1. Lock the handle into its forward position, using the clamping lever at the front of the handle.

2. Lean the TRIO backward to rest safely on the two protective cushions at the back-bottom of the machine’s frame, and on the guide tube.

3. Remove the sanding plates by grabbing the edges and pulling the plates away from the machine, disengaging the TRIO’s three prongs from their rubber
jigs. Caution: Do not use a screwdriver or other tool to pry the plates away from the machine; prying with tools can cause damage.

4. Remove the eight screws of the cover and remove the cover. Recommended: Check the sealing felt on the inside of the cover and replace as needed.

5. Loosen the counter nut of the belt tensioner, using a 17mm wrench, by turning the nut all the way back against the casing wall.

6. Expand the spring by turning the second nut back to the counter nut.

7. Push the belt tensioner back and remove the belt.

8. Use a vacuum to remove dust and dirt inside and around the pulley mechanism.

How to Change the Lagler TRIO Tooth Belt

How to Insert a New Tooth Belt

1. Push the belt tensioner all the way back to the casing wall.

2. Insert the new belt with the geared side facing and engaging the pinion gearing, with the flat side of the belt skirting the gear bearings.
Caution: Incorrectly inserting the belt can cause damage to the machine.

3. Tighten the spring using the nuts to adjust the spring to the proper length:

a. Orange spring: 55 millimeters (approx. 2 1/8”)

b. Blue spring: 52 millimeters (approx. 2”)

4. Replace the cover, fastening it with the eight screws previously removed

5. Mount each sanding plate by first inserting one of its three prongs (locking bolts) into one of the rubber jigs, then fitting the other two into their
respective positions. Press the plate into position as far as it will go.

6. The belt replacement is complete. Stand up the TRIO, readjust the handle to your preference for use. You’re ready to sand again.

Related Blog Posts

How to Clean the Lägler TRIO Filter 

How to Dismantle + Reassemble the Lägler TRIO Filter Unit

Arrows + Abrasives: How to Extend the Life of Abrasives Using the TRIO 

Related Parts

P949 (Tooth) Belt

P953 Sanding Disc, Complete

https://www.laglernorthamerica.com/wp-content/uploads/2020/02/TRIO-belt-title-scaled.jpg 1440 2560 webmaster https://www.laglernorthamerica.com/wp-content/uploads/2020/02/logo2-300x90.png webmaster2016-11-02 18:38:222020-02-29 18:42:16Lägler TRIO: How to Change the Tooth Belt
Page 1 of 212

Recent Posts

  • November 16 – 20: Lägler and Loba-Wakol Essential Systems Course, DenverAugust 21, 2020
  • Versatility and Team GreenAugust 18, 2020
  • Precision and Team GreenAugust 18, 2020
  • Durability and Team GreenAugust 18, 2020
  • Tradition and Team GreenAugust 18, 2020
  • The Versatility of LÄGLERAugust 12, 2020
  • The Precision of LÄGLERAugust 12, 2020
  • The Durability of LÄGLERAugust 12, 2020
  • The Tradition of LÄGLERAugust 11, 2020
  • October 19 – 23: Lägler and Loba-Wakol Essential Systems Course North CarolinaAugust 11, 2020

Tags

Abrasives Contractor Education Featured Item Fly-and-Sand How-To How-To Video How to sand a wood floor Lagler Sanding Manual Lägler Certification Training Lägler FLIP Lägler History Lägler HUMMEL Lägler Parts Lägler TRIO Machine Maintenance Marketing Premium Sanding Premium Sanding Technology PST Sanding Drums Social Media Subfloor Prep

Archive

  • August 2020
  • July 2020
  • July 2019
  • December 2017
  • November 2017
  • October 2017
  • September 2017
  • August 2017
  • July 2017
  • June 2017
  • May 2017
  • April 2017
  • March 2017
  • February 2017
  • January 2017
  • December 2016
  • November 2016
  • October 2016
  • September 2016
  • August 2016
  • July 2016
  • June 2016
  • May 2016

Maximize jobsite efficiency. Boost your bottom line.

Earn Lägler Certification

Signup to look, listen + learn through the

Lägler N.A. Newsletter

About Lägler North America

Lägler North America, a division of Palo Duro Hardwoods, is the North American distributor of machines and parts manufactured by Eugen Lägler GmbH in Germany. We are North America’s machine repair center, and offer Lägler’s one-day Premium Sanding Technology (PST®) certification course.

Latest News

Lägler N.A. Is Social May 11, 2016

Lägler North America is building a community via its social pages. Connect with us on Instagram, Facebook, and Twitter to see photos and videos, to learn trade tips, hear about opportunities and more.  

Stay Informed

Click to download the latest Lägler Direkt Newsletter

Download

Copyright © 2020 Lägler North America. All Rights Reserved.

  • Terms & Conditions
  • Shipping & Return Policies
  • Privacy Policy

Scroll to top