• Facebook
  • Instagram
  • Mail
  • Youtube
Call 1-800-8-HUMMEL
  • 0Shopping Cart
Lägler North America
  • Machines
    • SURFACE
      • HUMMEL
      • SUPERHUMMEL
    • FINE SANDING
      • TRIO
      • SINGLE
    • EDGE/STAIRS/CORNER
      • FLIP
      • ELAN
      • UNICO
  • Machine Parts
    • HUMMEL
    • SUPERHUMMEL
    • TRIO
    • FLIP
    • ELAN
    • SINGLE
    • UNICO
  • ABRASIVES
    • Buy Abrasives
  • Blog
  • PST®
  • Newsletter
    • Lägler Direkt Archive
    • Subscribe | Email Newsletter
  • Warranty
  • Contact
    • Info Request Form
    • Submit Photo | #LaglerOfTheDay
  • News & Events
  • Fly & Sand 2021
  • Menu Menu
You are here: Home1 / Blog2 / How-To

Posts

How to Replace the Lägler FLIP® V-Belt

November 29, 2017/in Lägler /by webmaster

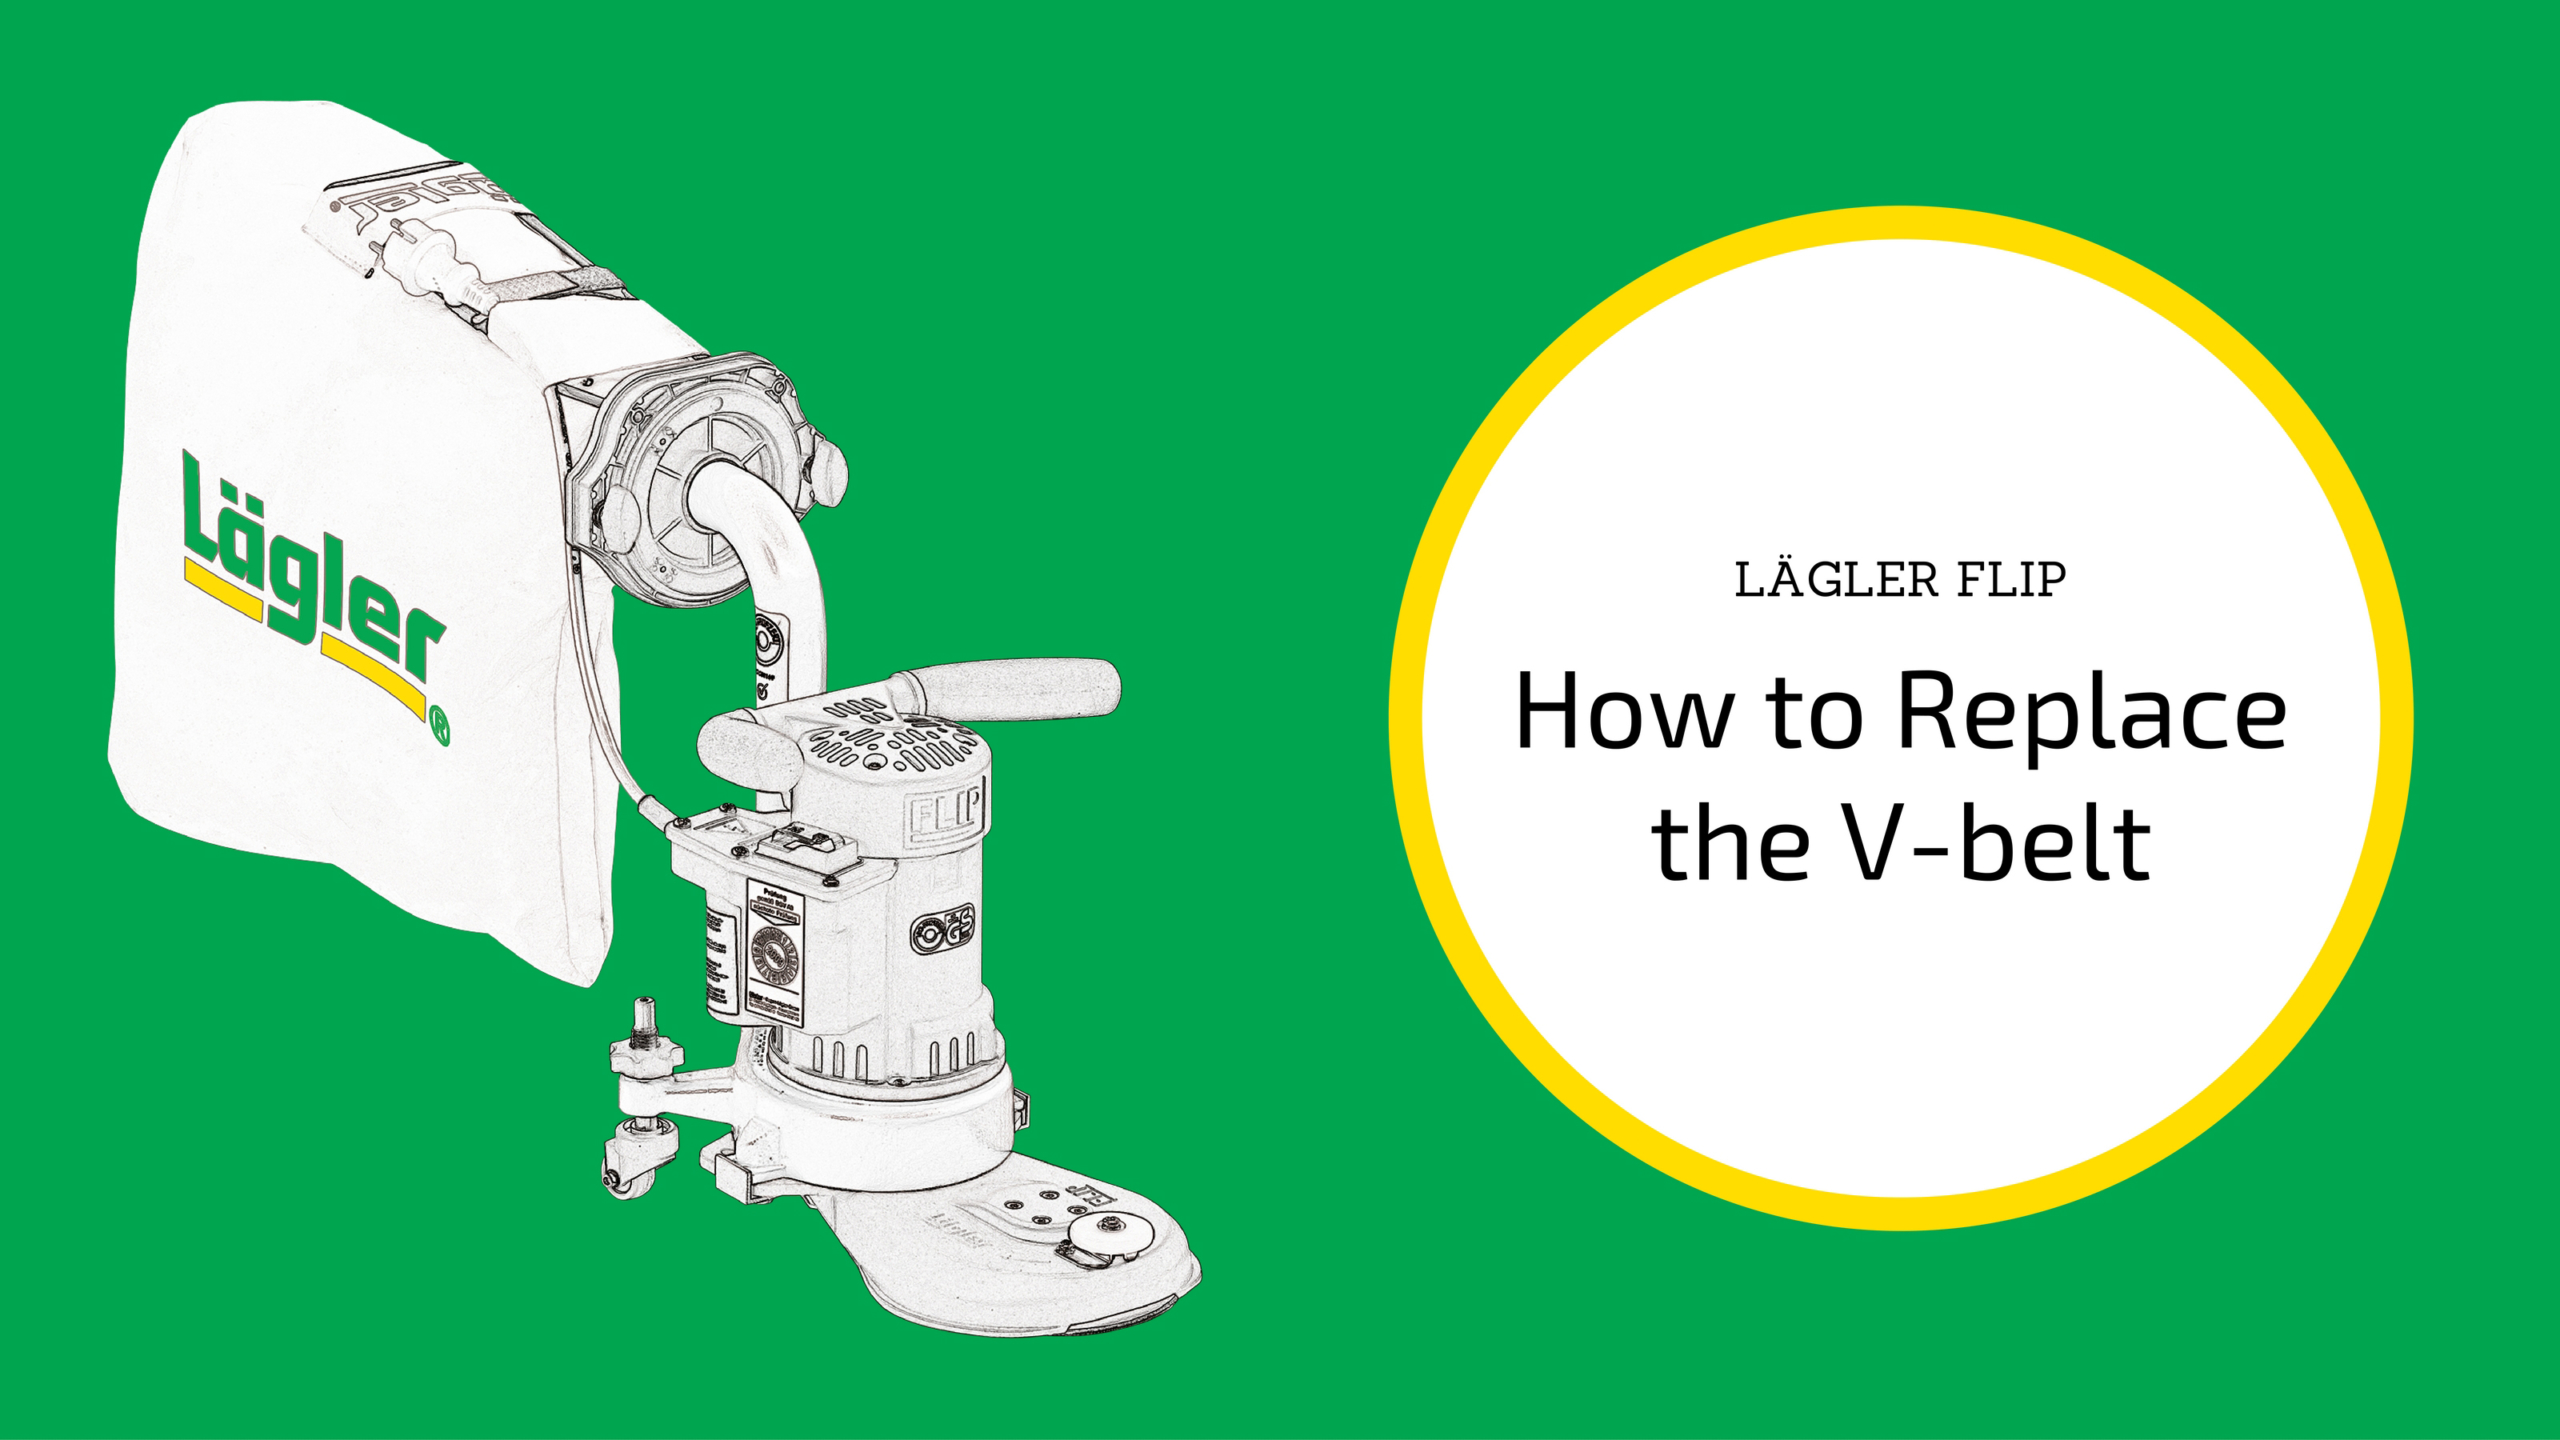
Have you noticed your Lägler FLIP® acting a bit different lately? Maybe you’re having a tough time starting it or the working speed has decreased.
Maybe it feels like it isn’t running as smoothly as usual or the noise has gotten louder. The FLIP might be losing its steam to suck dust. It’s maintenance
time.

All machines need a hug from time to time, and parts need to be replaced. It’s no different than routinely changing the oil on your truck. New oil, smooth
ride.

New V-belt, new edger.

Over time, residue accumulates in the pulleys and in the attachment. The issues mentioned above start happening and you know it’s time to take a look under
the hood and replace the V-belt. While you’re there, check whether the fan housing and blades to see if there is buildup there that needs to be dealt
with too.

The V-belt must be replaced, at the latest, when it cannot be retightened because the screws for connecting the attachment are at the end of the holes.

Special note: The V-belt should run without touching the ground of the pulley. The belt’s left and right edges should rest against the inner edges
of the pulley.

Step-by-step instructions for removing and installing the V-belt for the Lägler FLIP edger are listed below. They also are shown in the video above, using
the illustrations from the Lägler FLIP Operations Manual.

How to Remove the V-Belt on the Lägler FLIP

Assuming you’ve already turned off and unplugged the FLIP:

1. Lay the machine on its side or with the motor housing on a table. Avoid damages to the floor or table and the machine.

2. Undo the screw of the belt tightening plate (at the back of the attachment) with the universal spanner, the special T-grip driver (P1230 | 000.91.40.001) that comes with the purchase of a new FLIP.

How to Remove the Lagler FLIP V-Belt

3. Turn the belt tightening plate away from the attachment and re-tighten the screw of the belt tightening plate.

4. Use the universal spanner to remove the two screws that connect the attachment, along with the washers and the guide angles. Place these parts to the
side.

5. Remove the attachment from the machine and put down the attachment with the sanding disc facing upward.

How to Remove the Lagler FLIP V-Belt

6. Use the universal spanner to undo the fixing screws of the attachment cover and remove this from the attachment.

7. Turn the attachment over.

8. Use the universal spanner to undo the four fixing screws of the complete sanding disc.

9. Remove the attachment from the complete sanding disc.

How to Remove the Lagler FLIP V-Belt

10. Dispose of the worn-out V-belt.

11. Check whether the sanding plate pulley or the motor pulley are worn-out. Replace these parts if necessary. If one pulley appears to be worn out, then
both will be. Here are two signs of a worn out pulley:

  • The edges of the belt slip down into the groove of the pulley.
  • The pulley groove is polished from the belt running directly on it.

12. Clean the two pulleys and the attachment. Wear a respiratory protective mask if necessary.

How to Install the V-Belt on the Lägler FLIP

1. Place the new V-belt on the complete sanding plate pulley.

2. Insert the complete sanding plate with V-belt in the attachment. Ensure that the holes of the complete sanding plate are aligned with the holes in the
attachment.

How to Install the Lagler FLIP V-Belt

3. Make sure the sanding plate can be turned by hand and the V-belt is correctly placed in the attachment.

4. Turn the attachment over and tighten the four screws for attaching the complete sanding plate using the universal spanner.

5. Push the attachment over the motor pulley and insert the V-belt into the motor pulley.

6. Put on the attachment cover.

How to Install the Lagler FLIP V-Belt

7. Tighten the two screws for connecting the attachment, placing a washer and guide angle in the respective threads of the fan housing. Do not tighten the screws all the way yet.

Make sure the belt tightening plate is not located between the attachment and the fan housing. Otherwise, a significant amount of dust will escape
from this area during sanding.

8. Tighten the V-belt. (See the “How to Tighten the Lägler FLIP V-Belt” section below.)

After a few days’ use to break-in the new belt, check the belt tension. Tighten again as necessary.

How to Tighten the Lägler FLIP V-Belt

1. Lay the machine on its side or with the motor housing on a table. Avoid damages to the floor or table and the machine.

2. Use the universal spanner to loosen the two screws that connect the attachment to the fan housing.

3. Use the universal spanner to loosen the screw that attaches the belt tightening plate.

4. Hold the FLIP® by the fan housing and press the belt tightening plate forward toward the attachment at the same time with your thumb. Use
your other hand and the universal spanner to retighten the three screws.

Learn more about maintaining and getting the most out of your Lägler FLIP and
other Lägler sanding machines by subscribing to the Lägler North America monthly email newsletter,
and by following us on Instagram, Facebook and Twitter.

Related Blog Posts

How to Adjust Lägler FLIP Sanding Pressure

How to Replace Lägler FLIP Carbon Brushes

https://www.laglernorthamerica.com/wp-content/uploads/2020/02/FLIP-Change-V-Belt-scaled.jpg 1440 2560 webmaster https://www.laglernorthamerica.com/wp-content/uploads/2020/02/logo2-300x90.png webmaster2017-11-29 18:19:032020-02-29 18:26:10How to Replace the Lägler FLIP® V-Belt

Tips for Final Sanding Wood Floors

October 10, 2017/in Lägler /by webmaster

We’ve been rolling through Lägler’s “Sanding of Wooden Floors”
manual bit by bit. We’ve talked about how to pull the best work out of your crew and your machines using the big machine, edger and multi-disc. But
the formula for wood floor sanding success isn’t done ’til you nail the final sanding step.

5 Tips for the Final Wood Flooring Sanding Step

1. The grit of the abrasive used for the final sanding step depends on the wood species and how you sanded the floor up to that point, what grit sequence
you used to get there.

2. Wood flooring generally must be sanded with a finer grit when oil or wax is being used. The grit sequence must run accordingly to include finer grits.

3. The deeper the sanding marks, the more oil or wax can penetrate and make these indentations appear dark. Deep sanding marks are much more visible than
with finishing sanding. The usage of colored oils and stains will even reinforce this effect.

4. An even and fine surface structure of the wood flooring is particularly important for colored oil or stain. The deeper the sanding marks, the more
color pigments can deposit in them. The sanding marks therefore appear even darker than with normal oil. A surface treated with colored oil or
stain is therefore generally sanded with one grit number finer than with other treatments.

5. But it is up to the contractor to make the call on whether the surface quality following the final sanding step is suitable for the planned surface
treatment. Make sure to follow the finish manufacturers’ instructions.

6 Points to Consider After Completing Sanding (Before Finishing)

1. No more cracks or joints should be visible. Otherwise they need to be closed by using filler.

2. No more sanding marks from the coarse grits should be visible. With the help of a flash light, existing marks will become clearly visible. Such
faults will stand out after the subsequent surface treatment, due to differences in the brightness of the field. This can result in customer complaints.

3. Differences in the roughness of the wood surface between the field and edge sanding lead to different brightness levels after the following surface
treatment (“picture frame”).

4. No more damage or the other defects should be visible on the surface after the final sanding.

5. The surface should be inspected for foreign particle residues (e.g. iron filings, plaster residue). Small iron particles can lead to brown spots
(rust spots) in the finish coating, especially if the floor is coated with water-based finish.

6. No contaminants such as oils, greases, wax, resin, cleaning agents or substances containing silicone should be present on the surface. These substances
can impair the bonding of the wood surface with the finish, oil or wax and lead to complaints by the customer.

These tips are printed in Lägler’s sanding manual. You can download a digital version of the manual at no charge at laegler.com.

We also cover the how-tos and what-not-to-dos in-person in Denver, during Lägler’s one-day Premium Sanding Technology (PST®) certification training.
Call us if you dare (800-8-HUMMEL / 800-848-6635).

Related Blog Posts

How to Minimize Sanding Efforts + Maximize Business Profits

Big Machine Sanding Direction, Speed + Pressure

Abrasives: Cost vs Value of Quality

https://www.laglernorthamerica.com/wp-content/uploads/2020/02/TipsFinalSanding.jpg 422 750 webmaster https://www.laglernorthamerica.com/wp-content/uploads/2020/02/logo2-300x90.png webmaster2017-10-10 00:56:202020-02-26 00:59:06Tips for Final Sanding Wood Floors

How to Use a Lägler TRIO

September 26, 2017/in Lägler /by webmaster

Those who don’t know call the Lägler TRIO a buffer. Only those who don’t know.

The way to feel what’s what is to get your hands on the TRIO and do some work – and to make sure you’re using it the right way.

That comes with getting some practice laps at the source: Lägler’s Premium Sanding Technology (PST®) certification training.

Next best? Read what’s below. It’s based on Lägler’s “Sanding of Wooden Floors” manual (download free PDF).

How Best to Use the Lägler TRIO

The TRIO is designed with two functional advantages:

  • Produce a flatter surface than a belt sander when using the same grit abrasives
  • Sand in any direction, from wall to wall

Fine sanding using the TRIO generally begins with hook-and-loop sanding discs starting at 60 grit. You can sand with the TRIO up to 150 grit, depending
on the wood species and the subsequent surface treatment.

If you want to take it one step further, use sanding screens after the final sanding step. Use screens at the same grit as the sanding disc used in the
final sanding step.

One difference between the TRIO, the industry’s original multidisc sander, and a buffer is it packs the power for pre-sanding, too. You can use 40 grit
to smooth out minor over- and under-wood.

Sand with a Lagler TRIO in Any Direction

Fine Sanding with the Lägler TRIO

To create high-quality surfaces when using the TRIO for fine sanding:

  • Do not skip more than one grit number when pre-sanding with a belt sander
  • Do not skip any grit numbers when fine sanding with the TRIO

If you want less aggressive cutting with the TRIO:

  • Remove the additional weight
  • Attach two flexible Velcro rings to each sanding plate

These methods especially give you an advantage when sanding uneven engineered flooring, helping to prevent the top layer from being sanded through.

To increase sanding abrasion with the TRIO:

  • Remove the Velcro rings from the TRIO sanding plates
  • Decrease walking speed while sanding

Warning: Excessively slow walking speeds or continuous sanding in the same spot creates too much heat. That can cause burn marks on the wood flooring and
clogging of the abrasive. If a spot requires extra sanding, make sure to repeat sanding at appropriate time intervals.

The wood species and the surface treatment to be carried out after the fine sanding determines the grit number of the final sanding step.

Intermediate Finish Sanding with the Lägler TRIO

The TRIO can be used for intermediate finish sanding with sanding screens.

The application of a used sanding screen and the removal of the additional weight is recommended to reduce the risk of sanding through the finish layer
during intermediate finish sanding.

Sanding pads also can be used on the TRIO for the intermediate finish layer.

When sanding cork:

  • Never sand with abrasives coarser than 60 grit
  • Always remove the additional weight from the TRIO
  • Sand without the flexible Velcro ring on the sanding plates

Check surface quality and perform additional sanding steps depending on the result.

Last note: Clean the filter cartridge regularly.

Adding the TRIO to your roster of equipment is a next-level play. It’s for craftsmen who raise the bar for quality and give themselves the opportunity
to command a next-level place in their market.

We know it takes real commitment to the investment. We welcome you and your crew to join us for a one-day Lägler PST training class. Test drive the TRIO
and get started the right way.

Related Blog Posts

How to Minimize Sanding Efforts + Maximize Business Profits

Big Machine Sanding Direction, Speed + Pressure

Abrasives: Cost vs Value of Quality

https://www.laglernorthamerica.com/wp-content/uploads/2020/02/HowUseTRIO-title.jpg 422 750 webmaster https://www.laglernorthamerica.com/wp-content/uploads/2020/02/logo2-300x90.png webmaster2017-09-26 01:00:322020-02-26 01:03:48How to Use a Lägler TRIO

Abrasives: Cost Vs. Value of Quality

July 4, 2017/in Lägler /by webmaster

There are two approaches to floor sanding: guesswork and science.

Guesswork creates variables and challenges in sanding jobs that aren’t there. It causes the professional to change his or her approach from job to job,
species to species, and floor pattern to pattern. It produces results that vary.

The science of sanding is a proven process a professional can learn and use on each job, regardless of species, board widths, and installation pattern.
It produces consistent, quality results.

Quality is everything, if you’re trying to build a strong business on good work. That goes for your skills, machines, customer service, abrasives and the
other details. If you’re off-target in just one of those key areas, word on the street will bite you in the dust bag, whether you know it or not.

We talk about training and boosting your skills often on this blog, especially about Lägler’s Premium Sanding Technology (PST) class. Of course, we get into machine quality every day, too, talking about the standards Lägler holds itself to or just by posting photos of
Lägler’s craftsmen on Instagram quietly going about the business of hand-building and testing its machines.

It’s time to talk more about the ripple effect of choosing quality, especially with abrasives.

Free Online Download -- Lägler Sanding Manual

Cost vs. Value of Quality

Quality abrasives play a super-important role. Like with anything, you get what you pay for. Pay for cheap products, get cheap results.

You probably tell homeowners that. And you often see the problems caused by hacks, right? A homeowner calls you in to fix the disaster a “professional”
made of their floor. It was the low bidder they’d hired for the initial job, focusing only on the short-term pain of the money they were spending.
Now they are losing sleep, stressing the expense and headaches of the shoddy work they got from the contractor from hell.

They are painfully figuring out they’ve got to pay you what they should have stepped up to pay in the first place, just to fix the mess. That’s on top
of the money they already spent and the worry it caused them. Cheap quickly turned into way more expensive.

The same goes for any business that relies on quality ingredients to put out quality products or services it sells. A restaurant that goes cheap to save
a buck is short-sighted. It loses business in the long run because it’s worried about the cost of, say, a case of burger patties. The owner of that
restaurant probably isn’t connecting bad Yelp reviews to one purchase like which meat to buy.

But it isn’t just the meat. It’s the domino effect of that mindset that leads to going cheap on one thing after another. That restaurant owner doesn’t
invest in the other ingredients, either. Or replace the dirty or torn seats in the joint, or keep its restrooms clean, or care all that much when a
jaded employee doesn’t give customers a hello or smile or quality experience. Downward spiral.

For a true flooring pro – a craftsman – pride in quality work is at the top of the list. The good kind of word on the street makes the rounds and builds
the business like it’s got its own motor. Do good work, get good work.

Floor Sanding Abrasives: Cost vs. Value Quality

Floor Sanding Abrasives: The Nitty Gritty

The materials used in making abrasives affect sanding rates and how many square feet of life a professional gets out of them. Inexpensively produced abrasives
have shorter service life and need more frequent changing. The minerals used in inexpensive abrasives do not perform as aggressively, leading to more
time spent in the sanding process.

In the end, the additional costs of buying, storing, and transporting a larger quantity of lower-quality abrasives, plus having to spend more time sanding
with them makes investing in quality upfront a better value. (Sounds like that thrifty homeowner in the example above, right?)

In fact, the science of sanding means little without using the right abrasives for the right situations. A highly skilled race-car driver who has a fine-tuned
car can do little with it if the wrong tires are on it.

For wood floor sanding abrasives, the minerals, underlayment and adhesive are difference-makers. The types of underlayment (paper or cloth) and minerals
(silicon carbide, ceramic, aluminum oxide, and zirconia) needed depend on the intended use.

Grit Sequence for Success

Grit sequence is a key factor in the floor sanding process. It’s essential to follow the steps, like shifting properly through a race car’s gears. The
driver doesn’t get ahead by skipping gears. Instead, he bogs down his momentum.

Unlike in a car, proper grit sequence allows for skipping one grit, but only one. If a professional jumps two or more grits in the sequence, the scratches
from the previous grit will not be adequately removed. It will cost more effort, time, and abrasives to redo the work.

The first sanding step should be done with as coarse a grit as necessary, but as fine a grit as possible. That’s where the variable enters this science
of sanding. The professional must use his experience to recognize if a floor’s condition calls for an especially coarse grit to start.

For example, if it shows severe cupping or is coated with thick lacquer. The starting grit will help to determine the ending grit to be used. Everything
in between follows the steps of the process.

The science of sanding can be learned. A sanding professional can bank on its predictable, craftsman-quality results. No guesswork needed. Clients might
think it’s magic. It’s OK to leave them guessing.

The Bottom Line

Quality customers know when they are dealing with quality professionals. When they hire someone to sand and refinish their floor, they are investing a
good chunk into their home. They want to feel great about that. They want to know what they get back for their trust in you will be worth a grit when
the job is done.

Choosing quality is everything.

Learn more about the best ways to boost your floor sanding game. Learn it from Karl Lägler, the man who wrote the book on that game, by downloading the
free “Sanding of Wooden Floors” manual online from Lägler.

Related Blog Posts

How to Minimize Sanding Efforts + Maximize Business Profits

How to Subfloor Prep with a Multi-Disc Sander or Buffer

Big Machine Sanding Path Displacement

https://www.laglernorthamerica.com/wp-content/uploads/2020/02/Abrasives-Cost-vs-Value.jpg 422 750 webmaster https://www.laglernorthamerica.com/wp-content/uploads/2020/02/logo2-300x90.png webmaster2017-07-04 00:08:002020-02-29 00:12:29Abrasives: Cost Vs. Value of Quality

Big Machine Sanding Path Displacement

June 20, 2017/in Lägler /by webmaster

This won’t surprise you, given Lägler is a German manufacturer, but the company focuses a lot on efficiency.

Lägler cares about that in its production processes, and we care about helping sanding professionals be the most efficient they can be on the job. Knowing how
to get the most out of their machines – whatever brand they are – in the smartest way (least effort) will pay you back every day.

Efficiency when sanding floors saves wear on your body, your abrasives and machines. It saves you time. And all that saves you money and lets you move
on to the next job sooner.

What is Sanding Path Displacement?

One technique for being more efficient when sanding with the big machine is to find the right line for your sanding path displacement, and be consistent
with it.

A sanding path is the forward and reverse sanding motion on the same path without displacement of the sanding drum, meaning that forward and reverse path
is exactly over the top of itself in both directions.

Sanding drum displacement refers to how far over you move from one forward-reverse path to the next. (That should almost always mean moving
left to right across the room.)

The ideal amount of sanding path displacement is 50 percent, meaning each time you start the forward sanding motion you will be sanding over half the previous
sanding path’s width. Another way to look at it is you move to the right half the sanding drum’s width.

We follow that 50 percent rule because it helps us to avoid visible differences from path to path. If you’re using a Lägler sanding drum, its slightly
spherical shape also prevents edge lines from the drum being cut into the floor.

Big Machine Sanding Path Displacement | Lägler North America Blog

A lower amount of sanding path displacement causes a higher stripping rate. If your sanding path is only 25 percent, then you are only moving to the right
one-quarter of the drum’s width. In that case, you are sanding 75 percent of what you sanded during the previous path.

Increasing the sanding path displacement reduces the number of paths across a room, but there is a consequence (see the drawing below that highlights the
double-overlap at the outer edges of the drum).

Because at the outer edges, the outer 25 percent of the drum on each side, the floor gets sanded twice as much as the rest of the floor. Higher displacement
reduces the evenness of the wood floor.

Again, the ideal sanding path displacement is 50 percent.

Along with efficiency being a key to success in sanding floors and business, consistency is important. If you are not consistent with your sanding path
displacement, then you will not produce consistent sanding results. That will lead to inconsistent results with final outcomes of jobs.

That will affect your business overall. And that will affect our business. We’re in this together.

Learn More, Earn More

Learn more. Download Lägler’s free manual, “Sanding of Wooden Floors,” online at laegler.com.

Get hands-on training on a practice floor, with sanding path displacement (and so much more). Call Lägler North America to schedule one-day training and
Lägler Premium Sanding Technology (PST®) certification in Denver. You can get a one-on-one session or bring your crew (up to five in a class).

Learn more about PST®.
Schedule your one-day training by calling us at 800-848-6635 (800-8-HUMMEL).

Related Blog Posts

How to Minimize Sanding Efforts + Maximize Business Profits

How to Subfloor Prep with a Multi-Disc Sander or Buffer

The Showdown: TRIO vs. Multi-Disc Attachments

https://www.laglernorthamerica.com/wp-content/uploads/2020/02/SandingPath-title.jpg 422 750 webmaster https://www.laglernorthamerica.com/wp-content/uploads/2020/02/logo2-300x90.png webmaster2017-06-20 00:12:542020-02-29 00:16:03Big Machine Sanding Path Displacement

Are You a ‘Hidden Champion’ of Wood Flooring?

May 9, 2017/in Lägler /by webmaster

Have you heard of “hidden champions”? We recently heard this tag, what it means, and who it’s talking about. And started thinking about all the amazing
champions in wood flooring. Pros who knock out beautiful wood floors every day, and stand tall and proud over their latest badassery before rolling
on to their next challenger. Like Muhammad Ali standing over Sonny Liston in ’65. Or like Conor McGregor standing over, well, anybody any time he gets
in the octagon.

It turns out there are a few specific “rules” a hidden champion in business has to meet to make that grade. But what are rules? That isn’t stopping us
from running with the hidden-champion idea and how it can apply to what you do in the wood flooring industry.

See what you can make of this.

What is a Hidden Champion?

We most often think of champions as having to do with sports. Besides Ali and McGregor, we all know of LeBron James, Jimmy Johnson, Ronda Rousey, Peyton
Manning, the Chicago Cubs, and Always Dreaming, the latest thoroughbred to win the Kentucky Derby. All definitely are champions, and definitely are
not hidden.

So, what is a hidden champion? It’s a phrase used to tag small- to mid-sized businesses that meet a few specific guidelines of success, shining light on
them as quiet examples of awesome.

Hidden champions are companies that kill it in their little-known slice of the money-making world. They often are family-owned businesses with expertise
in a narrow line of work and are known as leaders in what they do.

Officially, hidden champions have to meet these three specific bullet points:

  • The company must be among the top three in the world in its industry, or number one on the company’s continent
  • The company’s annual revenue must be below $5 billion
  • The company and its products must be little known to the general public

The idea applies to all types of businesses all over the world. But it especially is attached to German companies. There are two reasons for that. The
man behind the research is Hermann Simon, a well-known German expert who started digging into these shadows more than 20 years ago. And he figured
out:

“Only about 1.1 percent of the world population is German, but 48 percent of the mid-sized world market leaders come from Germany.” Most recently, Simon
counted more than 2,700 hidden champion companies in the world, and more than 1,300 of those are in Germany.

Read + Watch "HUMMEL. Icon Builders.

How to Become a Wood Flooring Hidden Champion

We’re making a leap and assuming you draw less than $5 billion dollars in annual revenue. Check the box. That’s one hidden-champion requirement down.

We also know the public generally isn’t all that educated about the specialized skills and knowledge you have. They hire you to turn their wood floor installation,
sanding and finishing dreams into a lasting reality. Check that hidden-champion box. Two down.

Now, the third requirement: rank among top three in the world, or number one on your continent. The rule doesn’t work? Bend it. We’re rolling rogue on
this one, and turning this into the hidden-hidden champion playbook.

6 Factors of Hidden Champion Success

Most hidden champions specialize. In the bigger world, they make inconspicuous products – toothpaste tubes, car seat heaters, hammer-tone
green floor sanding machines – but in the market for these products they are ranked at the top. They focus on the key products they can produce better
than others and end up being more successful than average.

Apple is a great example of reaching explosive success because they cut the bull and stopped trying to sell a hundred products none of us needed or remember
now. Steve Jobs made the company refocus on a handful of world-changing products – iPod, iPhone, iPad – and now Apple is the richest company on the
planet.

Leaders and employees are driven by an “inner fire.” That fire to become, and to remain, number one in their industry lights ’em up like
nothing else. Hidden champions see the market as divided between “good” and “bad” market shares, or customers. They focus on avoiding the bad, like
trying to compete against overly aggressive pricing and discounts that devalue their products or services. They are driven to achieve good by building
a solid, reliable foundation and earning continued success through quality performance that lasts.

Hidden champions are close to their customers’ needs. What customers need and want are at the heart of what hidden champions produce.
They are the motivation for the quality, for improving how the work gets done, for learning more to be able to give their customers something more,
and for their innovations.
Customers add fuel to hidden champions’ inner fire to always do more and to produce the best quality they can.

Test Drive a Lägler TRIO at Lägler PST Certification Training

Set the standard and keep on truckin’. A lot of hidden champions earn their stripes with a main product or service, and are able to have
a special position in the market. There tend to be few true competitors who can compete well with what they offer.

Hidden champions don’t gain competitive advantages by reducing price. They usually get their edge because of quality products and high performance, and
by being accessible to the customer.

Companies also get a bump from figuring out processes to do things in ways competitors can’t or don’t know to do. For example, Lägler designs and builds
custom tools to produce custom parts on-site in its factory in Germany as part of its custom processes that its competitors can’t replicate.

The values of hidden champions tend to be hard work, intolerant of under-performance, low sickness rates, and high employee loyalty. The
leaders of these hidden champions also strongly identify with the work of their companies. They also stay much longer with their companies and are
more invested in them than other leaders.

Training on the job. There’s been talk for years about where the skilled hands-on jobs in America have gone. And German companies have
been highlighted as an example of a country using a system that keeps cranking out those middle-class manufacturing jobs. A huge reason for that is
the training. Apprentices learn for years how to be the best at their specialized skill. (Read “The Secrets of Lägler’s Success“)

But there’s great news for wood flooring contractors, especially those in the U.S. and Canada. This is the hub of training and education for installing,
sanding and finishing wood floors. Several companies and one National Wood Flooring Association (NWFA) serve up the hands-on opportunities flooring pros need to make the run at becoming hidden champions.

The Bottom Line

Even the smallest or largest companies can learn from what makes hidden champions successful. So much business happens at the local level, even for global
companies. And that applies to local wood flooring businesses.

How do you stand out in your market? Do you stand still and bang out the exact same work day after day or do you keep adding to your flooring
know-how through training?

Lägler supports education through the NWFA and through Lägler Premium Sanding Technology (PST®) certification.
Other companies offer specialty training in sanding and finishing, too. Training and certification builds the flooring industry as a whole, and even
helps to raise the standards that builders and homeowners expect – and will pay more to get.

If the idea of being a hidden champion fuels your fire, aim for being the best wood flooring pro in your city or area. Then don’t let up.

Of course, to make the official hidden-champion list, you’ve got to keep your revenue under $5 billion a year, too. Good luck.

#LearnMoreEarnMore: Subscribe to the Lägler North America monthly email newsletter and join us on Instagram and Facebook.

More Good Blog Posts

6 Things You Need to Know About Sanding Drums

The Showdown: TRIO vs. Multi-Disc Attachments

HUMMEL. The Icon Builders.

https://www.laglernorthamerica.com/wp-content/uploads/2020/02/HiddenChampion-title.jpg 506 900 webmaster https://www.laglernorthamerica.com/wp-content/uploads/2020/02/logo2-300x90.png webmaster2017-05-09 00:26:542020-02-29 00:30:42Are You a ‘Hidden Champion’ of Wood Flooring?

6 Things You Need to Know About Sanding Drums

March 28, 2017/in Lägler /by webmaster

HUMMEL owners, tell us: How easy is it to remove and replace your HUMMEL sanding drum? Yeah, easy-easy. DIY in the shop, at your trailer, on the jobsite
floor, right? No need to waste time or money for someone else to do it.

If you haven’t swapped out sanding drums yet, we have a one-minute “How to Replace a HUMMEL Sanding Drum” demo
video on our Lägler North America YouTube channel.

Know Why, How + When to Replace a Sanding Drum

Damaged sanding drums lead to damaged floors. Damaged floors lead to customer complaints, callbacks, re-sanding, and a lot of expense on your part. Needless
to say, it’s far cheaper to pay a little attention to the condition of your drum and replace it, when needed.

When you replace a worn or moderately damaged drum, save it. It’s still of use for first cuts when sanding especially rough floors or decks.

Below are photos of damaged drums and the consequences of continuing to use them when sanding wood floors.

Perpendicular Cuts Through the Drum Rubber

These unwanted cuts in the drum’s rubber come from nails, staples or other sharp objects protruding from the subfloor. Careful subfloor prep avoids this
type damage to a sanding drum.

When sanding with a drum that has this damage, you’ll see “streaks” appear on the floor as you sand. Those lines are raised marks that happen because of
the nail-torn grooves left in the drum not making proper contact with the sanding surface.

A drum with this type of damage needs to be replaced.

Sanding Drum Damaged by Nails or Sharp Objects in Subfloor Wood Floor Streaks Caused by a Damaged Sanding Drum
Material Embedded in Drum Rubber

Loose nails, staples or other debris can stick into the rubber and hold on for the ride. Obviously, that leads to an uneven drum and sanding result. The
debris can damage the drum and belt abrasive. It also leads to gouging the sanding surface.

You might be able to remove the debris from the rubber without leaving or causing damage to the drum. But we recommend you think twice. The slightest damage
can transfer to the floor and, like we’ve said, that becomes way more costly to you.

The safest move is to replace the sanding drum. But save the old drum for special uses, like using it on extra-rough first cuts. That can spare your new
drum some wear, and allow you to put on the new drum for finer cuts.

Sanding Drum Damaged by Sharp Objects Gouges Cut in a Wood Floor by a Damaged Sanding Drum
Unbalanced Sanding Drum

A drum that is out of balance makes uneven contact with the sanding surface, causing chatter (photo below). Poor balance is common with aftermarket drums.
Lägler balances its drums using a specially designed machine at the factory in Germany. It’s not unlike how a mechanic shop balances your truck’s wheels.
And the weight tolerance in Lägler’s process is extremely tight [Read “Sanding Drums: Lägler vs Aftermarket”
to learn how tight, and other stuff].

An unbalanced sanding drum needs to be replaced.

Wood Floor Chatter Can Be Caused by an Unbalanced Sanding Drum

Aged or Worn Out Sanding Drum

The rubber layers of sanding drums age, stiffen and wear out much like car tires do. The shape and flexibility of the rubber changes over time, regardless
of the amount of use. If you are using a “new” drum that sat for years waiting to get into the game but in reality is six to eight years old, it absolutely
is due for replacement, no ifs, ands or buts. Just like with car tires, there is a shelf life on the rubber’s usefulness.

Old, worn out drums tend to cut harder on the edges. Lägler drums are designed to have a “football” shape that feathers toward the edges and avoids those
hard edge-cut lines in the floor. As a drum loses its shape over time, it fails to retain that design.

How long does a drum last? The sanding drum you are using daily should be changed every three years. If you sand somewhat regularly, but
not daily, Lägler recommends replacement every five years. To minimize problems with your sanding drum and get the most out of its performance, keep
it clean between uses and check its condition on a regular basis.

Plan for regular replacement, just like you would plan for regular maintenance for your truck or van. It’s part of the investment for consistent, top-notch
performance of a machine your business relies on.

Old, Worn Out Sanding Drums Cause Poor Floor Sanding Results Marks Left in Wood Floor by Old, Worn Sanding Drum
Dirty Sanding Drum

Dust and debris collect in the aluminum drum cylinder, throwing the balance off. That causes chatter in the floor.

This is easy to avoid with regular cleaning. At least once every month, remove the drum and vacuum out the cylinder. While you’re doing it, look over the
drum’s condition and tend to any maintenance that’s needed.

Sanding Drum Clogged with Dust and Debris Causes Poor Performance

Uneven Floor Caused by Knotty Wood

This is not a sanding drum issue, but a situation that can be fixed with the right use of a sanding drum. Most common on pine and softwood, the knots are
harder and do not sand as well, similar to end-grain or inlays of different species.

For these situations, use Lägler’s hard drum (recognized by its reddish-colored rubber). It is less flexible and cuts more aggressively, the way you need
for the knots.

Knotty Wood Flooring Is Extra-Tough to Sand Lagler's Red Drum Is Designed to be More Aggressive on Knotty Wood Floors

Learn more about Lägler how-to. Subscribe to the Lägler North America newsletter and join us on social media: Instagram, Facebook, Twitter and YouTube.

Related Web Pages

HUMMEL Parts Online Catalog

The Showdown: Lägler TRIO vs Multi-Disc Attachments

HUMMEL. The Icon Builders. [Video]

https://www.laglernorthamerica.com/wp-content/uploads/2020/02/DrumDamage-title.jpg 563 1000 webmaster https://www.laglernorthamerica.com/wp-content/uploads/2020/02/logo2-300x90.png webmaster2017-03-28 00:46:062020-02-29 00:57:476 Things You Need to Know About Sanding Drums

Sanding Drums: Lägler vs. Aftermarket

March 14, 2017/in Lägler /by webmaster

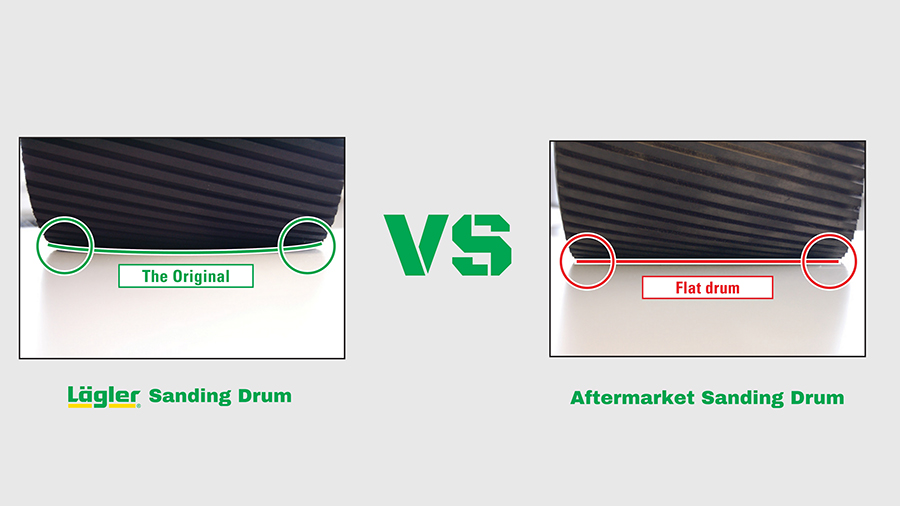
There are a lot of parts to care about with a “big machine” like Lägler’s HUMMEL. But even if you keep it purring, clean and rolling smoothly, it won’t
do you any good if you use a sanding drum that mars the floor with edge marks, waves and chatter.

You can see where we’re headed here, right? We recommend the Lägler sanding drum, of course. But, like everything with Lägler, there is a reason behind
the design. There are reasons we recommend the Lägler drum, and only the Lägler drum.

It simply isn’t the apples-to-apples trade with aftermarket versions like you might think.

In this post, we explain why Lägler recommends not using aftermarket or recycled drums, and how you can know whether a drum you are buying is an authentic
Lägler drum.

The Importance of the Sanding Drum

The quality and condition of your sanding drum is crucial for sanding success. It transfers the machine’s performance to the sand paper, which then impacts
the floor.

If a drum – the aluminum core, weight and outer layers of rubber – is older than four years, visibly worn out or damaged, or the rubber has hardened, it
needs to be replaced. We can promise a drum past its quality of life will give you sanding results your clients will not appreciate.

Lägler HUMMEL Sanding Drum vs Aftermarket Sanding Drum

The “Football” Shape of Lägler Sanding Drums

When looking at a new Lägler sanding drum, it is easy to miss seeing that the drum’s diameter is larger in the middle than it is at the edges. But this
shape is crucial to the quality of a sanded surface. It also is why you do not need to dress a Lägler drum.

Non-Lägler sanding drums have a flat shape, touching the floor from edge to edge of the drum. While overlapping sanding paths, a small change in elevation
occurs. That leads to a flat sanding drum leaving marks where its edges cut the floor.

Lägler removes this risk of edge-cuts with its drums by decreasing the drum’s diameter from the middle to the outside. That slightly oblong shape, kind
of like a football, is exactly what’s needed for feathering at the edges while sanding.

Lägler drums focus sanding pressure evenly in the center portion of the drum, assuming you have leveled your HUMMEL wheels (extremely easy to do; watch
our one-minute video). You will be able to see that by the wear pattern on the abrasive belt.

Edge Marks from Aftermarket Sanding Drum

Known Problems with Aftermarket + Recycled Sanding Drums

The market offers aftermarket and recycled sanding drums that fit on the Lägler HUMMEL, but they are not equal replacements for a Lägler original drum.
They cause damage to floors.

That damage leads to call-backs and more expense on your part as the sanding professional to fix the issues with the floor and to replace the faulty drum
so it doesn’t continue to cause problems.

On occasion, Lägler receives warranty claims for drums, and they are rejected. Virtually all these claims are based on problems that come from using non-Lägler
drum.

Problems that occur with aftermarket and recycled drums are:

  • Improper balancing, which leads to waves and/or chatter in the floor.
  • Vibrations caused by waves and chatter transfer throughout the HUMMEL, leading to damage to the machine.
  • The flat design of aftermarket drums does not provide the same predictable pressure per square inch, causing less-aggressive sanding results.
  • Flat-shaped drums cut the floor at their edges, leaving marks and causing uneven sanding throughout the project.
  • Non-Lägler drums often have a damaged or imprecise core; this also leads to damaging the floor during sanding.

Aftermarket Sanding Drum -- Worn Out Core

4 Visible Signs of Aftermarket Drums

Sanding drums that are not Lägler originals manufactured at Lägler headquarters in Germany have a few tell-tale signs. Here are four clear ways to see
that a sanding drum is an aftermarket drum.

Overlapping rubber layers. There are two layers of rubber on a drum. Aftermarket drums overlap, creating a hardened spot that will cause
vibrations that lead to waves. Lägler drums have rubber layers of even thickness, with the outer layer applied evenly on top of the inner layer, no
overlap.

No “football” shape. Adding to what’s been described in the section about football shape above, the larger contact area of non-Lägler
drums reduces aggression by up to 20 percent.

Worn out bore. Lägler does not reuse old sanding drums. The bore where the drum slides on and off the drum shaft gets worn out. To reuse
a drum, each bore would have to be replaced to be able to guarantee the refurbished drum is properly balanced. The cost of that effort makes recycled
drums too expensive.

Out of balance. Lägler uses special screws as balancing weights on the sanding drum core’s lid. Those weights are new for each drum. Lägler
has perfected its balancing act, keeping each end of the drum within less than 4/100 of an ounce. Sanding drums being recycled for resale need to be
re-balanced because of new rubber being applied, but drums that try to reuse old cores and old weights can’t be properly balanced.

Aftermarket Sanding Drum -- Rubber Layers Overlap

The Bottom Line of Using Aftermarket Sanding Drum on You HUMMEL

The issues laid out above not only lead to poor sanding results, they cause more frequent sanding drum replacements. That costs you more money.

We’re sure you’ve heard, “You get what you pay for.” You probably have said that to a hesitant client or two over the years, too, when they are considering
hiring your competitor with a lower estimate, right?

Think about all we’ve said in this blog post, and it’s easy to understand the importance of a just-right drum to the livelihood of Lägler as a company.
Bad drums lead to bad experiences and bad sanding results with Lägler’s HUMMEL; that would lead to a loss of sanding pros’ confidence in Lägler in
142 countries worldwide. A big deal.

If you have questions about Lägler sanding drums, or anything else Lägler, comment below or call us at 800-8-HUMMEL (800-848-6635) during
weekday business hours.

Other ways to learn more are:

  • Lägler N.A.’s blog
  • Lägler N.A.’s monthly email newsletter
  • Lägler N.A.’s Instagram, Facebook and YouTube pages
https://www.laglernorthamerica.com/wp-content/uploads/2020/02/SandingDrum.jpg 506 900 webmaster https://www.laglernorthamerica.com/wp-content/uploads/2020/02/logo2-300x90.png webmaster2017-03-14 00:58:182020-02-29 01:03:47Sanding Drums: Lägler vs. Aftermarket

How to Mount the Lägler TRIO V-Belt

February 14, 2017/in Lägler /by webmaster

How to Mount the Lägler TRIO V-Belt

In our previous blog post, we gave step-by-step instructions for removing the Lägler TRIO V-belt.
Here are the steps for putting a new V-belt on the TRIO.

First, if your TRIO was manufactured in 1994 or earlier, you will need to keep in mind these two notes:

1. Before placing the motor, make sure the tooth belt tensioner has not fallen out of its guides.

2. The tooth belt tensioner cannot be installed with the motor in place.

Step-by-Step Instructions: How to Mount the TRIO V-Belt

1. Loop the new V-belt around the motor pulley.

2. With the new V-belt in place, lower the motor vertically onto the machine housing. Make sure the V-belt does not slide off the motor pulley and get
jammed between the motor and the machine housing. The belt must be passed through the two recesses on the machine housing.

3. Attach the motor to the machine housing by using the four fixing screws.

Mounting Lägler TRIO V-belt

4. Use the wrench to push the tensioner back against the spring, and place the V-belt into the pulleys of the ventilator and tensioner. When the V-belt
has been inserted, you can release the tensioner into its regular position.

Mounting the Lägler TRIO V-belt

5. Insert the V-belt guard into the slot at the motor and push it toward the motor.

6. Insert the fixing screw for the V-belt guard and tighten it again.

7. Reassemble the machine:

a. Roll the chassis into the attachment position and tighten the two fasteners.

b. Remove the on/off switch from the motor switch box and hook it into the holder on the chassis.

c. Insert the cable plug of the sensor into the on/off switch. Make sure the nose of the cable plug is inserted into the groove of the socket. Lock this
connection by turning the ring nut clockwise. Note: The machine will not start if the cable plug of the sensor is disconnected.

d. Mount the suction hose to the neck of the upper part of the separator.

Mounting Lägler TRIO V-belt

8. While holding onto the handle, tilt the machine backward to a horizontal position. Make sure the machine rests on the guide tube and two protective
rubber pads in a stable position on a flat surface.

9. Mount the tooth belt (Instructions: “How to Change the Tooth Belt”).

That’s it. Sand on.

Learn More, Earn More

To learn more about Lägler #MaintenanceMatters and keeping your machines ready to rock, subscribe to the Lägler North America newsletter and join us on Instagram, Facebook, Twitter and YouTube.

Also, we teach some basics of maintenance in our one-day training and certification course here in Denver: Lägler Premium Sanding Technology (PST®).
Pick a day that works for you and/or your crew to do the training. Get it on the books by calling us at 800-8-HUMMEL (800-848-6635) or emailing [email protected]

Related Web Pages

Lägler TRIO Parts Catalog

How to Change the TRIO Tooth Belt

How to Extend the Life of Abrasives on the TRIO

https://www.laglernorthamerica.com/wp-content/uploads/2020/02/TRIORemoveV-Belt-scaled.jpg 1440 2560 webmaster https://www.laglernorthamerica.com/wp-content/uploads/2020/02/logo2-300x90.png webmaster2017-02-14 01:10:362020-02-29 01:14:15How to Mount the Lägler TRIO V-Belt

How to Remove the Lägler TRIO V-Belt

January 31, 2017/in Lägler /by webmaster

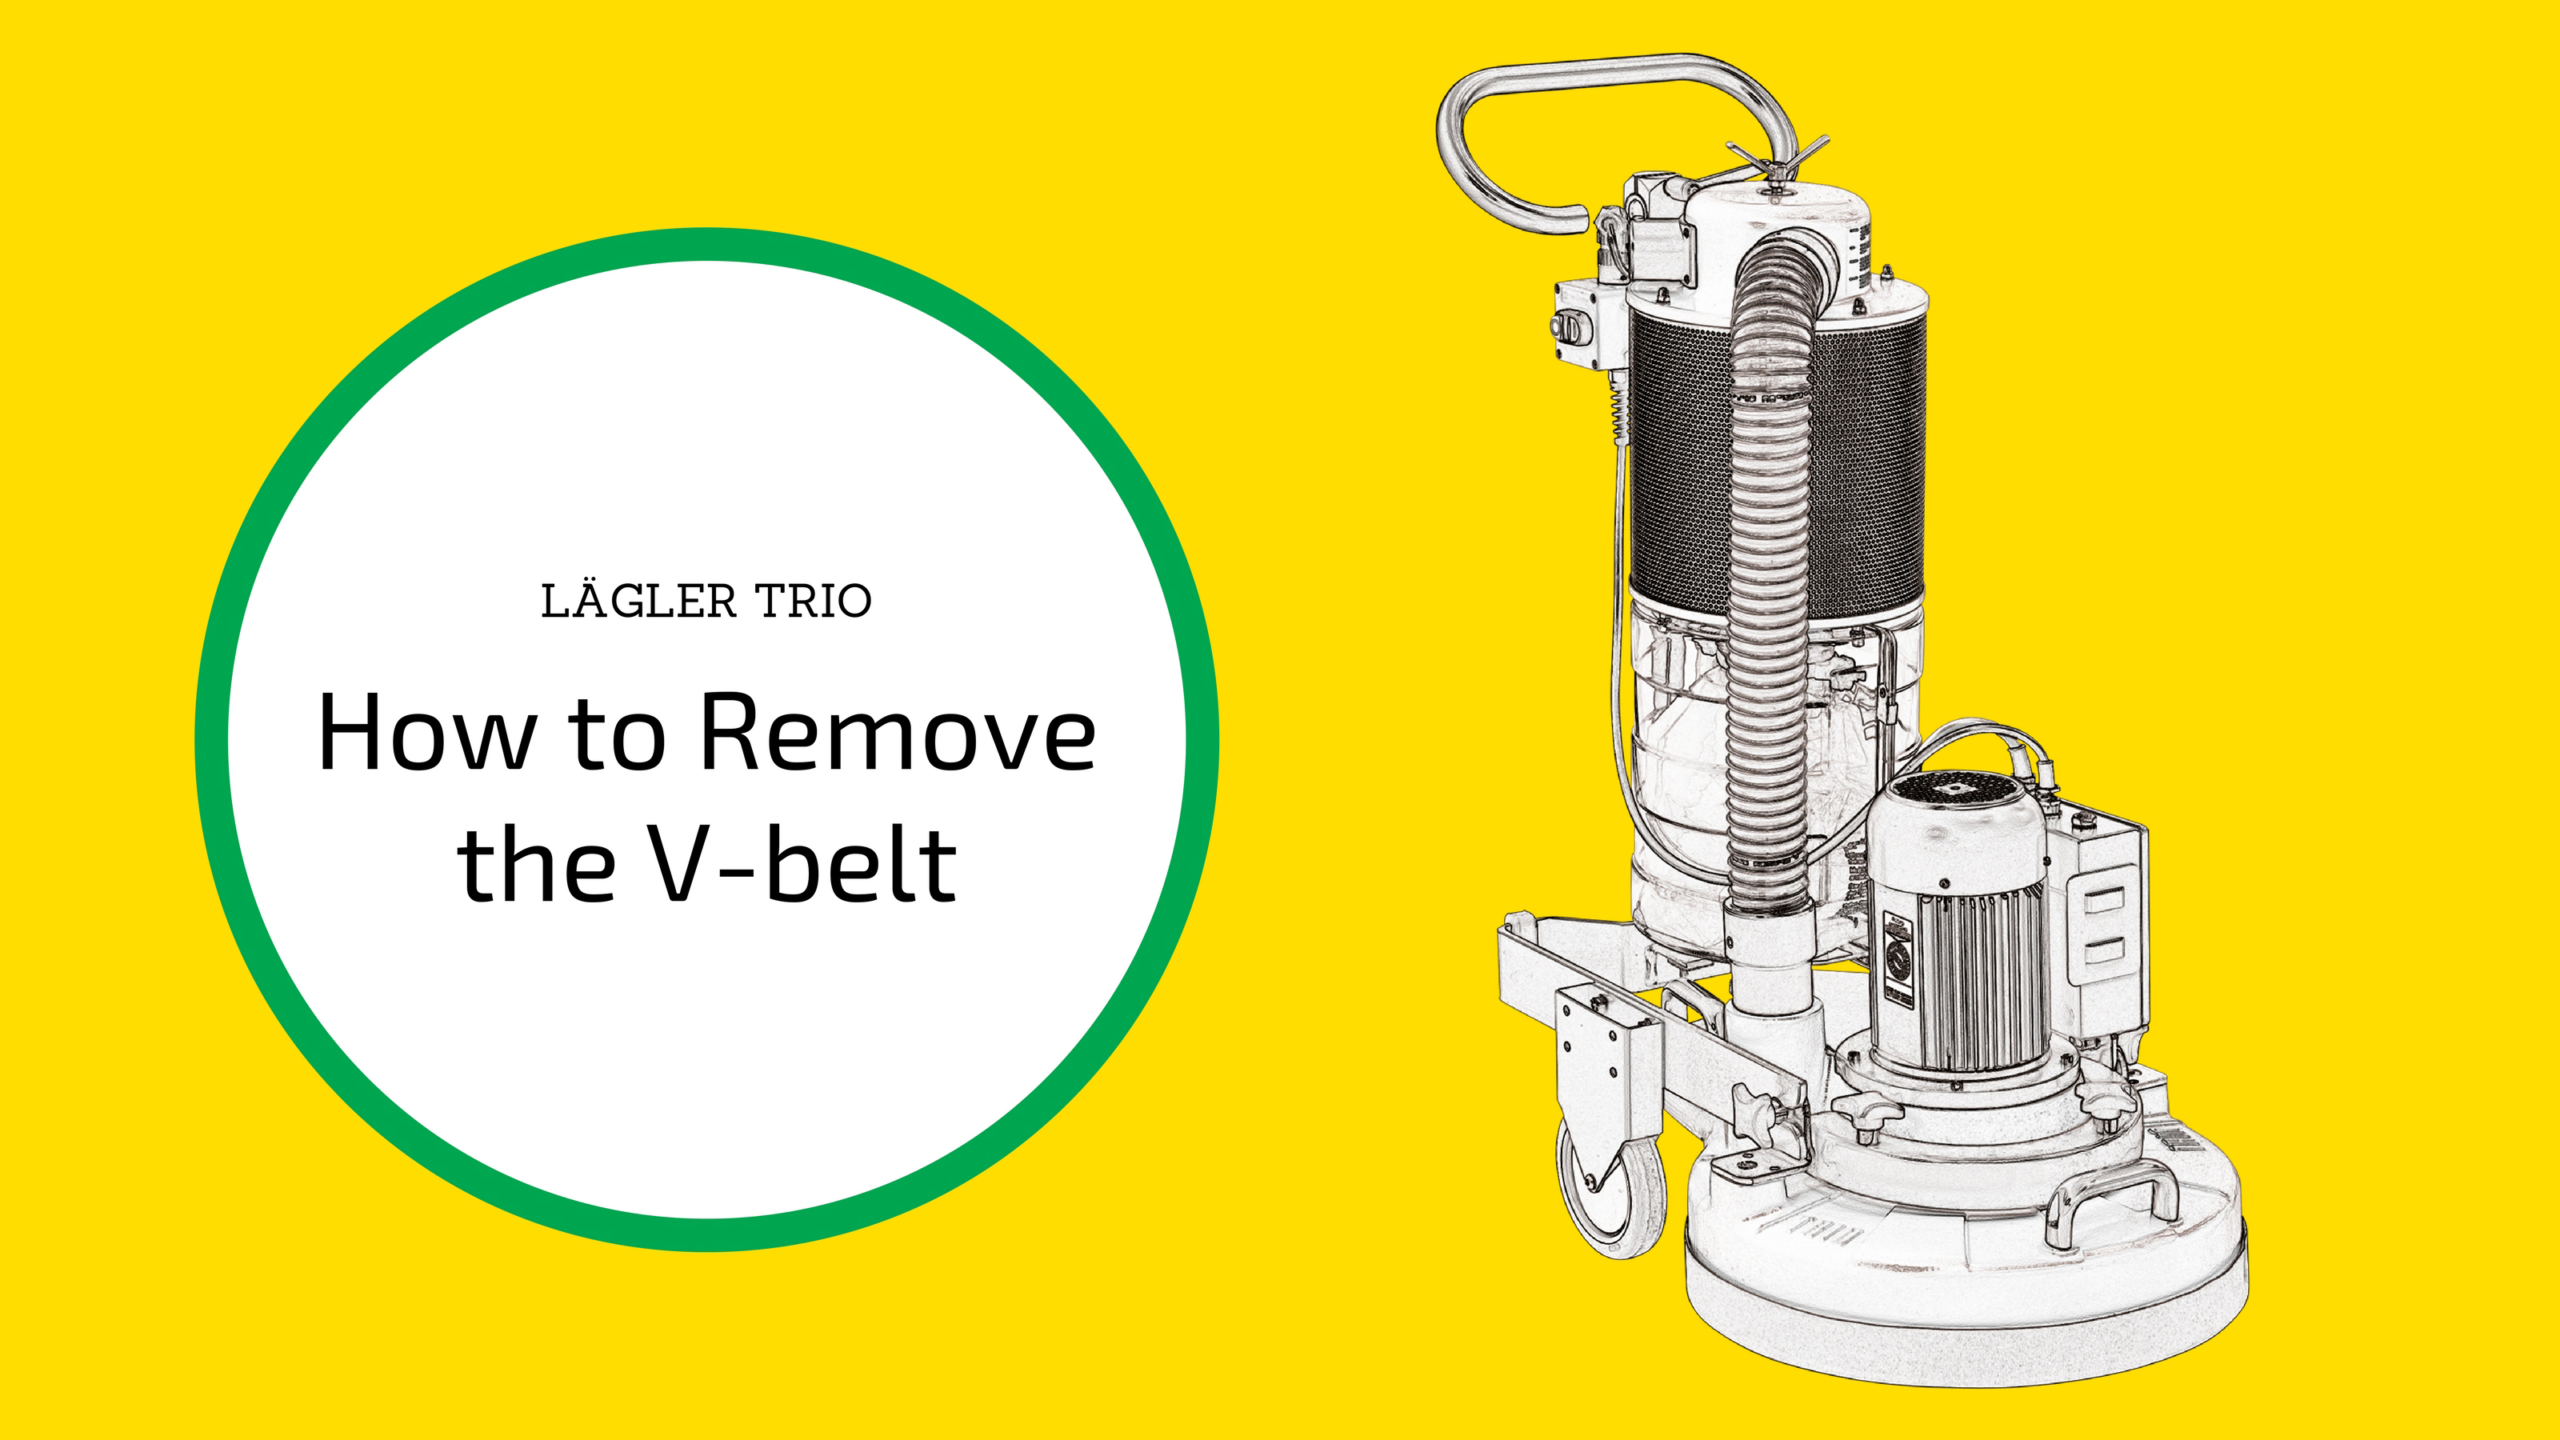
How to Remove the Lägler TRIO V-Belt

Our how-to blog posts like this one are all about helping you to solve your maintenance questions, especially when you’ve got a tight schedule and need
to keep running. But to do that, the first thing you need to know is how to tell when a part needs repair or replacement.

When to Replace the Lägler TRIO V-Belt

As much as we’d love to be able to put out a maintenance schedule that follows exact amounts of usage or length of time for certain parts, you know there
are too many variables for us to do that. Especially with rubber parts like the V-belt.

With the Lägler TRIO V-belt, if it shows signs of wear and tear, replace it. You don’t want to nitpick over squeezing out another job with a worn belt
and end up with lost time on a job site because you pushed too far. Our recommendation is to keep a spare V-belt on-hand, especially if you think the
amount of wear is questionable.

Now, on to our step-by-step instructions for how to remove the TRIO’s V-belt.

How to Remove the Lägler TRIO V-Belt

With the TRIO turned off and unplugged, follow these steps:

1. Remove the tooth belt. (Need help? Read our step-by-step instructions: “How to Change the Tooth Belt.”)

How to Remove the Lägler TRIO V-Belt

2. Bring the machine back into its upright position.

3. Loosen the cable plug of the sensor on the on/off switch by turning the ring nut counterclockwise, and pull off the cable plug off.

4. Remove the on/off switch from the chassis and hook it into the transport holder on motor switch box.

5. Pull the suction hose from the neck of the upper part of the separator.

6. Loosen the two cross-grip fasteners at the side by which the chassis is attached to machine housing and move the chassis backwards.

7. Remove the screw that fixes the V-belt guard to the fan insert.

Lägler TRIO V-Belt

8. Pull V-belt guard from its slot at the motor and put it aside.

9. Release the tension of the V-belt by carefully moving the V-belt tensioner using cranked closed-mouth wrench. The V-belt can now be disengaged from
the pulleys and the belt tensioner.

10. Release the tensioner to its regular position.

Lägler TRIO V-Belt

11. Remove the four screws that fix the motor to the machine housing and lift the motor off, keeping it in a vertical position. The V-belt now can be removed.

12. Use a vacuum to remove dust and dirt.

To get your TRIO back in action read, “How to Mount the Lägler TRIO V-Belt.”

Learn More, Earn More

Our recommendation when using any Lägler machines and parts is to maintain regularly. Nothing else will prolong the life of machine parts like being cleaned
and cared for. It will save you time and money, and help you achieve better floor sanding results.

To learn more about keeping your machines money-making ready, subscribe to the Lägler North America newsletter and join us on Instagram, Facebook, Twitter and YouTube.

Also, we teach maintenance basics during our Lägler Premium Sanding Technology (PST®) certification training here in Denver. To setup training for you and/or your crew when it fits into your schedule, call us at 800-8-HUMMEL (800-848-6635)
or email [email protected]

Related Web Pages

Lägler TRIO Parts Catalog

How to Change the TRIO Tooth Belt

How to Clean the TRIO Filter

https://www.laglernorthamerica.com/wp-content/uploads/2020/02/TRIO-RemoveV-Belt-scaled.jpg 1440 2560 webmaster https://www.laglernorthamerica.com/wp-content/uploads/2020/02/logo2-300x90.png webmaster2017-01-31 01:14:312020-02-29 01:17:55How to Remove the Lägler TRIO V-Belt
Page 1 of 212

Recent Posts

  • November 16 – 20: Lägler and Loba-Wakol Essential Systems Course, DenverAugust 21, 2020
  • Versatility and Team GreenAugust 18, 2020
  • Precision and Team GreenAugust 18, 2020
  • Durability and Team GreenAugust 18, 2020
  • Tradition and Team GreenAugust 18, 2020
  • The Versatility of LÄGLERAugust 12, 2020
  • The Precision of LÄGLERAugust 12, 2020
  • The Durability of LÄGLERAugust 12, 2020
  • The Tradition of LÄGLERAugust 11, 2020
  • October 19 – 23: Lägler and Loba-Wakol Essential Systems Course North CarolinaAugust 11, 2020

Tags

Abrasives Contractor Education Featured Item Fly-and-Sand How-To How-To Video How to sand a wood floor Lagler Sanding Manual Lägler Certification Training Lägler FLIP Lägler History Lägler HUMMEL Lägler Parts Lägler TRIO Machine Maintenance Marketing Premium Sanding Premium Sanding Technology PST Sanding Drums Social Media Subfloor Prep

Archive

  • August 2020
  • July 2020
  • July 2019
  • December 2017
  • November 2017
  • October 2017
  • September 2017
  • August 2017
  • July 2017
  • June 2017
  • May 2017
  • April 2017
  • March 2017
  • February 2017
  • January 2017
  • December 2016
  • November 2016
  • October 2016
  • September 2016
  • August 2016
  • July 2016
  • June 2016
  • May 2016

Maximize jobsite efficiency. Boost your bottom line.

Earn Lägler Certification

Signup to look, listen + learn through the

Lägler N.A. Newsletter

About Lägler North America

Lägler North America, a division of Palo Duro Hardwoods, is the North American distributor of machines and parts manufactured by Eugen Lägler GmbH in Germany. We are North America’s machine repair center, and offer Lägler’s one-day Premium Sanding Technology (PST®) certification course.

Latest News

Lägler N.A. Is Social May 11, 2016

Lägler North America is building a community via its social pages. Connect with us on Instagram, Facebook, and Twitter to see photos and videos, to learn trade tips, hear about opportunities and more.  

Stay Informed

Click to download the latest Lägler Direkt Newsletter

Download

Copyright © 2020 Lägler North America. All Rights Reserved.

  • Terms & Conditions
  • Shipping & Return Policies
  • Privacy Policy

Scroll to top