• Facebook
  • Instagram
  • Mail
  • Youtube
Call 1-800-8-HUMMEL
  • 0Shopping Cart
Lägler North America
  • Machines
    • SURFACE
      • HUMMEL
      • SUPERHUMMEL
    • FINE SANDING
      • TRIO
      • SINGLE
    • EDGE/STAIRS/CORNER
      • FLIP
      • ELAN
      • UNICO
  • Machine Parts
    • HUMMEL
    • SUPERHUMMEL
    • TRIO
    • FLIP
    • ELAN
    • SINGLE
    • UNICO
  • ABRASIVES
    • Buy Abrasives
  • Blog
  • PST®
  • Newsletter
    • Lägler Direkt Archive
    • Subscribe | Email Newsletter
  • Warranty
  • Contact
    • Become a Distributor
    • Info Request Form
    • Submit Photo | #LaglerOfTheDay
  • News & Events
  • Menu Menu
You are here: Home1 / Blog2 / Lägler FLIP

Tag Archive for: Lägler FLIP

How to Replace the Lägler FLIP® V-Belt

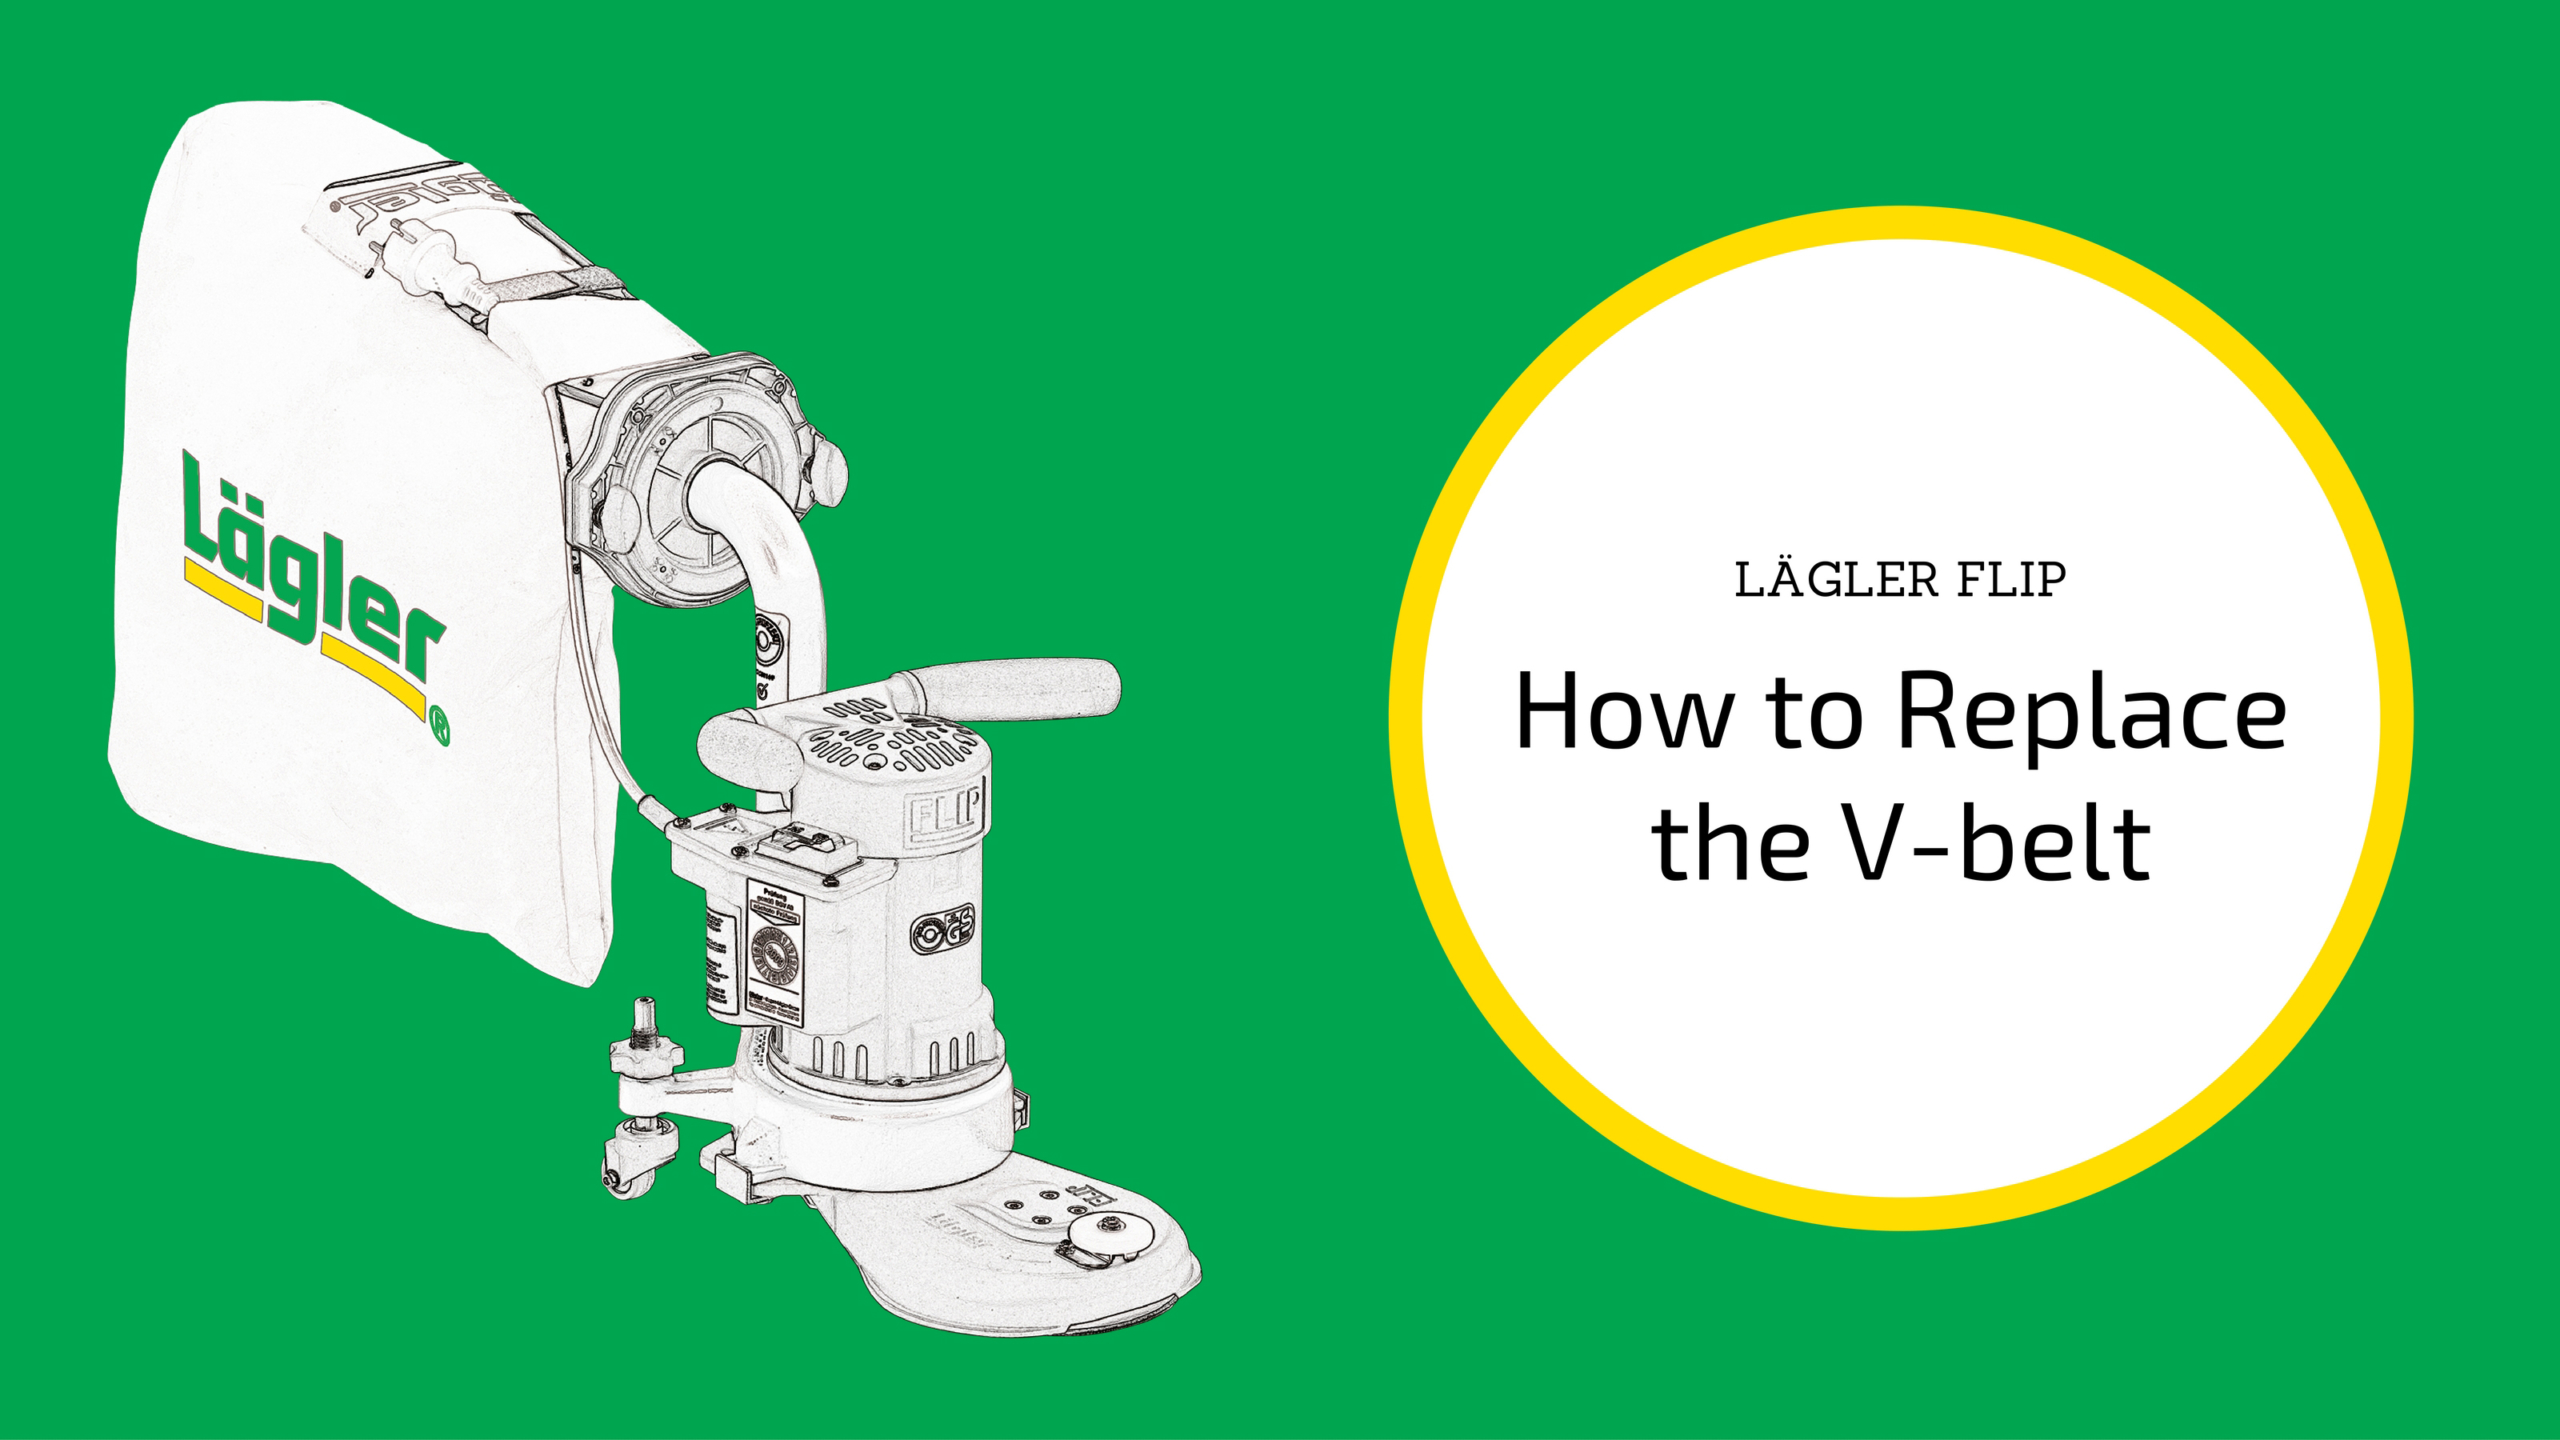
Have you noticed your Lägler FLIP® acting a bit different lately? Maybe you’re having a tough time starting it or the working speed has decreased.
Maybe it feels like it isn’t running as smoothly as usual or the noise has gotten louder. The FLIP might be losing its steam to suck dust. It’s maintenance
time.

All machines need a hug from time to time, and parts need to be replaced. It’s no different than routinely changing the oil on your truck. New oil, smooth
ride.

New V-belt, new edger.

Over time, residue accumulates in the pulleys and in the attachment. The issues mentioned above start happening and you know it’s time to take a look under
the hood and replace the V-belt. While you’re there, check whether the fan housing and blades to see if there is buildup there that needs to be dealt
with too.

The V-belt must be replaced, at the latest, when it cannot be retightened because the screws for connecting the attachment are at the end of the holes.

Special note: The V-belt should run without touching the ground of the pulley. The belt’s left and right edges should rest against the inner edges
of the pulley.

Step-by-step instructions for removing and installing the V-belt for the Lägler FLIP edger are listed below. They also are shown in the video above, using
the illustrations from the Lägler FLIP Operations Manual.

How to Remove the V-Belt on the Lägler FLIP

Assuming you’ve already turned off and unplugged the FLIP:

1. Lay the machine on its side or with the motor housing on a table. Avoid damages to the floor or table and the machine.

2. Undo the screw of the belt tightening plate (at the back of the attachment) with the universal spanner, the special T-grip driver (P1230 | 000.91.40.001) that comes with the purchase of a new FLIP.

How to Remove the Lagler FLIP V-Belt

3. Turn the belt tightening plate away from the attachment and re-tighten the screw of the belt tightening plate.

4. Use the universal spanner to remove the two screws that connect the attachment, along with the washers and the guide angles. Place these parts to the
side.

5. Remove the attachment from the machine and put down the attachment with the sanding disc facing upward.

How to Remove the Lagler FLIP V-Belt

6. Use the universal spanner to undo the fixing screws of the attachment cover and remove this from the attachment.

7. Turn the attachment over.

8. Use the universal spanner to undo the four fixing screws of the complete sanding disc.

9. Remove the attachment from the complete sanding disc.

How to Remove the Lagler FLIP V-Belt

10. Dispose of the worn-out V-belt.

11. Check whether the sanding plate pulley or the motor pulley are worn-out. Replace these parts if necessary. If one pulley appears to be worn out, then
both will be. Here are two signs of a worn out pulley:

  • The edges of the belt slip down into the groove of the pulley.
  • The pulley groove is polished from the belt running directly on it.

12. Clean the two pulleys and the attachment. Wear a respiratory protective mask if necessary.

How to Install the V-Belt on the Lägler FLIP

1. Place the new V-belt on the complete sanding plate pulley.

2. Insert the complete sanding plate with V-belt in the attachment. Ensure that the holes of the complete sanding plate are aligned with the holes in the
attachment.

How to Install the Lagler FLIP V-Belt

3. Make sure the sanding plate can be turned by hand and the V-belt is correctly placed in the attachment.

4. Turn the attachment over and tighten the four screws for attaching the complete sanding plate using the universal spanner.

5. Push the attachment over the motor pulley and insert the V-belt into the motor pulley.

6. Put on the attachment cover.

How to Install the Lagler FLIP V-Belt

7. Tighten the two screws for connecting the attachment, placing a washer and guide angle in the respective threads of the fan housing. Do not tighten the screws all the way yet.

Make sure the belt tightening plate is not located between the attachment and the fan housing. Otherwise, a significant amount of dust will escape
from this area during sanding.

8. Tighten the V-belt. (See the “How to Tighten the Lägler FLIP V-Belt” section below.)

After a few days’ use to break-in the new belt, check the belt tension. Tighten again as necessary.

How to Tighten the Lägler FLIP V-Belt

1. Lay the machine on its side or with the motor housing on a table. Avoid damages to the floor or table and the machine.

2. Use the universal spanner to loosen the two screws that connect the attachment to the fan housing.

3. Use the universal spanner to loosen the screw that attaches the belt tightening plate.

4. Hold the FLIP® by the fan housing and press the belt tightening plate forward toward the attachment at the same time with your thumb. Use
your other hand and the universal spanner to retighten the three screws.

Learn more about maintaining and getting the most out of your Lägler FLIP and
other Lägler sanding machines by subscribing to the Lägler North America monthly email newsletter,
and by following us on Instagram, Facebook and Twitter.

Related Blog Posts

How to Adjust Lägler FLIP Sanding Pressure

How to Replace Lägler FLIP Carbon Brushes

https://www.laglernorthamerica.com/wp-content/uploads/2020/02/FLIP-Change-V-Belt-scaled.jpg 1440 2560 webmaster https://www.laglernorthamerica.com/wp-content/uploads/2020/02/logo2-300x90.png webmaster2017-11-29 18:19:032020-02-29 18:26:10How to Replace the Lägler FLIP® V-Belt

How Best to Use the Lägler FLIP

It seems to be something like an open secret that the Lägler FLIP® is engineered for versatility. The information is out there, in Lägler’s “Sanding of Wooden Floors”
manual and in some pieces already on this blog.

But we know how it goes. We haven’t read many manuals either – not for connecting a new device, assembling the kid’s new Hot Wheels race track, or whatever.

So, we’re laying out the essentials here on how you can get the most out of the FLIP.

The edger uses a 6” (150 mm) disc. It can be used to cut
aggressively, finely or on a medium setting, all adjustable with the turn of the rollers.

Sanding attachments can be “flipped” to swap out lengths and diameters, from everyday edging to reaching under radiators and cabinets, to sliding into
tight spots like corners and between spindles.

Versatility.

3 Tips for Using the FLIP

1. Sand clockwise. The FLIP is designed for edge sanding clockwise around a room. The sanding disc rotates clockwise, cutting at the 12
o’clock position. The fiberglass cover of the FLIP’s attachments has a cutout directly over the sanding zone, optimizing its dust suction capability.
(What the super-short video of the FLIP being used to vacuum a pile of dust, and you’ll see what we mean.)

What happens if I sand in a counter-clockwise path around the room? Moving counter-clockwise around the edge of a room will not damage the FLIP.
It will give you a more aggressive cut as you move the edger against the clockwise rotation of the abrasive, which, of course, also means deeper scratches
you will need to work harder to remove later. It also will decrease dust collection, because the clockwise rotation and the suction are designed to
work optimally together.

Lägler FLIP® is engineered for versatility. Learn more in Lägler’s “Sanding of Wooden Floors”

2. Take it easy. Do not press down. The FLIP’s design takes ergonomics into account. It’s built to make edging a
bit easier on your body. If you press down or lean your weight onto the machine, it will decrease the sanding plate speed and give you uneven sanding,
including burn marks. It also will put unnecessary stress on the machine.

So, take it easy. It helps you, the machine and the floor.

3. Choose the right grit abrasives at the right time. If you just sanded the field of the room with your big machine
using a 40-grit belt, use 40 grit on your edger. If you just edged with 80 grit and you’re moving on to your single-disc or multi-disc sander, use
80 grit with that machine.

The last thing you want is for the homeowner to walk in and be able to see a band around the edge of the room where it doesn’t match with the field. Successful
floor sanding is one of those mysteries you get to keep to yourself and let them wonder how you made their floor look so awesome. If they can see how
the magic is made, it ain’t being made well.

Bonus Tip: The white wheel that is screwed onto the top of the short/standard and long FLIP attachments is your wall roller. Notice the
track it sits in allows you to set the position of the wheel. Just loosen the screw, adjust the wheel to let you closer or farther from the wall, tighten
the screw.

How to Use the FLIP Corner Attachment

Don’t let the name of the FLIP corner attachment fool you. It’s not just for corners.

In fact, when this attachment is at its most valuable to you probably is not in the corners. It’s sliding between spindles, around tight spots with radiators,
getting around pipes, and anywhere else a 6” disc isn’t the machine for the moment.

The corner attachment has a 2 3/8” (60 mm) diameter. And it rips fast, with RPMs cranking almost two and a half times as fast as the FLIP’s short and long
attachments you do most of your edging with.

3 Tips for Using the FLIP Corner Attachment

1. Sand counter-clockwise. Yeah, that’s opposite of what we are saying above when sanding with the short
and long attachments. But, in general, you’re quick-hitting small spots where you’re not going to be running along the wall, right? Not much room to
run between spindles. So, this is just a heads-up, letting you know how the attachment is designed to be used.

3 Tips for Using the Lägler FLIP® Corner Attachment | Lägler North America Blog

2. Use the flexible Velcro ring. Always. Sand with the donut between the abrasive and the sanding disc.

3. Use the finest grit possible. Like a boxer, you want to minimize your time in the corners, don’t you? And keep
the bonus tip in mind, too …

Bonus tip: The speed of rip of the corner attachment sanding disc heats up the abrasive pretty quickly. Tip #3 above spotlights fine grits,
which will reduce some of the need to change paper, but when it’s time for a new abrasive, be aware the heat can melt the abrasive to the donut.

How to Avoid the Paper and Flexible Ring Sticking Together

1. Take a water break. Set the FLIP aside for a brief cool down period before pulling the abrasive off the machine.

2. Tag team. Keep a second donut and abrasive ready to go. You can swap in the fresh set keep grinding while the first set is cooling
down.

All this information is in two of Lägler’s manuals: “Sanding of Wooden Floors” and “FLIP Operation, Maintenance, Safety.”

Both are available for free download at laegler.com.

It’s also part of Lägler’s Premium Sanding Technology (PST®) certification training.
You can schedule that for you and your crew with us in Denver, or make a European vacation of it by heading to England or Germany.

Related Blog Posts

How to Minimize Sanding Efforts + Maximize Business Profits

Big Machine Sanding Direction, Speed + Pressure

Abrasives: Cost vs Value of Quality

https://www.laglernorthamerica.com/wp-content/uploads/2020/02/HowUseFLIP-title.jpg 422 750 webmaster https://www.laglernorthamerica.com/wp-content/uploads/2020/02/logo2-300x90.png webmaster2017-08-29 03:52:142020-02-26 03:57:39How Best to Use the Lägler FLIP

The Most Popular, Most Helpful Lägler N.A. Content of 2016

We’re doing what people do at the end of one year, beginning of another. We look back at what we did well and what we can improve. We always want to keep
doing better.

That runs from machine designs and production at the factory in Germany to customer service, certification training and every way we connect with you pros
online here in North America.

We kicked off a new, mobile-friendly website in 2016. With it came a blog, and we started social media pages on Instagram, Facebook,
Twitter and YouTube. We started making videos and answering top questions you have about using and
maintaining Lägler machines.

Added up, you all spent about five work weeks of the year learning from the content on our blog. That’s a great start, and we aim to build on that in the
coming year.

Here’s a recap, highlighting the most popular how-to topics and just plain fun social media posts.

What is Lägler Premium Sanding Technology (PST) Certification Training?

TOP BLOG CONTENT

Lägler Certification: What is Lägler PST?

Our most viewed blog page. Like we say in that post, our training program is about two things:

1. Building relationships with contractors, letting them know we are the true resource about Lägler machines and we’re ready to help.

2. Helping contractors to maximize success with their sanding and finishing businesses.

In this post, we describe the Lägler process that gets you the most out of every floor while taking the least time on the job. Greatest efficiency for
the flattest floors. We tell what the one-day certification course costs and why we offer it at a financial loss to ourselves.

Nothing builds trust like truth and, of course, quality machines you can count on for many years. That’s what we bank on every day.

Read the full post, “Lägler Certification: What is Lägler PST?”

TOP HUMMEL® BLOG POSTS

Not surprisingly, HUMMEL blog posts are a favorite among all our topics. It’s the most popular Lägler machine in North America, and is used by many thousands
across the world.

How to Replace a Lägler HUMMEL Sanding Drum

This post tells the two most important things to know about the HUMMEL drum. It also includes step-by-step instructions.

The video in this post shows proof that the HUMMEL design maintains its nearly 50 years of original engineering while also taking on all the parts that
have been refined along those many years. New parts on, say, a 1983 machine? No problem. Maintain and roll on.

Read the full post, “How to Replace a Lägler HUMMEL Sanding Drum.”

Why You Should Sand Wood Floors at an Angle and Left to Right | Lägler North America Blog

Why You Should Sand Wood Floors at an Angle + Left to Right

We’ve refined our thinking on sanding at an angle. For example, we used to recommend cutting at an angle for the first pass, and then with the direction
of a straight-laid floor for finer grits.

Now, we recommend using at least a slight angle for each pass. It’s all about getting the flattest results.

We also explain why to sand left to right as you move across the field of a room, and why you should not sand right to left, if you want to achieve the
best results.

Read the full post, “Why You Should Sand Wood Floors at an Angle + Left to Right.”

4 Reasons Not to Use a Wire-Brush Drum with a Lägler HUMMEL

We know the wire-brushed look is especially cool with current trends in wood flooring. But we also know the reasons you don’t want to throw a wire-brush
drum on your HUMMEL for that job.

What did we say about truth above? Truth builds trust, and trust us when we say we are focused on quality floors and offering the best information we have
to you.

Read the full post, “4 Reasons Not to Use a Wire-Brush Drum with a Lägler HUMMEL.”

Do you have Lägler HUMMEL questions and helpful content ideas? Use the Contact link in the menu heading above to submit your suggestions.
We want to tackle all the information that will be helpful to you in the field with future blog and video posts.

TOP FLIP® BLOG POSTS

The FLIP edger finally is getting its due in North America. The machine was launched in 2001 in Germany, and now is becoming much more widely known and
used here. Search #LaglerFLIP on
Instagram to see photos and videos from some of the guys who are using it — and bragging about it — across the land.

How to Use the Lägler FLIP Corner Attachment | Lägler North America Blog

How to Use the Lägler FLIP Corner Attachment

How do you handle room corners, around pipes, and between railing balusters? You could scrape. You could use an orbital sander in some of those spots.
But the FLIP corner attachment is the high-speed tool that knocks it all out the cleanest and quickest.

The FLIP is sold with the short and corner attachments, and this blog post includes tips for using both.

Read the full post, “How to Use the FLIP Corner Attachment.”

How to Adjust Lägler FLIP Sanding Pressure

Like everything with Lägler machines, the engineers have lightened the pro’s load on the job. With the FLIP, don’t burn out your shoulders to add a touch
of pressure here or there. Just use as recommended.

This blog post gives step-by-step instructions for making sure the FLIP is cutting as expected. It tells how to set the pressure based on which attachment
you’re using, and in only of seconds of effort on the job.

The CAD drawings in this post also show what goes wrong when you’re edger is running on off-kilter settings like an old sea captain with an uneven peg
leg.

Read the full post, “How to Adjust FLIP Sanding Pressure.”

What Lägler FLIP questions and helpful content ideas do you have? Tell us, using the Contact link in the menu heading above. We want to
turn those questions into useful blog and video posts to help everyone #LearnMoreEarnMore.

TOP TRIO BLOG POSTS

What is a surefire way to know when a floor sanding guy doesn’t own a TRIO and hasn’t participated in Lägler’s Premium Sanding Technology (PST®)
certification training? He calls the machine a buffer and thinks it slows down the process.

For those who know better, we’re building our how-to TRIO content. For those who want to test-drive a TRIO and see why so many others swear by it, read,
“What is Lägler PST?”
and get in touch with us.

How the Lägler TRIO Sanding Disc Arrows Help You to Extend the Life of Your Abrasives | Lägler North America Blog

Lägler TRIO: Sanding Disc Arrows + Abrasives

Let’s veer off the path for a minute. Have you ever noticed on the gas gauge in your truck that arrow next to the little silhouette of the gas pump that
either points left or right? It’s a reminder, showing you on which side of the vehicle your gas tank is when you pull up to the pump at the gas station.

Well, the TRIO has a similar reminder on its three sanding discs. This blog post tells why the arrows cast in the plate are there and how that plays a
part in extending the life of your abrasives.

The post also talks hard plates and donuts. Getting hungry? Read the full post, “Lägler TRIO: Sanding Disc Arrows + Abrasives.”

How to Clean the Lägler TRIO Filter

What are the three things you need to know about cleaning the TRIO filter? What is the one thing you really shouldn’t ever do and, we’re willing to bet,
you or someone on your crew has done?

This post includes a super-short video and the three simple steps you should use to clean your filter in only seconds.

Read the full post, “How to Clean the Lägler TRIO Filter.”

How to Dismantle and Reassemble the Lägler TRIO Filter Unite | Lägler North America Blog

How to Dismantle + Reassemble the TRIO Filter Unit

Right off the top, this post tells three signals it’s time to get into your filter unit for some basic maintenance.

Don’t push the TRIO to the side, because you aren’t sure what’s wrong. And don’t use time and money to have someone else handle it. You’ve got this.

Step-by-step instructions in this post lay out exactly what you need to know. It’s also good to keep your manual handy. Read when in need.

Read the full blog post, “How to Dismantle + Reassemble the Lägler TRIO Filter Unit.”

What Lägler TRIO questions and blog/video ideas do you have? The Contact link in the menu heading above is your path to telling us. We
can turn your question – which likely is a common question many others have – into helpful blog content for everyone.

TOP VIDEO CONTENT

We started a YouTube channel this past year. It’s great for embedding videos in our blog posts. If you watch as much on YouTube as you do on TV, like your kids do, look us up and
subscribe.

But we also post our videos on Instagram and Facebook, where these videos (mostly how-to) add up many times more views. (If you aren’t promoting your business
on social media and want to learn, give these blog posts a look: “Social Media for Wood Flooring Pros”
and “Interview with a Contractor: Social Media Success.”)

So view our videos using whatever app you favor. Below is one of our most popular, “How to Replace a HUMMEL Sanding Drum.”

Follow Lägler North America Content

Follow our blog and more content through our monthly email newsletter and our Facebook, Instagram, Twitter and YouTube social media
pages.

Share your content suggestions using our contact page.

And make 2017 your biggest yet. We’ll be here.

https://www.laglernorthamerica.com/wp-content/uploads/2020/02/Content-Year-in-Review-scaled.jpg 1440 2560 webmaster https://www.laglernorthamerica.com/wp-content/uploads/2020/02/logo2-300x90.png webmaster2016-12-27 01:25:502020-02-29 01:35:30The Most Popular, Most Helpful Lägler N.A. Content of 2016

How to Use the Lägler FLIP Corner Attachment

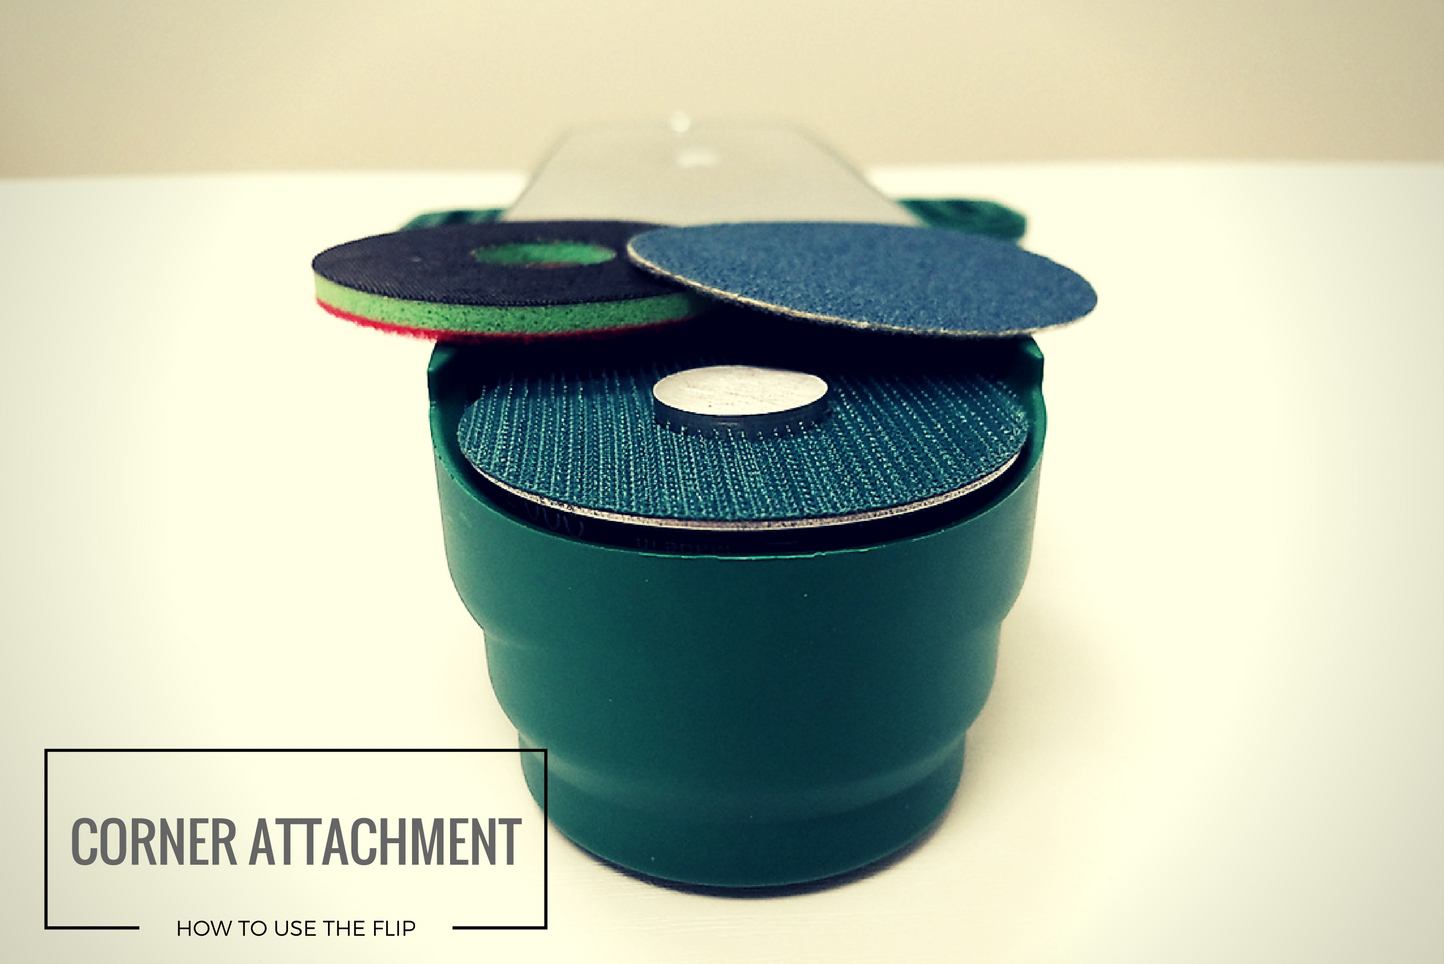
Flexibility of tools on the job stands out. And the Lägler FLIP, with its corner attachment, can be one of the difference-makers on the job site.

If you use a FLIP, you know the short attachment well, and maybe the long one. You run the FLIP clockwise with those, following the machine’s designed
rotation (arrow on top of the attachment reminds you the disc is turning to the right). With the short and long attachments, you can cover the edges
of rooms, get under cabinets and radiators, and handle stairs.

But how do you handle small or narrow spots, like around pipes, or between spindles/balusters of a railing on stairs, or the corners? Do you scrape? Sand
by hand?

The corner attachment is designed to help you knock out those tight spots with ease and speed. (Watch a quick video example of the FLIP being used between the spindles from Rende Flooring’s @callmetito on Instagram.)

In fact, with its smaller 2 3/8” (60 mm) sanding plate diameter, the FLIP’s rotation cranks at a speed that makes it even more aggressive than its larger
counterparts, making corners quick-hit work. The disc diameter for the short and long attachments is more than
double the size at almost 6″ (150 mm). The RPM when using the corner attachment is 9,300 compared to 3,720 RPM when using the short or long attachments.

Because of that, this is the number one tip for using the FLIP corner attachment to take away from this blog post: Sand counter-clockwise.

That will help you to control the hyper-aggression that naturally comes with a smaller disc’s rotation speed, and reduce the heat that speed and increased
friction cause.

But there is more we recommend you keep in mind.

3 More Things to Know When Using the FLIP Corner Attachment

> Set the FLIP’s wheels at the same position as when using the short attachment

> Use a flexible foam hook-and-loop donut between the sanding plate and the abrasive

> Use the finest grit the situation allows

When changing the abrasive, if the disc and donut on the machine are hot after use, let them cool before pulling the abrasive off the donut. Otherwise,
pulling on the abrasive can lead to the foam donut separating and needing to be replaced.

Bonus tip: Have a spare donut setup with the next grit you need ready to go. That way, you can pull the used abrasive and donut off the
sanding plate as one piece, and set it to the side to cool before removing the disc from the donut. With your new abrasive disc already set to go on
your second donut, you’re ready to put it on the corner attachment and keep on moving.

Related FLIP Parts

Corner Attachment, Complete: P1253 from
Lägler North America; 335.01.00.100 (Global manufacturer number)

“Foam Donut”/Flexible Velcro Ring, Corner: P1262;
335.02.13.105

Abrasives for FLIP Corner Attachment: CFLIP40,
CFLIP60, CFLIP80,
CFLIP100

Related Blog Posts

How to Adjust Lägler FLIP Sanding Pressure

How to Replace Lägler FLIP Carbon Brushes

How to Remove the Lägler HUMMEL Motor

https://www.laglernorthamerica.com/wp-content/uploads/2020/02/FLIP-CornerAttachment-HED.jpg 964 1444 webmaster https://www.laglernorthamerica.com/wp-content/uploads/2020/02/logo2-300x90.png webmaster2016-10-05 18:46:332020-02-29 18:48:35How to Use the Lägler FLIP Corner Attachment

How to Adjust Lägler FLIP Sanding Pressure

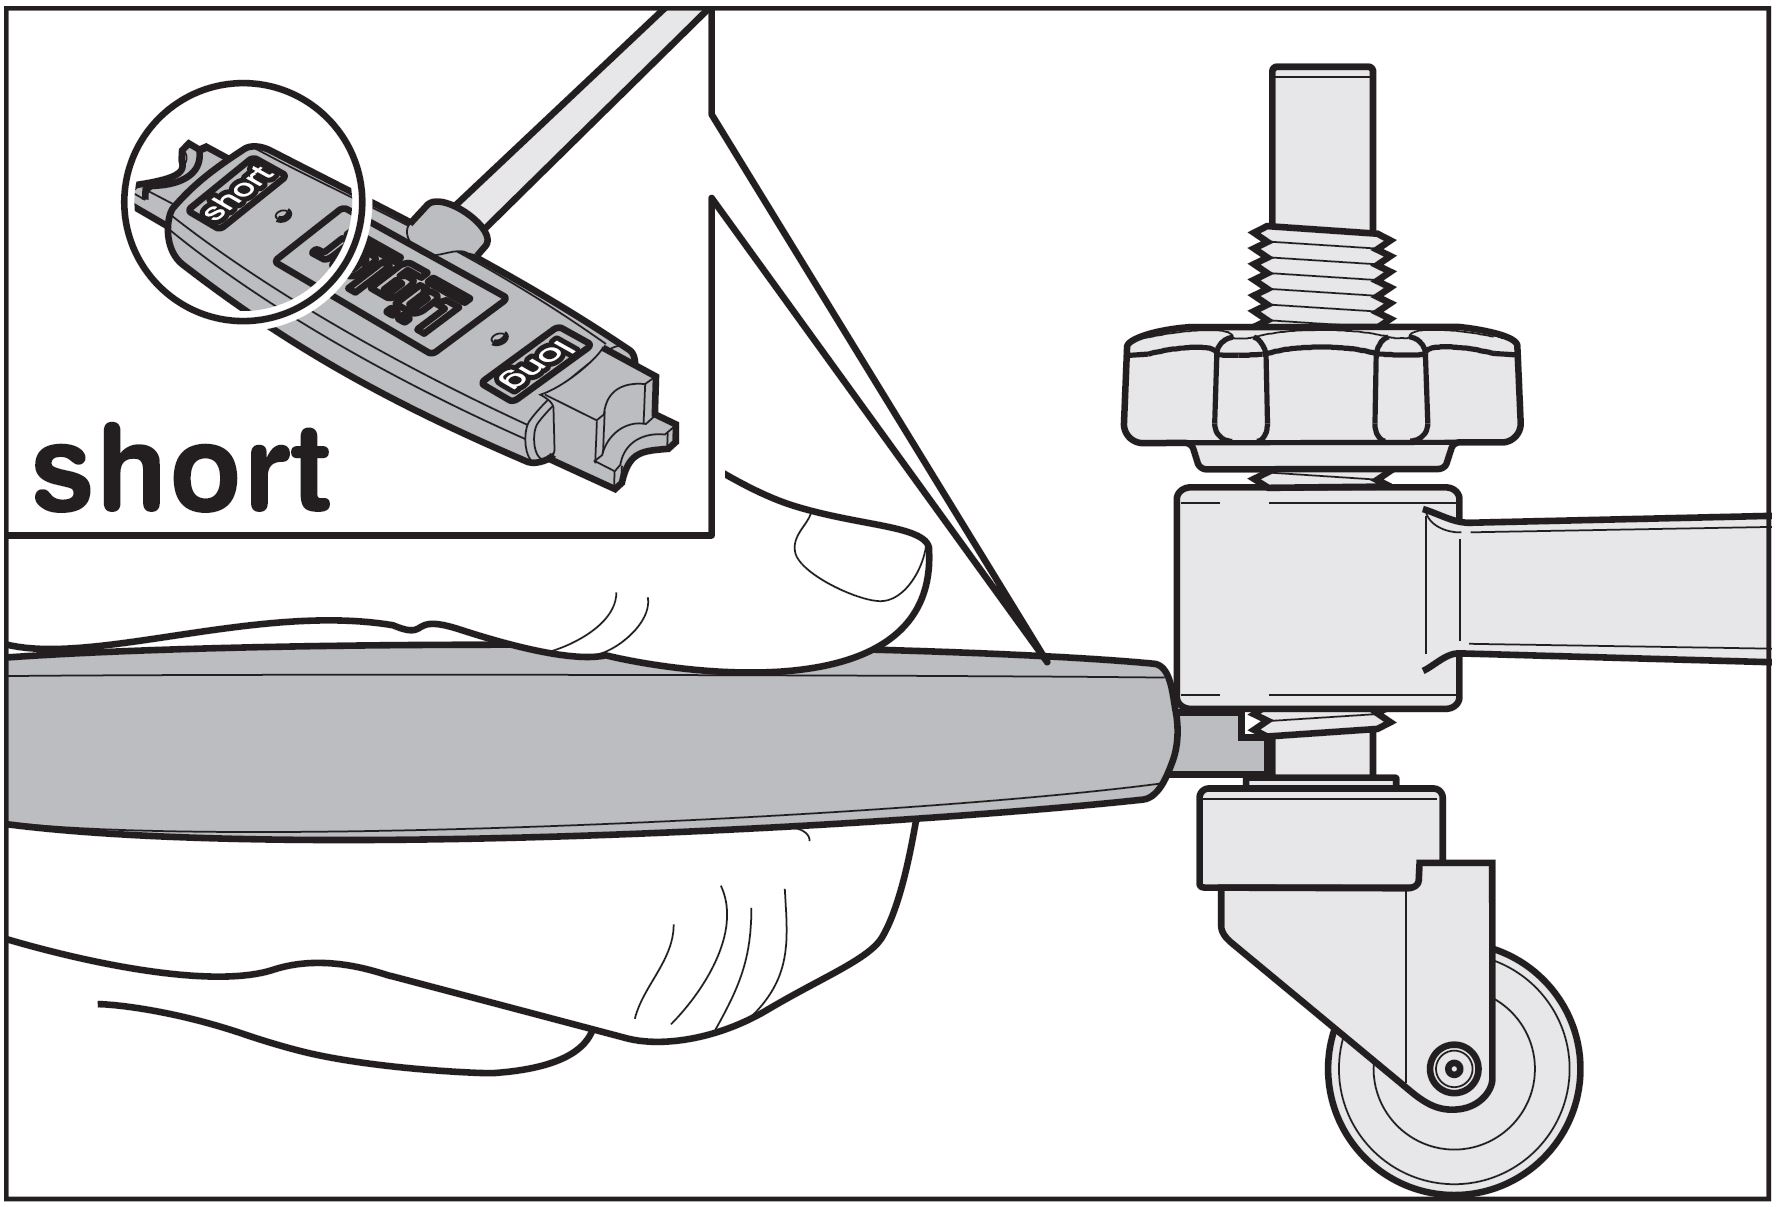
Adjust the Lägler FLIP Wheel Settings to Change Aggressiveness

Did you know you can adjust the aggressiveness of the Lägler FLIP?

It’s not about the pressure you apply. It doesn’t take any more effort on your part.

For rougher or finer sanding with the FLIP, you only need to take a quick minute to adjust the angle of the machine, using the two wheel posts (See “Adjusting
the Guide Rollers” section in the operation manual). You do that with the universal spanner, the T-shaped screwdriver that accompanies a purchase of
a new FLIP.

The black spanner handle is marked with “short” on one end and “long” on the other. Short and long refer to the short and long FLIP attachments. Use the
appropriate end of the spanner handle to apply the standard wheel setting for whichever FLIP attachment you are using. For the corner attachment, use
the short spanner.

It’s important to use the same setting for both wheels. Otherwise, the FLIP will sit unevenly on the floor, and it will cut unevenly.

How to Set the Standard FLIP Wheel Position

With the FLIP turned off and unplugged, follow these easy steps to make sure you are sanding evenly and with the least amount of physical effort:

  1. Loosen the black locknut by hand or by using the universal spanner.
  2. Use the appropriate setting (short or long) to measure the space between the guide roller/wheel and the yellow arm of the FLIP’s fan housing, while
    unscrewing the roller to adjust height.
  3. Retighten the locknut.
  4. Repeat the above steps to set the second guide roller position.

If your settings are even, the sanding area will appear centered in front of the FLIP. Uneven guide roller settings will produce sanding that is off-center
to the left or right, to whichever wheel is set lower.

Adjusting for Fine vs. Rough Sanding

For finer sanding with the FLIP, close the gap between the wheel and the fan housing arm. To increase aggressiveness, increase the space between the wheel
and the fan housing arm.

Another way to look at it is that the higher the locknut is set when tightened, the rougher the FLIP is set to cut. The lower the locknut is set when tightened,
the finer the FLIP is set to sand.

Learn more about using the Lägler FLIP and other Lägler sanding machines.
Become Lägler certified through our Premium Sanding Technology (PST®) training.

Related FLIP Parts

Guide Roller: LNA# P626 | Mfr# 100.45.01.105

Universal Spanner: P1230 | 000.91.40.001

https://www.laglernorthamerica.com/wp-content/uploads/2020/02/FLIPadjustwheel1.JPG 1207 1777 webmaster https://www.laglernorthamerica.com/wp-content/uploads/2020/02/logo2-300x90.png webmaster2016-07-27 18:59:292020-02-29 19:02:43How to Adjust Lägler FLIP Sanding Pressure

Recent Posts

  • NWFA Wood Talk Podcast – A Conversation with Russ Watts of Lägler North AmericaJune 30, 2022
  • July 26-28, 2022: Hosting the NWFA Intermediate Installation + CP TestingJanuary 4, 2022
  • CLASS FULL: August 23-25, 2022: Wadesboro Lägler + Loba Wakol Prep, Sand, & Finish CourseJanuary 4, 2022
  • September 20-22, 2022: Bowling Green Hands-On Training with Basic CoatingsJanuary 4, 2022
  • October 20-21, 2022: Denver Two-Day Basic Sand & Finish with Basic CoatingsJanuary 4, 2022
  • October 24-28, 2022: Denver Lägler Sanding + Berger-Seidle Advanced CourseJanuary 4, 2022
  • November 8-10, 2022: Hosting the NWFA- Intermediate Sand & Finish + CP TestingJanuary 4, 2022
  • November 15-17, 2022: Bowling Green Hands-On Training with Basic CoatingsJanuary 4, 2022
  • December 14-16, 2022: Denver Lägler + Loba Wakol Prep, Sand, & Finish CourseJanuary 4, 2022
  • LNA VP Marc Schulz Featured on NWFA’s “Wood Talk” PodcastMay 14, 2021

Tags

Abrasives Contractor Education Featured Item Fly-and-Sand How-To How-To Video How to sand a wood floor Lagler Sanding Manual Lägler Certification Training Lägler FLIP Lägler History Lägler HUMMEL Lägler Parts Lägler TRIO Machine Maintenance Marketing Premium Sanding Premium Sanding Technology PST Sanding Drums Social Media Subfloor Prep

Archive

  • June 2022
  • January 2022
  • May 2021
  • August 2020
  • July 2019
  • December 2017
  • November 2017
  • October 2017
  • September 2017
  • August 2017
  • July 2017
  • June 2017
  • May 2017
  • April 2017
  • March 2017
  • February 2017
  • January 2017
  • December 2016
  • November 2016
  • October 2016
  • September 2016
  • August 2016
  • July 2016
  • June 2016
  • May 2016

Maximize jobsite efficiency. Boost your bottom line.

Earn Lägler Certification

Signup to look, listen + learn through the

Lägler N.A. Newsletter

About Lägler North America

Lägler North America, a division of Palo Duro Hardwoods, is the North American distributor of machines and parts manufactured by Eugen Lägler GmbH in Germany. We are North America’s machine repair center, and offer Lägler’s one-day Premium Sanding Technology (PST®) certification course.

Latest News

Lägler N.A. Is Social May 11, 2016

Lägler North America is building a community via its social pages. Connect with us on Instagram, Facebook, and Twitter to see photos and videos, to learn trade tips, hear about opportunities and more.  

Stay Informed

Click to download the latest Lägler Direkt Newsletter

Download

Copyright © 2020 Lägler North America. All Rights Reserved.

  • Terms & Conditions
  • Shipping & Return Policies
  • Privacy Policy

Scroll to top