• Facebook
  • Instagram
  • Mail
  • Youtube
Call 1-800-8-HUMMEL
  • 0Shopping Cart
Lägler North America
  • Machines
    • SURFACE
      • HUMMEL
      • SUPERHUMMEL
    • FINE SANDING
      • TRIO
      • SINGLE
    • EDGE/STAIRS/CORNER
      • FLIP
      • ELAN
      • UNICO
  • Machine Parts
    • HUMMEL
    • SUPERHUMMEL
    • TRIO
    • FLIP
    • ELAN
    • SINGLE
    • UNICO
  • ABRASIVES
    • Buy Abrasives
  • Blog
  • PST®
  • Newsletter
    • Lägler Direkt Archive
    • Subscribe | Email Newsletter
  • Warranty
  • Contact
    • Info Request Form
    • Submit Photo | #LaglerOfTheDay
  • News & Events
  • Fly & Sand 2021
  • Menu Menu
You are here: Home1 / Blog2 / Lägler TRIO

Posts

How to Use a Lägler TRIO

September 26, 2017/in Lägler /by webmaster

Those who don’t know call the Lägler TRIO a buffer. Only those who don’t know.

The way to feel what’s what is to get your hands on the TRIO and do some work – and to make sure you’re using it the right way.

That comes with getting some practice laps at the source: Lägler’s Premium Sanding Technology (PST®) certification training.

Next best? Read what’s below. It’s based on Lägler’s “Sanding of Wooden Floors” manual (download free PDF).

How Best to Use the Lägler TRIO

The TRIO is designed with two functional advantages:

  • Produce a flatter surface than a belt sander when using the same grit abrasives
  • Sand in any direction, from wall to wall

Fine sanding using the TRIO generally begins with hook-and-loop sanding discs starting at 60 grit. You can sand with the TRIO up to 150 grit, depending
on the wood species and the subsequent surface treatment.

If you want to take it one step further, use sanding screens after the final sanding step. Use screens at the same grit as the sanding disc used in the
final sanding step.

One difference between the TRIO, the industry’s original multidisc sander, and a buffer is it packs the power for pre-sanding, too. You can use 40 grit
to smooth out minor over- and under-wood.

Sand with a Lagler TRIO in Any Direction

Fine Sanding with the Lägler TRIO

To create high-quality surfaces when using the TRIO for fine sanding:

  • Do not skip more than one grit number when pre-sanding with a belt sander
  • Do not skip any grit numbers when fine sanding with the TRIO

If you want less aggressive cutting with the TRIO:

  • Remove the additional weight
  • Attach two flexible Velcro rings to each sanding plate

These methods especially give you an advantage when sanding uneven engineered flooring, helping to prevent the top layer from being sanded through.

To increase sanding abrasion with the TRIO:

  • Remove the Velcro rings from the TRIO sanding plates
  • Decrease walking speed while sanding

Warning: Excessively slow walking speeds or continuous sanding in the same spot creates too much heat. That can cause burn marks on the wood flooring and
clogging of the abrasive. If a spot requires extra sanding, make sure to repeat sanding at appropriate time intervals.

The wood species and the surface treatment to be carried out after the fine sanding determines the grit number of the final sanding step.

Intermediate Finish Sanding with the Lägler TRIO

The TRIO can be used for intermediate finish sanding with sanding screens.

The application of a used sanding screen and the removal of the additional weight is recommended to reduce the risk of sanding through the finish layer
during intermediate finish sanding.

Sanding pads also can be used on the TRIO for the intermediate finish layer.

When sanding cork:

  • Never sand with abrasives coarser than 60 grit
  • Always remove the additional weight from the TRIO
  • Sand without the flexible Velcro ring on the sanding plates

Check surface quality and perform additional sanding steps depending on the result.

Last note: Clean the filter cartridge regularly.

Adding the TRIO to your roster of equipment is a next-level play. It’s for craftsmen who raise the bar for quality and give themselves the opportunity
to command a next-level place in their market.

We know it takes real commitment to the investment. We welcome you and your crew to join us for a one-day Lägler PST training class. Test drive the TRIO
and get started the right way.

Related Blog Posts

How to Minimize Sanding Efforts + Maximize Business Profits

Big Machine Sanding Direction, Speed + Pressure

Abrasives: Cost vs Value of Quality

https://www.laglernorthamerica.com/wp-content/uploads/2020/02/HowUseTRIO-title.jpg 422 750 webmaster https://www.laglernorthamerica.com/wp-content/uploads/2020/02/logo2-300x90.png webmaster2017-09-26 01:00:322020-02-26 01:03:48How to Use a Lägler TRIO

The Showdown: TRIO vs. Multi-Disc Attachments

February 28, 2017/in Lägler /by webmaster

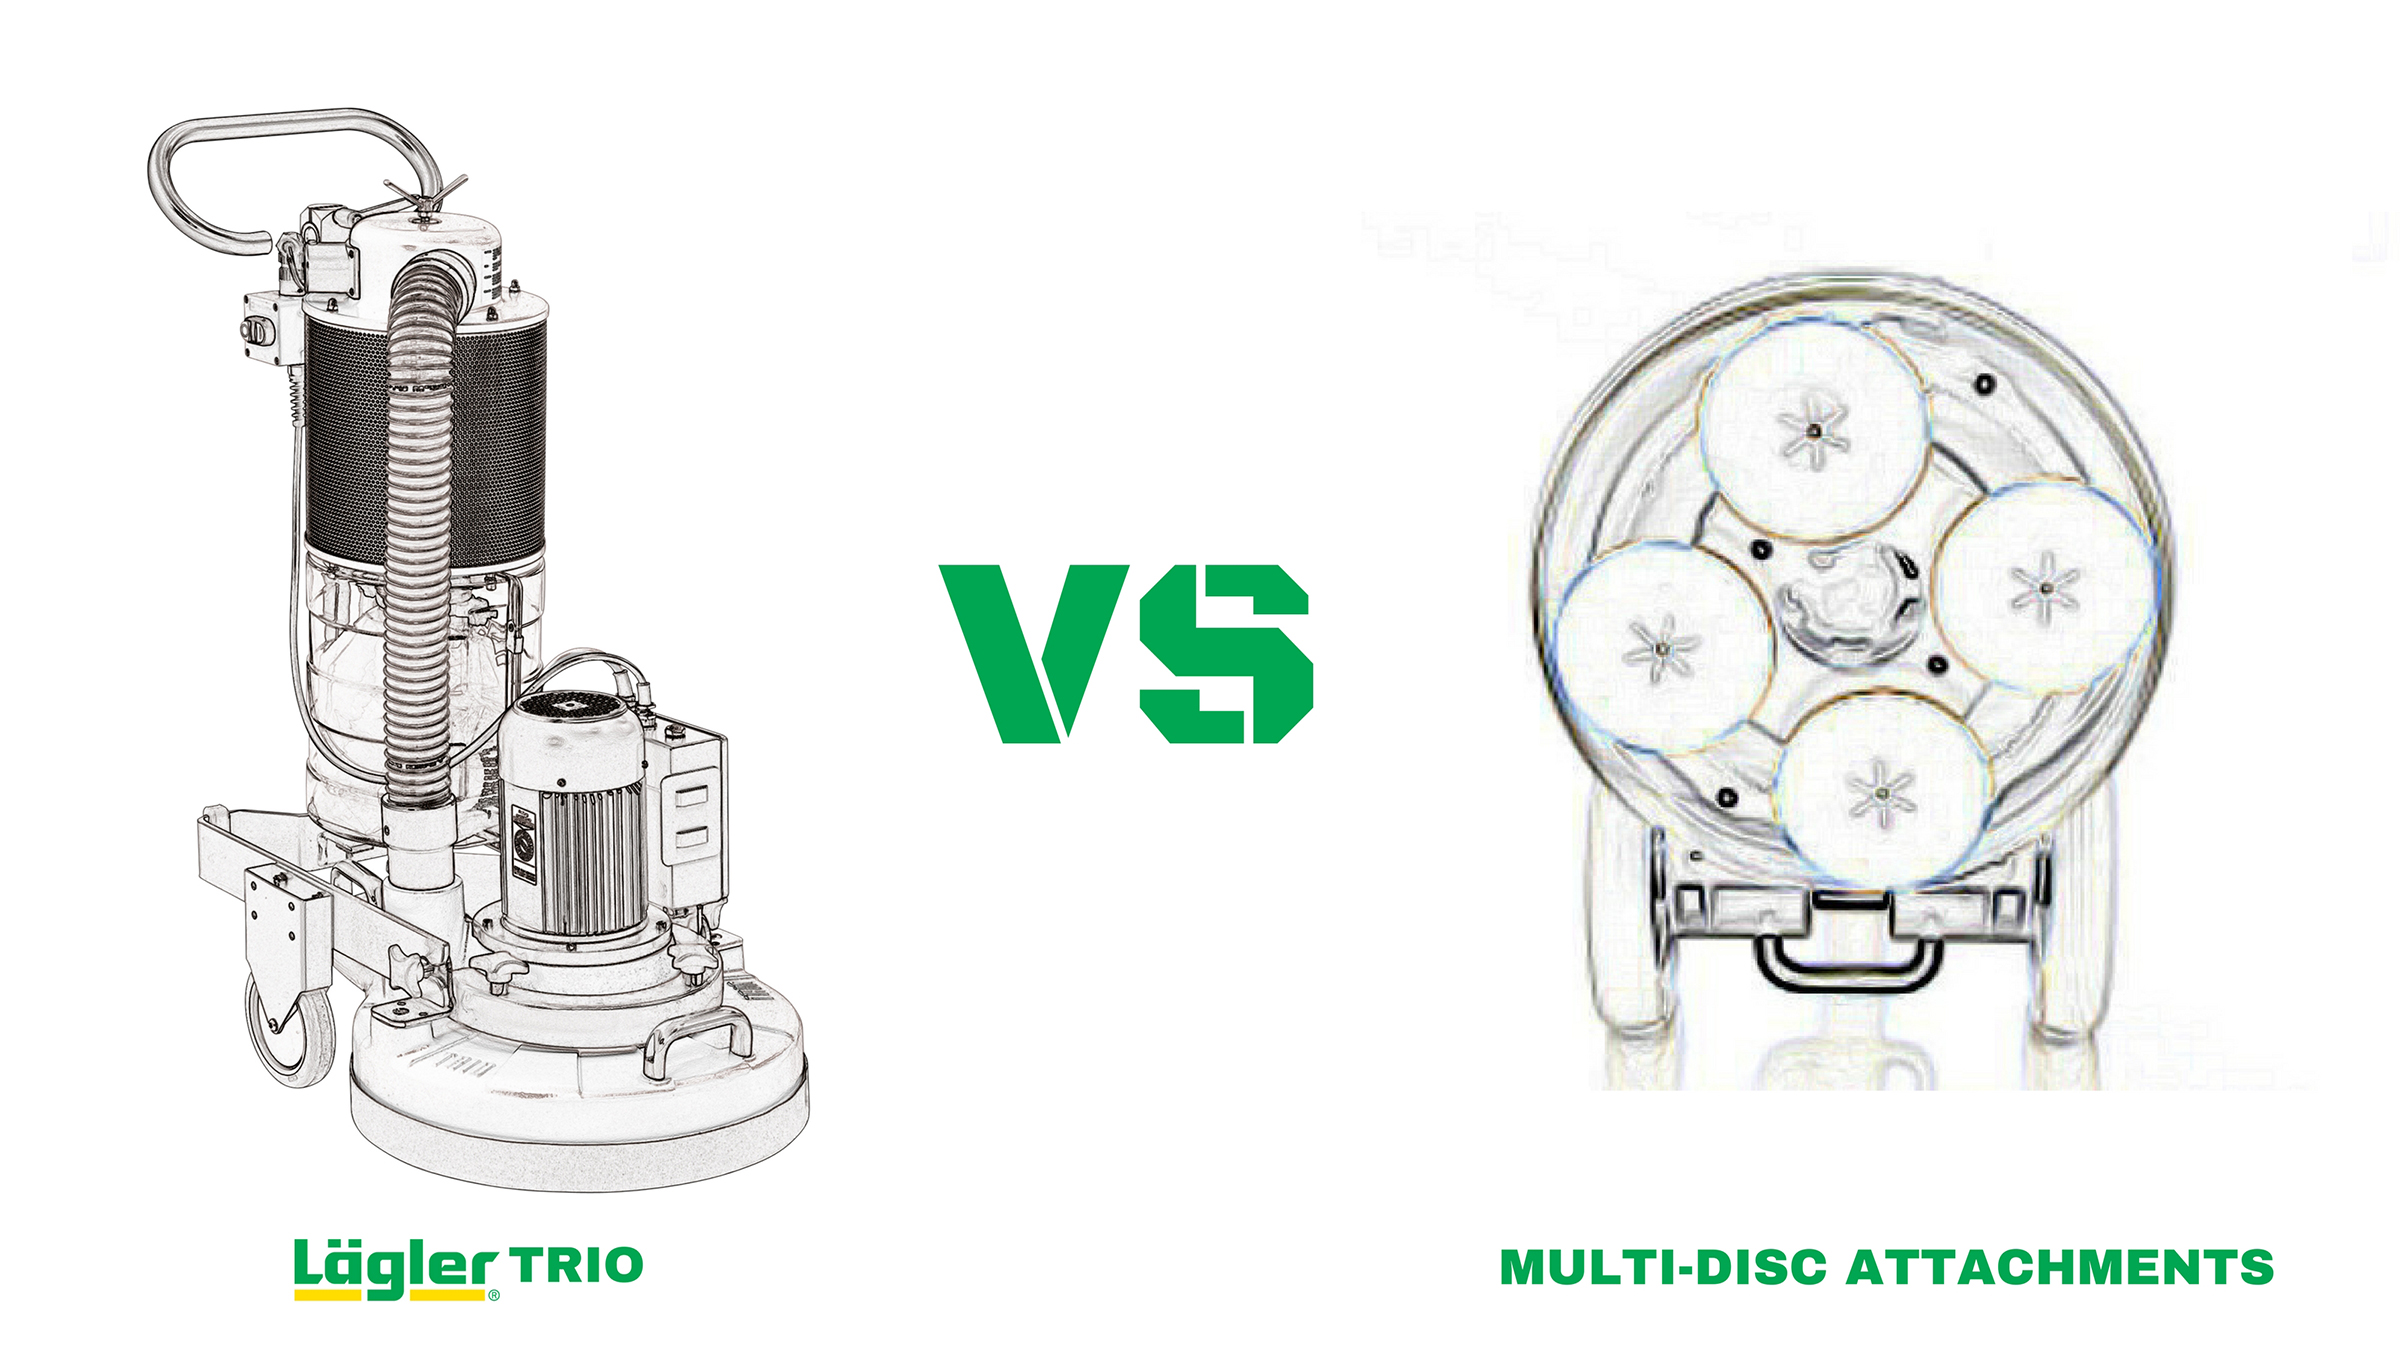
Lägler engineers took on a special “Coke vs. Pepsi” kind of project in 2015. They spent more than eight months testing to see if the TRIO really held its
own against competitors’ multi-disc attachments, and then analyzing their test results.

After all, it’s useless to hide from truth and blindly follow bias for the company, especially if there’s no substance to it. You’d know the difference
just like we would.

Obviously, the engineers had expected their designs – and massive investment in the machine since it was invented and put out on the market in 1993 – to
be everything they’d planned. But since the TRIO entered the market as a one-of-a-kind fine sanding machine, competitors have come out with their own
ideas to counter the TRIO, all options that are more affordable to make and for contractors to buy.

Affordable is good. Lägler’s take is that investing in quality is better – and more affordable in the long run.

Competition is good, too. It pushes our games higher, right?

So, Lägler’s engineers setup their lab experiment to learn for themselves the truth about the TRIO and its competition. They used Lägler’s training facilities
and put each of the machines through the same precise test, using Lägler’s Premium Sanding Technology (PST®) hands-on certification process.

Lägler GmbH in Germany

Lägler GmbH factory and PST training facilities in Germany

Why Conduct Multi-Disc Sanding Test?

The trend in wood flooring in recent years has been to achieve a natural surface appearance. Also, the demand for ever-higher surface quality is in
part due to design trends that open up living spaces, use larger windows and improve overall lighting.

People are seeing their wood floors, and appreciating them in ways they often didn’t before. They are choosing to have wood floors as a key
design element in their homes with expectations their floors are something to be showed off.

The TRIO was designed for this fine sanding need.

Single-disc machines are not designed or intended for fine sanding, not even Lägler’s SINGLE.
To achieve perfect surface quality a significantly longer amount of time is required, if using a single-disc sander. Due to the large sanding disc,
the pressure and abrasion are much less.

Manufacturers of single-disc machines recognized these problems. Several of them started offering multi-disc plates as an optional attachment.

Test Drive a TRIO at Lägler PST Certification Training

Comparison of Multi-Disc Concepts

Lägler set up a real-world job site to test the differences between its TRIO, a dedicated multi-disc sander, and two single-disc machines converted
for multi-disc sanding with attachments. Each was made by a different manufacturer. The engineers compared the three machines using Lägler’s PST® method on a 108-square-foot floor (10 m²) at Lägler.

The two single-disc machines in this test (Machines A + B) were equipped with four-disc attachments, in which the individual inflexible mounted sanding
discs were driven by an outer gear ring. The time required for each sanding step was recorded.

The individual times in the image below show Machines A and B needed more time than the TRIO, especially when fine sanding. With Machine A, in particular,
time added up, in part, because it was necessary to sand some areas twice to remove visible scratches from the first attempt.

TRIO vs Multi-Disc Attachments Sanding Times

The key difference-maker – and, frankly, part of the reason why the TRIO was designed the way it was nearly 25 years ago – is the TRIO’s independently
flexible sanding plates. Each of the TRIO’s three discs adjusts to the floor independently, maintaining contact with the surface and sanding uneven
spots to be flat.

The inflexible suspended discs of the four-disc sanding attachments did not adjust themselves to the floor, allowing for uneven surfaces to either
remain uneven or call for additional cuts.

Overall, looking at the chart above, the TRIO achieves a time savings of approximately 25 percent compared to Machine A and about 18 percent compared
to Machine B. The TRIO also produced the flattest floor, due to its flexibility.

Measuring + Comparing Abrasion

To determine the amount of material removed, the wood dust from each sanding machine was weighed after each sanding step. The area used for this test
was 388 square feet (36 m²) of oak mosaic flooring at Lägler.

For the TRIO, the plastic dust bag was removed from the machine’s integrated dust containment cylinder and weighed. For the multi-disc machines, separate
containment systems were needed and the dust was removed from the vacuum bags to be weighed.

The chart below shows the size of abrasives for each machine, the types of machines and disc suspension, and the wattage for each. The image also compares
the machines’ levels of success across the wide range of grits: 40-60-80-100-120. The results of how much material was removed from the floor highlights
the sanding pressure and capabilities of each machine.

TRIO vs Multi-Disc Attachments Sanding Grits

Comparing Abrasives

When comparing the success of sanding, testing the sanding machines is only one part. The machine is important for the surface finish, while the abrasive
material determines the actual removal rate.

To compare Lägler’s zirconium-based abrasives against another manufacturer’s zircon-mix abrasives, the Lägler engineers took the TRIO out of this part
of the test. Only the two converted single-disc machines were used. The test area again was 388 square feet (36 m²) of oak mosaic flooring.

The abrasives with the higher zirconium content removed up to 20 percent more material than the zircon mix, depending on the grit and machine used.

Comparing Abrasives: TRIO vs Multi-Disc Attachments

Truth in Testing

The truth is what it is. Luckily, for Lägler, no bias is needed to appreciate that truth. Sure, had the results not come out so favorable for the TRIO,
talking publicly about it wouldn’t be the point just yet. Instead, the focus would have been on improving the machine to make sure it gives sand-and-finish
pros the long-lasting quality they need.

The real point for Lägler, as always, is to produce the best quality floor sanding machines on the planet.

Learn More, Earn More

Learn more about the Lägler TRIO and get hands-on experience
in PST certification training.

Plan for one day of PST in Denver (or the U.K. or Germany), and take an extra day for yourself to go skiing, fishing, brewery hopping, or whatever.

Read up – “What Is Lägler PST?”
– and book your class.

Other ways to keep up are:

  • Lägler N.A.’s blog
  • Lägler N.A.’s monthly email newsletter
  • Lägler N.A.’s Instagram, Facebook and YouTube pages
  • Lägler GmbH’s sanding techniques manual, available online in several languages 


https://www.laglernorthamerica.com/wp-content/uploads/2020/02/TRIO-vs-Multi-Disc-Attachments.jpg 1350 2400 webmaster https://www.laglernorthamerica.com/wp-content/uploads/2020/02/logo2-300x90.png webmaster2017-02-28 01:04:092020-02-29 01:10:18The Showdown: TRIO vs. Multi-Disc Attachments

How to Mount the Lägler TRIO V-Belt

February 14, 2017/in Lägler /by webmaster

How to Mount the Lägler TRIO V-Belt

In our previous blog post, we gave step-by-step instructions for removing the Lägler TRIO V-belt.
Here are the steps for putting a new V-belt on the TRIO.

First, if your TRIO was manufactured in 1994 or earlier, you will need to keep in mind these two notes:

1. Before placing the motor, make sure the tooth belt tensioner has not fallen out of its guides.

2. The tooth belt tensioner cannot be installed with the motor in place.

Step-by-Step Instructions: How to Mount the TRIO V-Belt

1. Loop the new V-belt around the motor pulley.

2. With the new V-belt in place, lower the motor vertically onto the machine housing. Make sure the V-belt does not slide off the motor pulley and get
jammed between the motor and the machine housing. The belt must be passed through the two recesses on the machine housing.

3. Attach the motor to the machine housing by using the four fixing screws.

Mounting Lägler TRIO V-belt

4. Use the wrench to push the tensioner back against the spring, and place the V-belt into the pulleys of the ventilator and tensioner. When the V-belt
has been inserted, you can release the tensioner into its regular position.

Mounting the Lägler TRIO V-belt

5. Insert the V-belt guard into the slot at the motor and push it toward the motor.

6. Insert the fixing screw for the V-belt guard and tighten it again.

7. Reassemble the machine:

a. Roll the chassis into the attachment position and tighten the two fasteners.

b. Remove the on/off switch from the motor switch box and hook it into the holder on the chassis.

c. Insert the cable plug of the sensor into the on/off switch. Make sure the nose of the cable plug is inserted into the groove of the socket. Lock this
connection by turning the ring nut clockwise. Note: The machine will not start if the cable plug of the sensor is disconnected.

d. Mount the suction hose to the neck of the upper part of the separator.

Mounting Lägler TRIO V-belt

8. While holding onto the handle, tilt the machine backward to a horizontal position. Make sure the machine rests on the guide tube and two protective
rubber pads in a stable position on a flat surface.

9. Mount the tooth belt (Instructions: “How to Change the Tooth Belt”).

That’s it. Sand on.

Learn More, Earn More

To learn more about Lägler #MaintenanceMatters and keeping your machines ready to rock, subscribe to the Lägler North America newsletter and join us on Instagram, Facebook, Twitter and YouTube.

Also, we teach some basics of maintenance in our one-day training and certification course here in Denver: Lägler Premium Sanding Technology (PST®).
Pick a day that works for you and/or your crew to do the training. Get it on the books by calling us at 800-8-HUMMEL (800-848-6635) or emailing [email protected]

Related Web Pages

Lägler TRIO Parts Catalog

How to Change the TRIO Tooth Belt

How to Extend the Life of Abrasives on the TRIO

https://www.laglernorthamerica.com/wp-content/uploads/2020/02/TRIORemoveV-Belt-scaled.jpg 1440 2560 webmaster https://www.laglernorthamerica.com/wp-content/uploads/2020/02/logo2-300x90.png webmaster2017-02-14 01:10:362020-02-29 01:14:15How to Mount the Lägler TRIO V-Belt

How to Remove the Lägler TRIO V-Belt

January 31, 2017/in Lägler /by webmaster

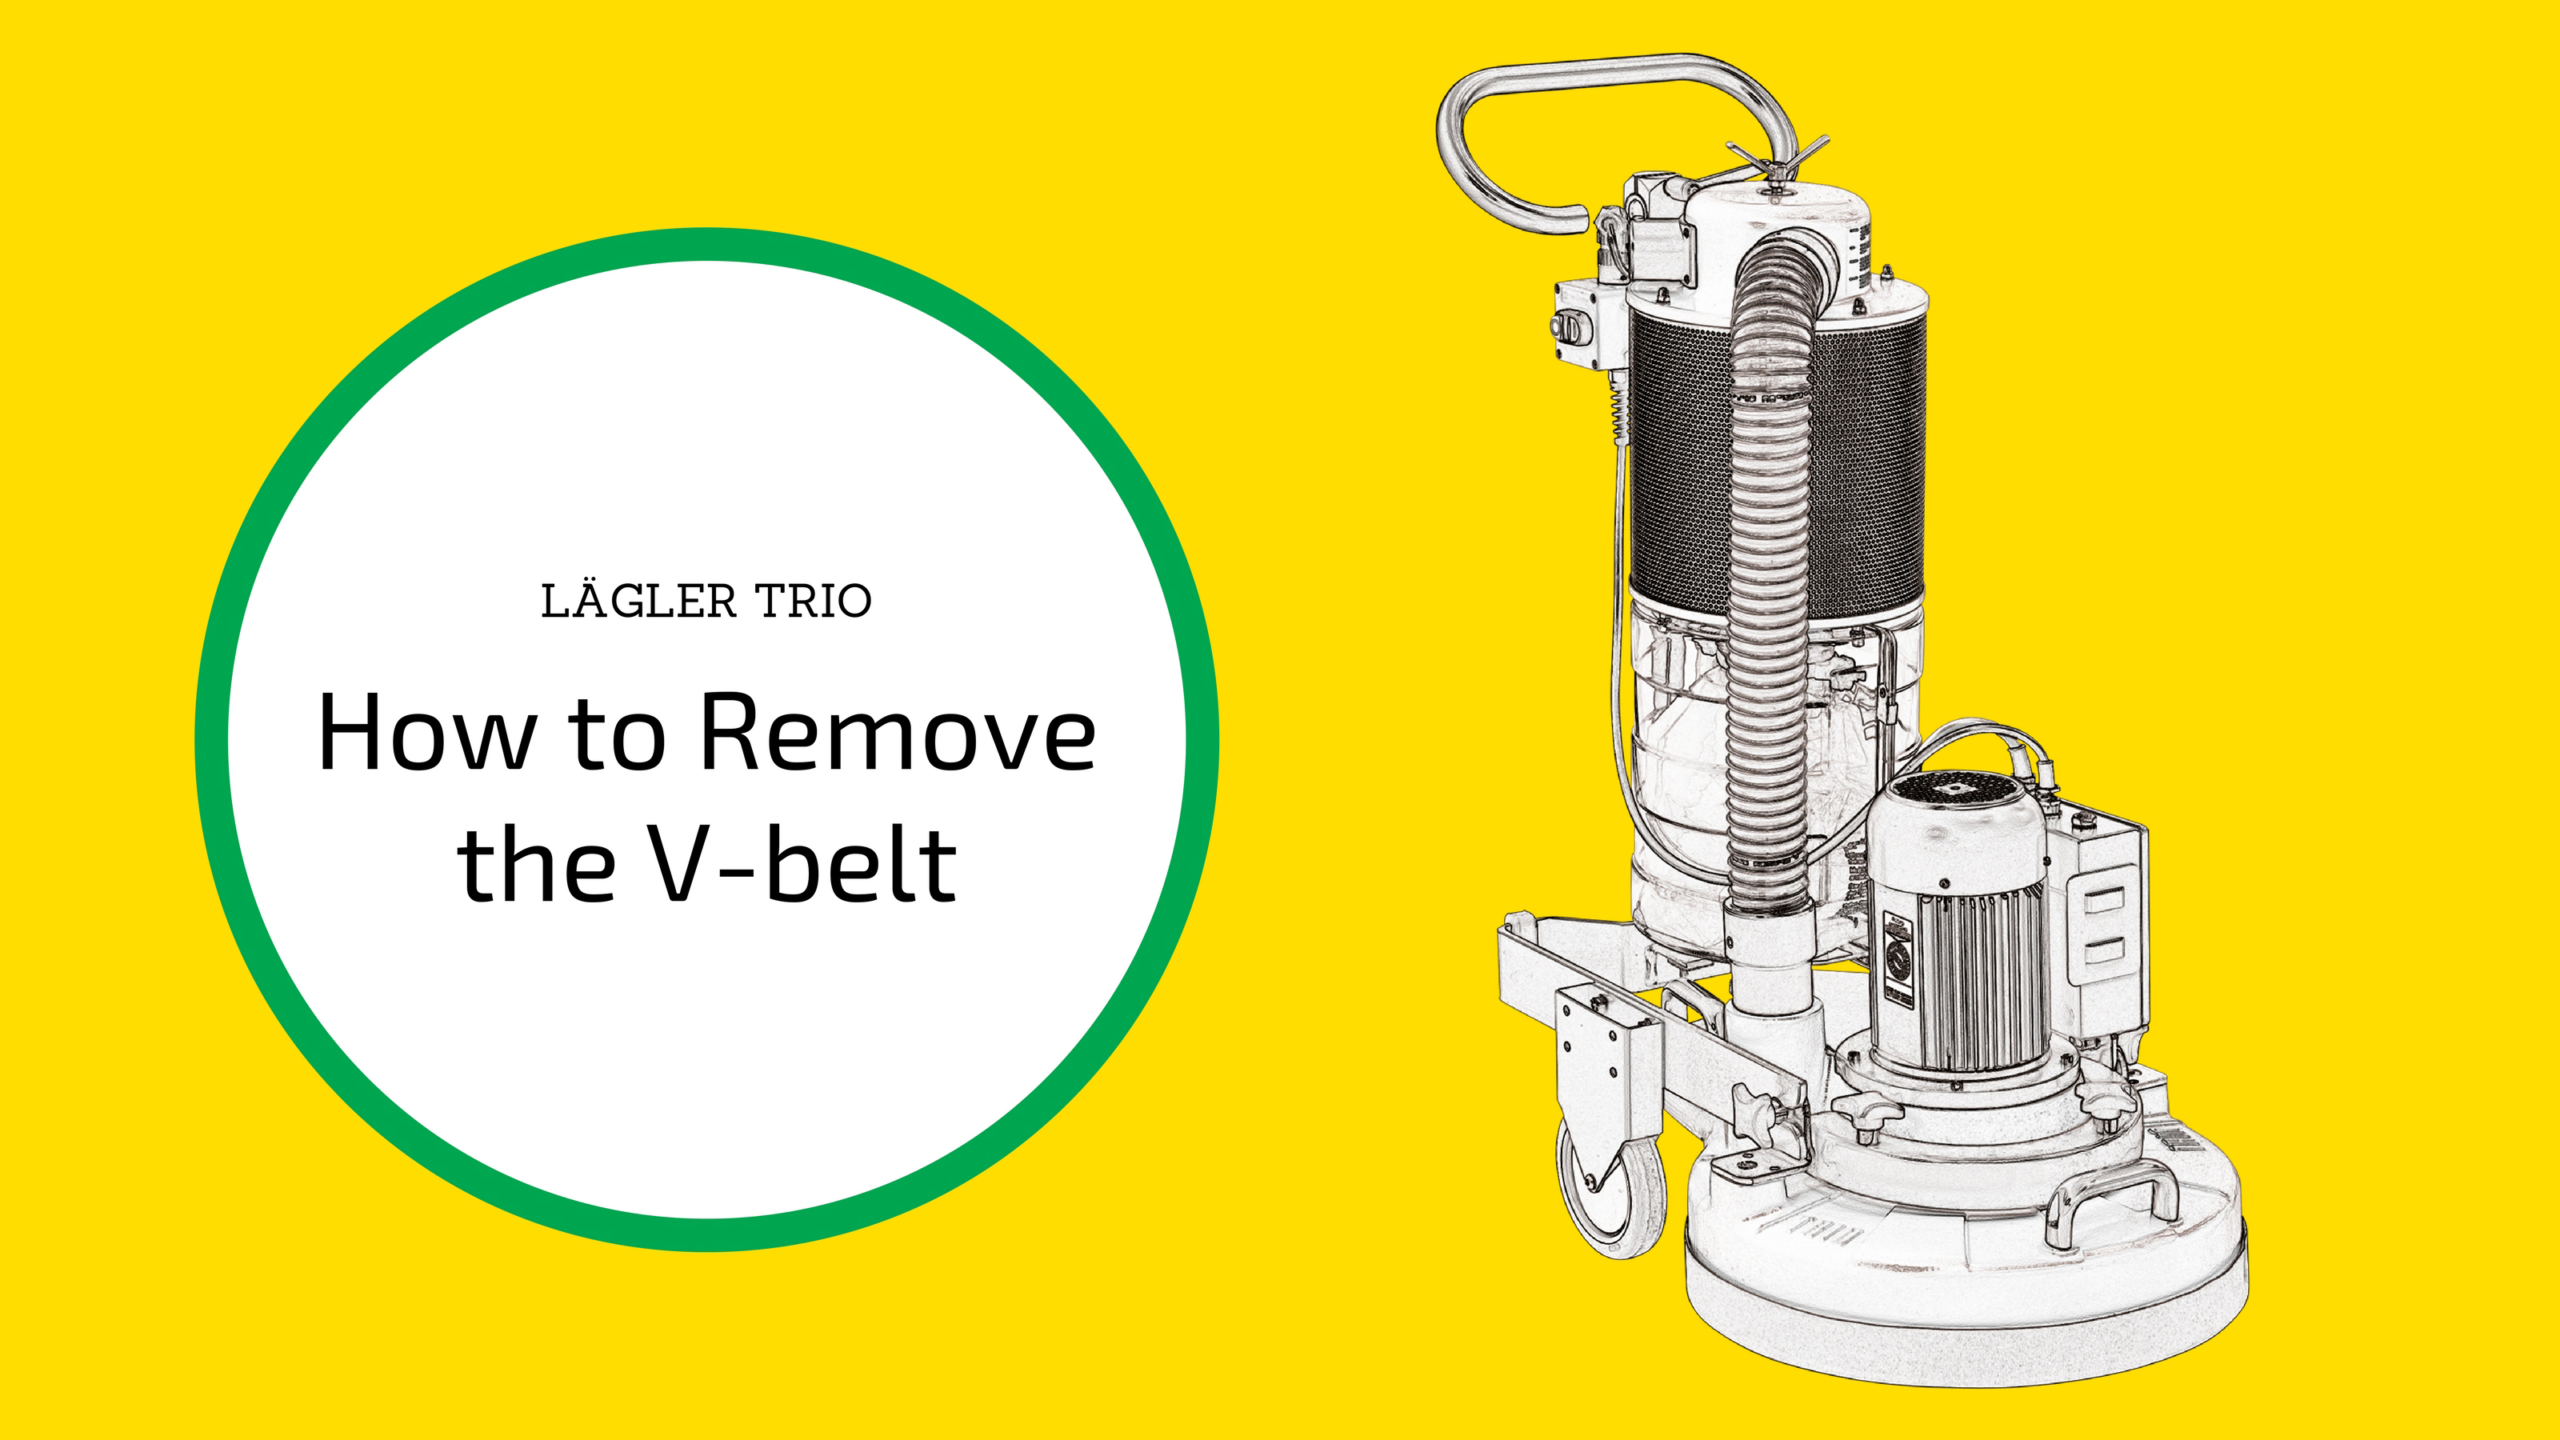
How to Remove the Lägler TRIO V-Belt

Our how-to blog posts like this one are all about helping you to solve your maintenance questions, especially when you’ve got a tight schedule and need
to keep running. But to do that, the first thing you need to know is how to tell when a part needs repair or replacement.

When to Replace the Lägler TRIO V-Belt

As much as we’d love to be able to put out a maintenance schedule that follows exact amounts of usage or length of time for certain parts, you know there
are too many variables for us to do that. Especially with rubber parts like the V-belt.

With the Lägler TRIO V-belt, if it shows signs of wear and tear, replace it. You don’t want to nitpick over squeezing out another job with a worn belt
and end up with lost time on a job site because you pushed too far. Our recommendation is to keep a spare V-belt on-hand, especially if you think the
amount of wear is questionable.

Now, on to our step-by-step instructions for how to remove the TRIO’s V-belt.

How to Remove the Lägler TRIO V-Belt

With the TRIO turned off and unplugged, follow these steps:

1. Remove the tooth belt. (Need help? Read our step-by-step instructions: “How to Change the Tooth Belt.”)

How to Remove the Lägler TRIO V-Belt

2. Bring the machine back into its upright position.

3. Loosen the cable plug of the sensor on the on/off switch by turning the ring nut counterclockwise, and pull off the cable plug off.

4. Remove the on/off switch from the chassis and hook it into the transport holder on motor switch box.

5. Pull the suction hose from the neck of the upper part of the separator.

6. Loosen the two cross-grip fasteners at the side by which the chassis is attached to machine housing and move the chassis backwards.

7. Remove the screw that fixes the V-belt guard to the fan insert.

Lägler TRIO V-Belt

8. Pull V-belt guard from its slot at the motor and put it aside.

9. Release the tension of the V-belt by carefully moving the V-belt tensioner using cranked closed-mouth wrench. The V-belt can now be disengaged from
the pulleys and the belt tensioner.

10. Release the tensioner to its regular position.

Lägler TRIO V-Belt

11. Remove the four screws that fix the motor to the machine housing and lift the motor off, keeping it in a vertical position. The V-belt now can be removed.

12. Use a vacuum to remove dust and dirt.

To get your TRIO back in action read, “How to Mount the Lägler TRIO V-Belt.”

Learn More, Earn More

Our recommendation when using any Lägler machines and parts is to maintain regularly. Nothing else will prolong the life of machine parts like being cleaned
and cared for. It will save you time and money, and help you achieve better floor sanding results.

To learn more about keeping your machines money-making ready, subscribe to the Lägler North America newsletter and join us on Instagram, Facebook, Twitter and YouTube.

Also, we teach maintenance basics during our Lägler Premium Sanding Technology (PST®) certification training here in Denver. To setup training for you and/or your crew when it fits into your schedule, call us at 800-8-HUMMEL (800-848-6635)
or email [email protected]

Related Web Pages

Lägler TRIO Parts Catalog

How to Change the TRIO Tooth Belt

How to Clean the TRIO Filter

https://www.laglernorthamerica.com/wp-content/uploads/2020/02/TRIO-RemoveV-Belt-scaled.jpg 1440 2560 webmaster https://www.laglernorthamerica.com/wp-content/uploads/2020/02/logo2-300x90.png webmaster2017-01-31 01:14:312020-02-29 01:17:55How to Remove the Lägler TRIO V-Belt

The Most Popular, Most Helpful Lägler N.A. Content of 2016

December 27, 2016/in Lägler /by webmaster

We’re doing what people do at the end of one year, beginning of another. We look back at what we did well and what we can improve. We always want to keep
doing better.

That runs from machine designs and production at the factory in Germany to customer service, certification training and every way we connect with you pros
online here in North America.

We kicked off a new, mobile-friendly website in 2016. With it came a blog, and we started social media pages on Instagram, Facebook,
Twitter and YouTube. We started making videos and answering top questions you have about using and
maintaining Lägler machines.

Added up, you all spent about five work weeks of the year learning from the content on our blog. That’s a great start, and we aim to build on that in the
coming year.

Here’s a recap, highlighting the most popular how-to topics and just plain fun social media posts.

What is Lägler Premium Sanding Technology (PST) Certification Training?

TOP BLOG CONTENT

Lägler Certification: What is Lägler PST?

Our most viewed blog page. Like we say in that post, our training program is about two things:

1. Building relationships with contractors, letting them know we are the true resource about Lägler machines and we’re ready to help.

2. Helping contractors to maximize success with their sanding and finishing businesses.

In this post, we describe the Lägler process that gets you the most out of every floor while taking the least time on the job. Greatest efficiency for
the flattest floors. We tell what the one-day certification course costs and why we offer it at a financial loss to ourselves.

Nothing builds trust like truth and, of course, quality machines you can count on for many years. That’s what we bank on every day.

Read the full post, “Lägler Certification: What is Lägler PST?”

TOP HUMMEL® BLOG POSTS

Not surprisingly, HUMMEL blog posts are a favorite among all our topics. It’s the most popular Lägler machine in North America, and is used by many thousands
across the world.

How to Replace a Lägler HUMMEL Sanding Drum

This post tells the two most important things to know about the HUMMEL drum. It also includes step-by-step instructions.

The video in this post shows proof that the HUMMEL design maintains its nearly 50 years of original engineering while also taking on all the parts that
have been refined along those many years. New parts on, say, a 1983 machine? No problem. Maintain and roll on.

Read the full post, “How to Replace a Lägler HUMMEL Sanding Drum.”

Why You Should Sand Wood Floors at an Angle and Left to Right | Lägler North America Blog

Why You Should Sand Wood Floors at an Angle + Left to Right

We’ve refined our thinking on sanding at an angle. For example, we used to recommend cutting at an angle for the first pass, and then with the direction
of a straight-laid floor for finer grits.

Now, we recommend using at least a slight angle for each pass. It’s all about getting the flattest results.

We also explain why to sand left to right as you move across the field of a room, and why you should not sand right to left, if you want to achieve the
best results.

Read the full post, “Why You Should Sand Wood Floors at an Angle + Left to Right.”

4 Reasons Not to Use a Wire-Brush Drum with a Lägler HUMMEL

We know the wire-brushed look is especially cool with current trends in wood flooring. But we also know the reasons you don’t want to throw a wire-brush
drum on your HUMMEL for that job.

What did we say about truth above? Truth builds trust, and trust us when we say we are focused on quality floors and offering the best information we have
to you.

Read the full post, “4 Reasons Not to Use a Wire-Brush Drum with a Lägler HUMMEL.”

Do you have Lägler HUMMEL questions and helpful content ideas? Use the Contact link in the menu heading above to submit your suggestions.
We want to tackle all the information that will be helpful to you in the field with future blog and video posts.

TOP FLIP® BLOG POSTS

The FLIP edger finally is getting its due in North America. The machine was launched in 2001 in Germany, and now is becoming much more widely known and
used here. Search #LaglerFLIP on
Instagram to see photos and videos from some of the guys who are using it — and bragging about it — across the land.

How to Use the Lägler FLIP Corner Attachment | Lägler North America Blog

How to Use the Lägler FLIP Corner Attachment

How do you handle room corners, around pipes, and between railing balusters? You could scrape. You could use an orbital sander in some of those spots.
But the FLIP corner attachment is the high-speed tool that knocks it all out the cleanest and quickest.

The FLIP is sold with the short and corner attachments, and this blog post includes tips for using both.

Read the full post, “How to Use the FLIP Corner Attachment.”

How to Adjust Lägler FLIP Sanding Pressure

Like everything with Lägler machines, the engineers have lightened the pro’s load on the job. With the FLIP, don’t burn out your shoulders to add a touch
of pressure here or there. Just use as recommended.

This blog post gives step-by-step instructions for making sure the FLIP is cutting as expected. It tells how to set the pressure based on which attachment
you’re using, and in only of seconds of effort on the job.

The CAD drawings in this post also show what goes wrong when you’re edger is running on off-kilter settings like an old sea captain with an uneven peg
leg.

Read the full post, “How to Adjust FLIP Sanding Pressure.”

What Lägler FLIP questions and helpful content ideas do you have? Tell us, using the Contact link in the menu heading above. We want to
turn those questions into useful blog and video posts to help everyone #LearnMoreEarnMore.

TOP TRIO BLOG POSTS

What is a surefire way to know when a floor sanding guy doesn’t own a TRIO and hasn’t participated in Lägler’s Premium Sanding Technology (PST®)
certification training? He calls the machine a buffer and thinks it slows down the process.

For those who know better, we’re building our how-to TRIO content. For those who want to test-drive a TRIO and see why so many others swear by it, read,
“What is Lägler PST?”
and get in touch with us.

How the Lägler TRIO Sanding Disc Arrows Help You to Extend the Life of Your Abrasives | Lägler North America Blog

Lägler TRIO: Sanding Disc Arrows + Abrasives

Let’s veer off the path for a minute. Have you ever noticed on the gas gauge in your truck that arrow next to the little silhouette of the gas pump that
either points left or right? It’s a reminder, showing you on which side of the vehicle your gas tank is when you pull up to the pump at the gas station.

Well, the TRIO has a similar reminder on its three sanding discs. This blog post tells why the arrows cast in the plate are there and how that plays a
part in extending the life of your abrasives.

The post also talks hard plates and donuts. Getting hungry? Read the full post, “Lägler TRIO: Sanding Disc Arrows + Abrasives.”

How to Clean the Lägler TRIO Filter

What are the three things you need to know about cleaning the TRIO filter? What is the one thing you really shouldn’t ever do and, we’re willing to bet,
you or someone on your crew has done?

This post includes a super-short video and the three simple steps you should use to clean your filter in only seconds.

Read the full post, “How to Clean the Lägler TRIO Filter.”

How to Dismantle and Reassemble the Lägler TRIO Filter Unite | Lägler North America Blog

How to Dismantle + Reassemble the TRIO Filter Unit

Right off the top, this post tells three signals it’s time to get into your filter unit for some basic maintenance.

Don’t push the TRIO to the side, because you aren’t sure what’s wrong. And don’t use time and money to have someone else handle it. You’ve got this.

Step-by-step instructions in this post lay out exactly what you need to know. It’s also good to keep your manual handy. Read when in need.

Read the full blog post, “How to Dismantle + Reassemble the Lägler TRIO Filter Unit.”

What Lägler TRIO questions and blog/video ideas do you have? The Contact link in the menu heading above is your path to telling us. We
can turn your question – which likely is a common question many others have – into helpful blog content for everyone.

TOP VIDEO CONTENT

We started a YouTube channel this past year. It’s great for embedding videos in our blog posts. If you watch as much on YouTube as you do on TV, like your kids do, look us up and
subscribe.

But we also post our videos on Instagram and Facebook, where these videos (mostly how-to) add up many times more views. (If you aren’t promoting your business
on social media and want to learn, give these blog posts a look: “Social Media for Wood Flooring Pros”
and “Interview with a Contractor: Social Media Success.”)

So view our videos using whatever app you favor. Below is one of our most popular, “How to Replace a HUMMEL Sanding Drum.”

Follow Lägler North America Content

Follow our blog and more content through our monthly email newsletter and our Facebook, Instagram, Twitter and YouTube social media
pages.

Share your content suggestions using our contact page.

And make 2017 your biggest yet. We’ll be here.

https://www.laglernorthamerica.com/wp-content/uploads/2020/02/Content-Year-in-Review-scaled.jpg 1440 2560 webmaster https://www.laglernorthamerica.com/wp-content/uploads/2020/02/logo2-300x90.png webmaster2016-12-27 01:25:502020-02-29 01:35:30The Most Popular, Most Helpful Lägler N.A. Content of 2016

Lägler TRIO: How to Change the Tooth Belt

November 2, 2016/in Lägler /by webmaster

Good condition of the tooth belt, or the belt that turns the three sanding plates (discs) of the Lägler TRIO fine sanding machine, is critical. No belt,
no sanding. It’s that simple.

In this post, and the video below, we give step-by-step instructions for removing the current belt and replacing it with a new belt.

How to Know When the Tooth Belt Needs to Be Changed

It can be difficult to know when to change the belt, unless it’s the most obvious situation: a three- or four-year-old belt that has dried and become brittle,
and then breaks. In that case, the sanding discs will not turn.

Otherwise, a common way to recognize when the tooth belt needs to be changed is to notice decreased RPMs and less dust filling the dust bag.


How to Remove the Tooth Belt

Starting with the machine turned off and unplugged from power:

1. Lock the handle into its forward position, using the clamping lever at the front of the handle.

2. Lean the TRIO backward to rest safely on the two protective cushions at the back-bottom of the machine’s frame, and on the guide tube.

3. Remove the sanding plates by grabbing the edges and pulling the plates away from the machine, disengaging the TRIO’s three prongs from their rubber
jigs. Caution: Do not use a screwdriver or other tool to pry the plates away from the machine; prying with tools can cause damage.

4. Remove the eight screws of the cover and remove the cover. Recommended: Check the sealing felt on the inside of the cover and replace as needed.

5. Loosen the counter nut of the belt tensioner, using a 17mm wrench, by turning the nut all the way back against the casing wall.

6. Expand the spring by turning the second nut back to the counter nut.

7. Push the belt tensioner back and remove the belt.

8. Use a vacuum to remove dust and dirt inside and around the pulley mechanism.

How to Change the Lagler TRIO Tooth Belt

How to Insert a New Tooth Belt

1. Push the belt tensioner all the way back to the casing wall.

2. Insert the new belt with the geared side facing and engaging the pinion gearing, with the flat side of the belt skirting the gear bearings.
Caution: Incorrectly inserting the belt can cause damage to the machine.

3. Tighten the spring using the nuts to adjust the spring to the proper length:

a. Orange spring: 55 millimeters (approx. 2 1/8”)

b. Blue spring: 52 millimeters (approx. 2”)

4. Replace the cover, fastening it with the eight screws previously removed

5. Mount each sanding plate by first inserting one of its three prongs (locking bolts) into one of the rubber jigs, then fitting the other two into their
respective positions. Press the plate into position as far as it will go.

6. The belt replacement is complete. Stand up the TRIO, readjust the handle to your preference for use. You’re ready to sand again.

Related Blog Posts

How to Clean the Lägler TRIO Filter 

How to Dismantle + Reassemble the Lägler TRIO Filter Unit

Arrows + Abrasives: How to Extend the Life of Abrasives Using the TRIO 

Related Parts

P949 (Tooth) Belt

P953 Sanding Disc, Complete

https://www.laglernorthamerica.com/wp-content/uploads/2020/02/TRIO-belt-title-scaled.jpg 1440 2560 webmaster https://www.laglernorthamerica.com/wp-content/uploads/2020/02/logo2-300x90.png webmaster2016-11-02 18:38:222020-02-29 18:42:16Lägler TRIO: How to Change the Tooth Belt

Lägler TRIO: Sanding Disc Arrows + Abrasives

September 21, 2016/in Lägler /by webmaster

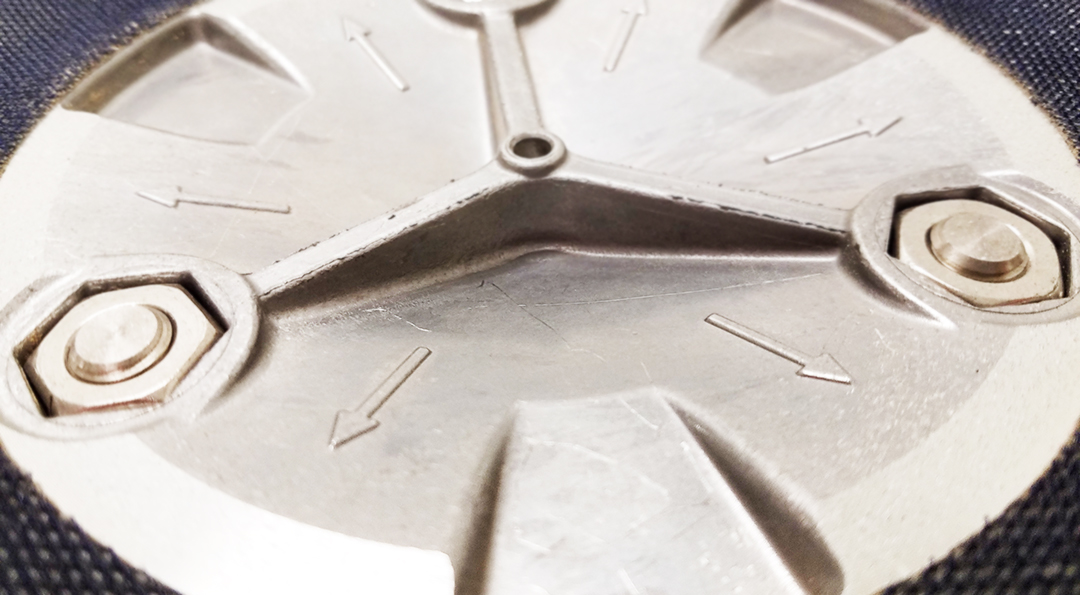
Have you noticed the six arrows on the bottom of a Lägler TRIO sanding disc?

We point them out during our Premium Sanding Technology training (PST® certification). A lot of times, the guys hadn’t noticed
them before. The arrows are subtle and built into the aluminum disc, but they have a purpose.

Look and feel around the outer surface of the sanding disc, noticing the alternating solid and hollow sections under the hook-and-loop backing ring. Where
the arrows point are the solid sections, the six areas of the sanding disc that make contact with the sanding surface.

#LaglerTip > Extend the life of abrasives when using the TRIO: When the paper is worn, pull it off and turn it slightly to line up the unworn parts of the paper with the arrows/solid sections of the disc, and refasten to continue sanding.

TRIO Sanding Disc Innovations

We recently talked about Lägler’s quality-or-nothing approach on this blog (Read: “4 Reasons Not to Use a Wire-Brush Sanding Drum with a HUMMEL”).

That means when a machine concept is new – for example the HUMMEL in ’69 and the TRIO in ’93 – it rolls out the gate ready for the long haul.

Lägler innovations to its existing machines are small refinements that might often go unnoticed, because the core product was slowly developed to be on
point before anyone in the field got their hands on it.

With the TRIO, one of those small improvements was with the sanding disc. Originally, the disc was a solid plastic plate. A few years after the TRIO’s
release, the aluminum disc was produced with its alternating solid and hollow sections. That change enables more aggressive cutting.

TRIO sanding disc with foam ring/donut (red, green and black), topped by sand paper.

Sanding with the Lägler TRIO: Hard Plate ­+ Donut

The recommended standard hook-and-loop sanding setup with the TRIO builds from the sanding disc surface like this: self-adhesive backing ring, foam ring/donut,
and then the abrasive.

A common-enough mistake is to sand with only the self-adhesive backing ring. That won’t help the floor or your machine. Remember to put the abrasive on
before sanding.

Hard plating takes the foam donut out from between the backing ring and the sand paper. That gives you around 10 percent more aggressive cutting for exceptionally
uneven flooring. But we recommend using the foam donut.

Screening with the Lägler TRIO

When screening, remember to take off the foam ring. If you don’t, it will cause unnecessary wear on the ring, and you’ll need to replace it sooner than
expected.

#LaglerTip > Always screen with the same grit as the last sand paper used.

The standard setup for screening is to use a maroon pad between the backing ring on the disc and the screen. Make sure to use the plastic white pin to
hold on the screen. The pins are sold individually. When buying a set for the TRIO, remember to order three.

Related Blog Posts

How to Clean the TRIO Filter

How to Change the TRIO Tooth Belt

How to Dismantle + Reassemble the TRIO Filter Unit

Related Lägler Parts

Self-Adhesive Backing Ring: P955 from Lägler North America; 900.02.12.305 (Global manufacturer number)

Foam Ring: P954; 900.02.13.205

Sanding Disc Complete / Universal Disc: P953: 900.02.10.200

Plastic Screen Pin: P950; 900.02.23.205

https://www.laglernorthamerica.com/wp-content/uploads/2020/02/TRIOarrows.jpg 595 1080 webmaster https://www.laglernorthamerica.com/wp-content/uploads/2020/02/logo2-300x90.png webmaster2016-09-21 18:49:192020-02-29 18:51:19Lägler TRIO: Sanding Disc Arrows + Abrasives

How to Dismantle + Reassemble the Lägler TRIO Filter Unit

July 13, 2016/in Lägler /by webmaster

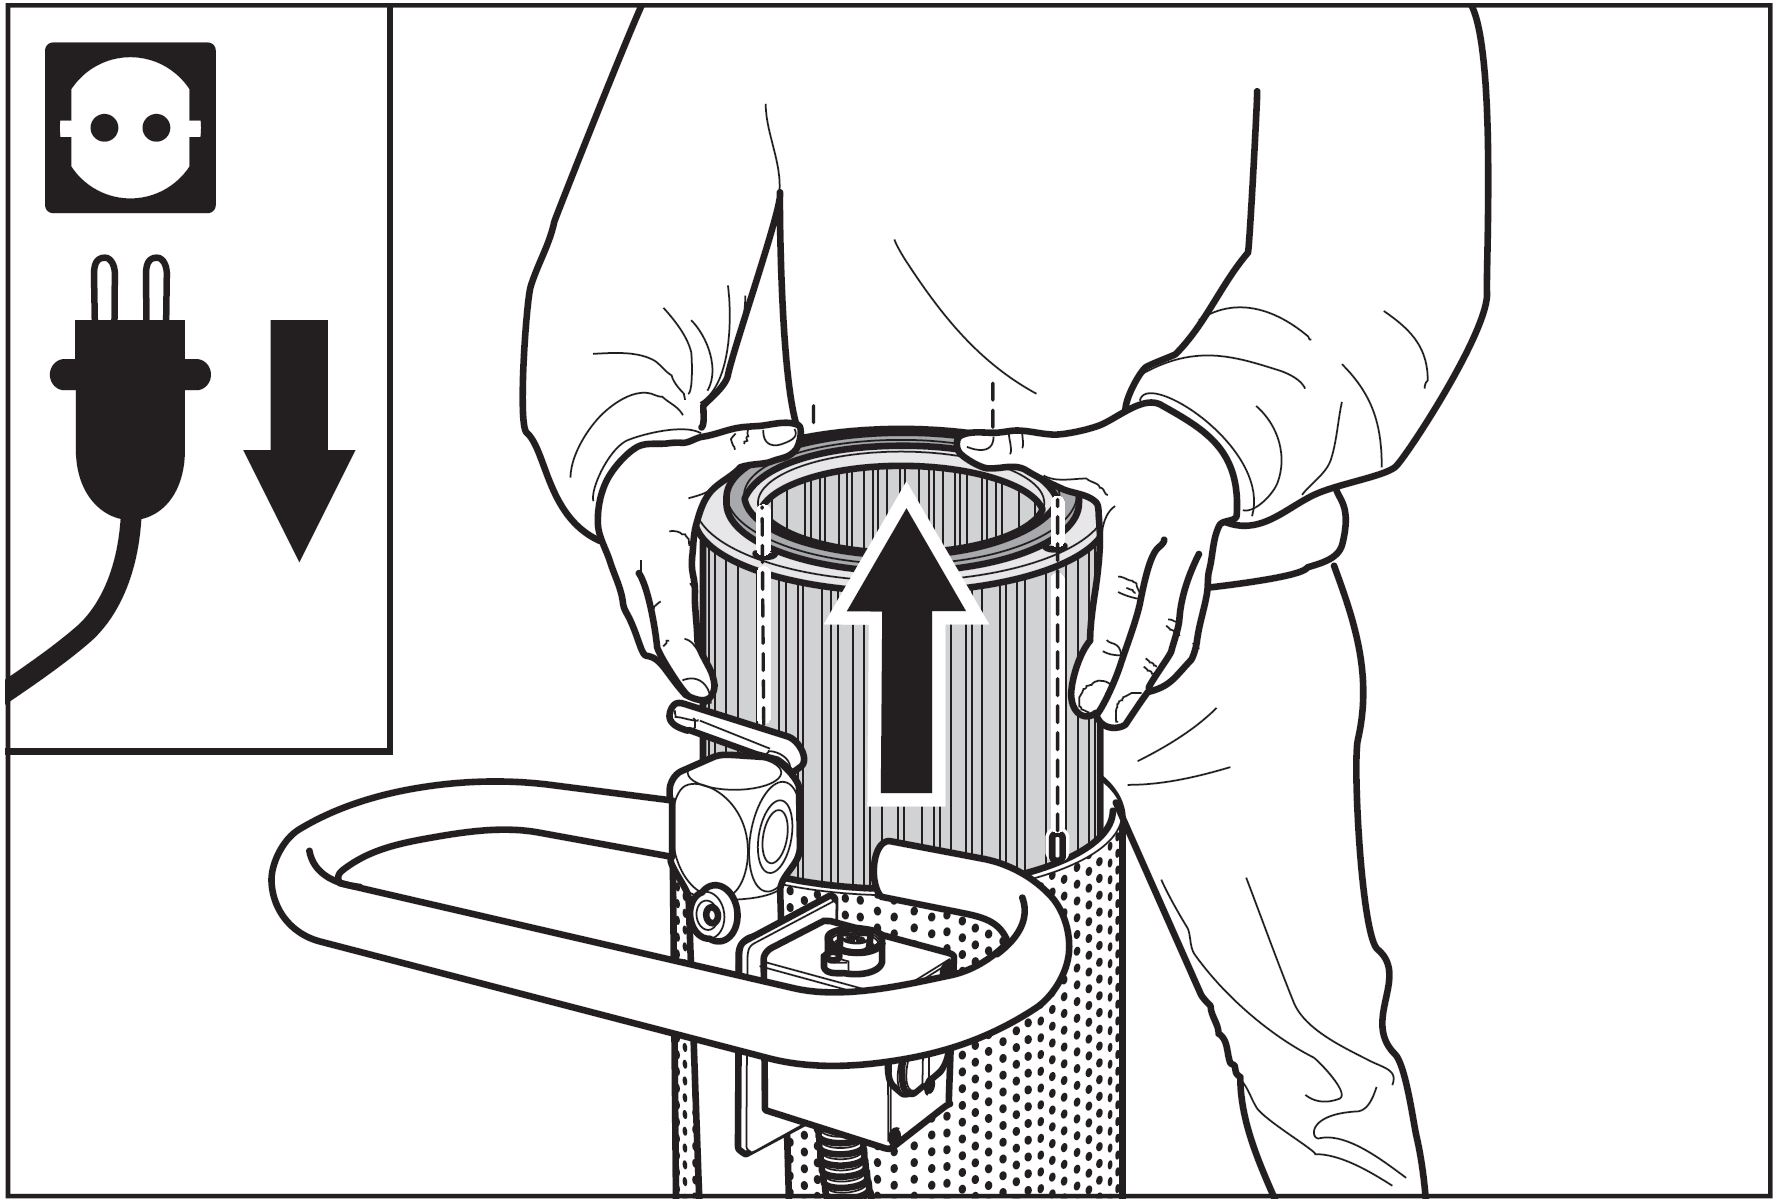
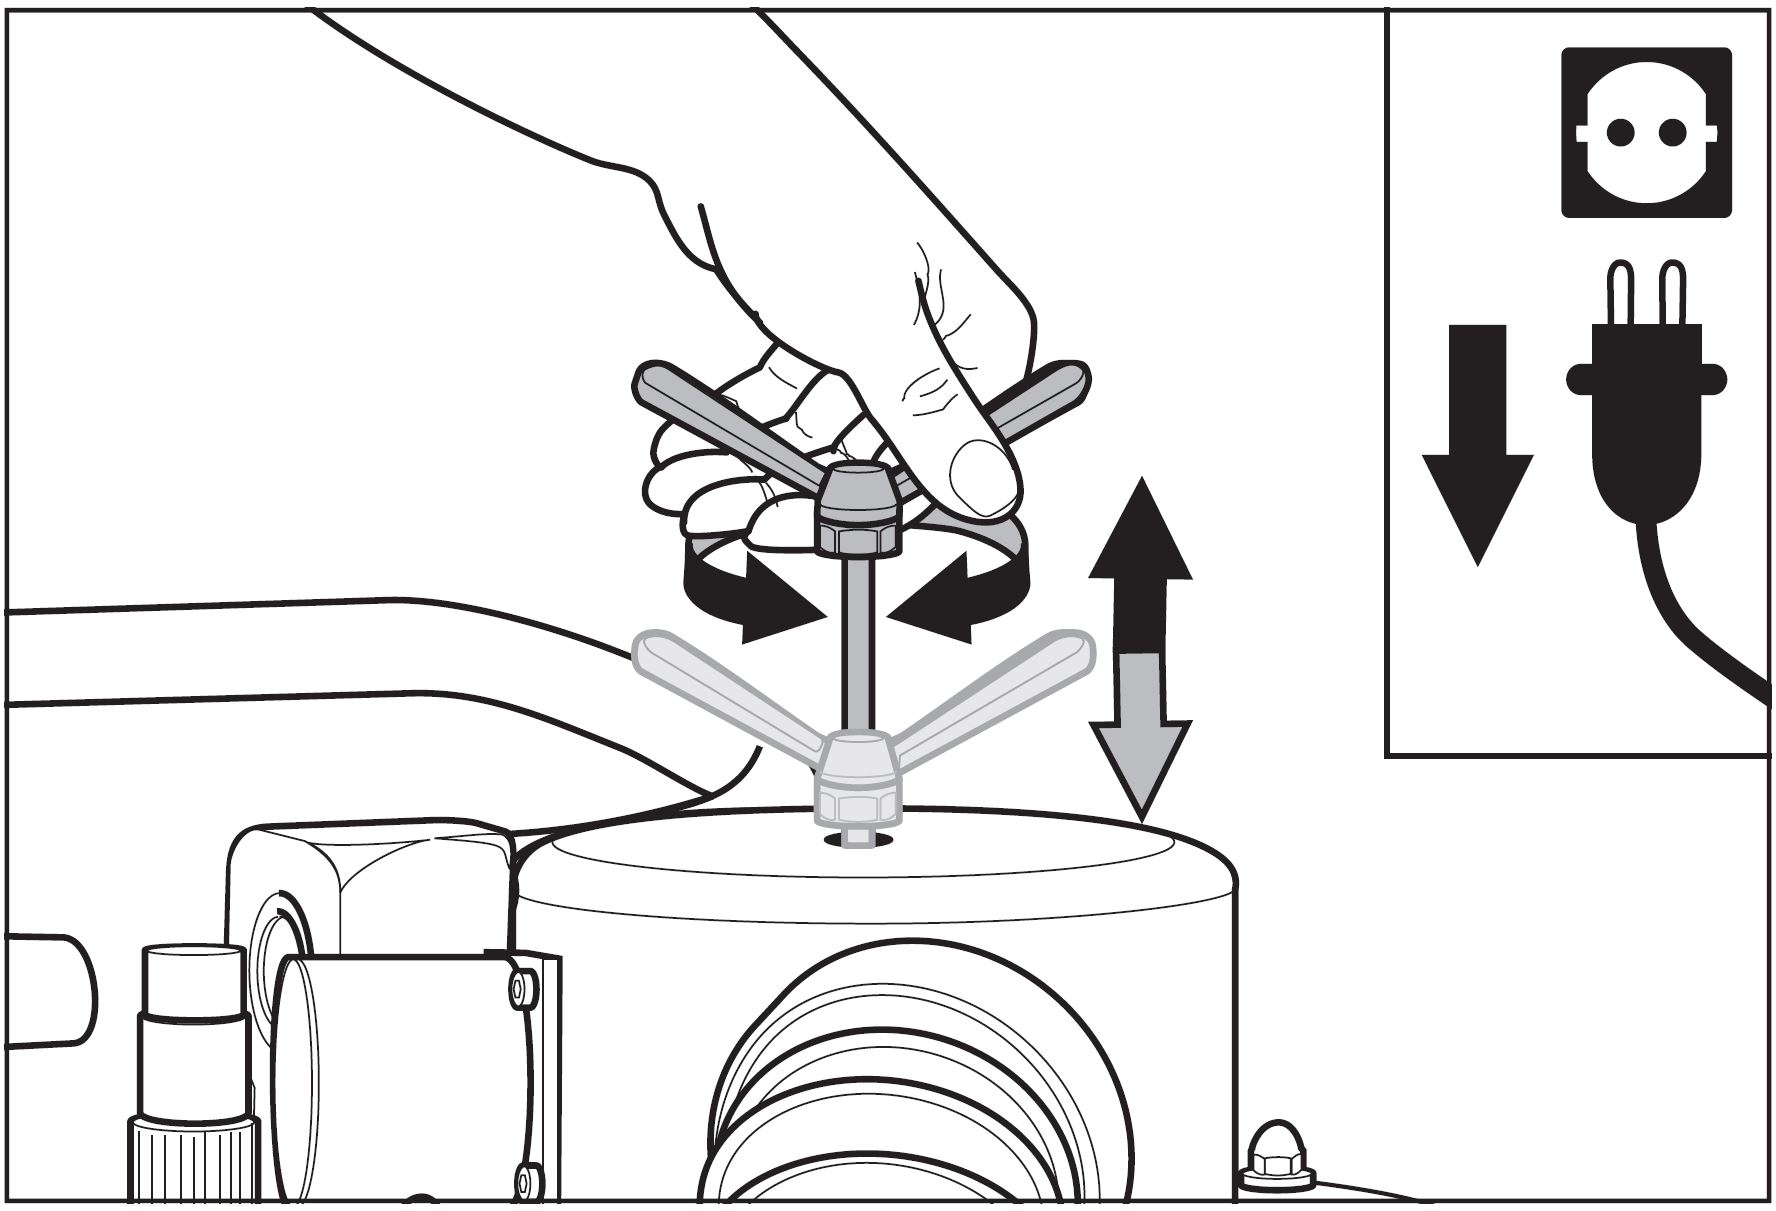
It’s easy to dismantle and reassemble the Lägler TRIO filter unit. You know it’s time to do this if:

  • You are needing to clean the filter more often than each time you change dust bags
  • The machine’s suction has decreased
  • Dust is being emitted into the environment during use

Cleaning the Lägler TRIO filter starts with the wing screw on top (Read “How to Clean the Lägler TRIO Filter”).

If you have used the wing screw and its attached rod with brushes (inside the filter unit) to knock the dust from your TRIO filter, but the machine is
showing signs of decreased suction and increased dust emission, it’s time to take cleaning the next level.

How to Remove the TRIO Filter Unit

To remove the clogged filter, first ensure the TRIO is turned off and the power supply is disconnected, then:

  1. Unseat the cable plug of the sensor on top of the on/off switch by turning the ring nut and pulling off the cable plug.
  2. Unhook the on/off switch from the chassis and hook it onto transport holder on the front of the switchbox (to the left of the motor).
  3. Remove the dust suction hose from the neck of the dust separator.
  4. Before removing the filter cover, slide a flooring board between the closed dust containment cylinder and the chassis to prevent the cylinder from
    falling during removal.
  5. Remove the four cap nuts on top of the filter unit/separator cover and lift the cover off the machine.
  6. Lift the filter out of the filter casing to clean or replace it, as needed.

How to Reassemble the TRIO Filter Unit

  1. Before inserting the cleaned or new TRIO filter, make sure the rubber seals are in the groove on the filter.
  2. Slide the filter onto the four screws from above, being careful not to damage the filter.
  3. When placing the cover back onto the machine, insert the perforated metal into the cover so that it touches the inside of the ridge.
  4. Put the washers on the screws that stick out the cover and put the cap nuts back on loosely; do not tighten yet.
  5. If necessary, open the flap on the dust containment cylinder for access to the bottom part of the fourth screw to ensure it is reseated properly. Remember
    to put the washer on the fourth screw before placing the cap nut back on.
  6. Using the wingnut on top of the filter unit, push the cleaning slide all the way down.
  7. Check the relative positions of all the parts again before tightening the cap nuts, and tighten them with care not to bend the cover in the process.
  8. Unhook the on/off switch from the transport holder and replace in its working position below the machine’s handle.
  9. Insert the plug of the sensor back onto the on/off switch and secure the ring nut.
  10. Put the suction hose back on and reconnect the TRIO to the power supply.

Continue learning and getting the most out of your Lägler sanders:

  1. Subscribe to Lägler North America’s monthly newsletter to receive email notifications of our latest blog posts and videos.
  2. Follow us on social media: @laglerna on Instagram and Twitter, and @laglernorthamerica on Facebook.
  3. Subscribe to our new YouTube channel.
https://www.laglernorthamerica.com/wp-content/uploads/2020/02/TRIOfilter-removing.JPG 1201 1779 webmaster https://www.laglernorthamerica.com/wp-content/uploads/2020/02/logo2-300x90.png webmaster2016-07-13 19:05:222020-02-29 19:08:04How to Dismantle + Reassemble the Lägler TRIO Filter Unit

How to Clean the Lägler TRIO Filter

July 13, 2016/in Lägler /by webmaster

Have you seen our tag #MaintenanceMatters? We use it on Instagram, Facebook and Twitter. Because it’s true, maintenance matters to your machines and your business’ success. Plus, we like to talk about the matters of maintenance.

So here’s another one that should be happening every day when you use your Lägler TRIO fine wood floor sanding machine.

Three things to know about cleaning the TRIO fine sanding machine filter unit:

  1. The filter should be cleaned after each dust bag change; it only takes a few moments.
  2. Do not blow compressed air into the dust bag container or the neck of the suction hose; it can damage the pressure control sensor.
  3. Failing to clean the filter unit will decrease dust suction, make the TRIO perform less efficiently, and dust emission into the environment will increase.

Three Steps to Basic Cleaning of the TRIO Filter

There are only three steps to knock the dust out of the filter and into the dust bag, assuming you already have turned off and unplugged the machine. These steps only take five seconds:

  • Grab the wing screw on top of the filter unit on top of the TRIO, then gently pull it upward. That moves the cleaning rod and brushes located inside
    the filter unit. Watch the video above to see how the TRIO’s internal filter cleaning system works.
  • Slowly turn the wing screw side to side, back and forth; then move it up and down a few times, knocking dust into the dust bag.
  • When finished with step two, push the wing screw/slide all the way down, or the machine’s suction will be decreased.

If these simple steps do not sufficiently clean the filter or if it seems like you are needing to repeat this cleaning process too often, the filter likely
is clogged.

In that case, you need to dismantle the filter unit for more thorough cleaning. Read “How to Dismantle and Reassemble the Lägler TRIO Filter Unit.”


Related Lägler TRIO Parts

Separator (Dust Containment + Filter Unit): P1010 (Lägler N.A.), 900.00.16.100

Wing Nut/Screw: P028, 000.20.45.083

Filter Brush: P1015, 900.16.45.105

Filter: P952, 900.16.18.105


Subscribe to Lägler North America’s monthly newsletter to learn more.

https://www.laglernorthamerica.com/wp-content/uploads/2020/02/TRIOfilter-cleaning.JPG 1211 1776 webmaster https://www.laglernorthamerica.com/wp-content/uploads/2020/02/logo2-300x90.png webmaster2016-07-13 19:03:112020-02-29 19:04:55How to Clean the Lägler TRIO Filter

Recent Posts

  • November 16 – 20: Lägler and Loba-Wakol Essential Systems Course, DenverAugust 21, 2020
  • Versatility and Team GreenAugust 18, 2020
  • Precision and Team GreenAugust 18, 2020
  • Durability and Team GreenAugust 18, 2020
  • Tradition and Team GreenAugust 18, 2020
  • The Versatility of LÄGLERAugust 12, 2020
  • The Precision of LÄGLERAugust 12, 2020
  • The Durability of LÄGLERAugust 12, 2020
  • The Tradition of LÄGLERAugust 11, 2020
  • October 19 – 23: Lägler and Loba-Wakol Essential Systems Course North CarolinaAugust 11, 2020

Tags

Abrasives Contractor Education Featured Item Fly-and-Sand How-To How-To Video How to sand a wood floor Lagler Sanding Manual Lägler Certification Training Lägler FLIP Lägler History Lägler HUMMEL Lägler Parts Lägler TRIO Machine Maintenance Marketing Premium Sanding Premium Sanding Technology PST Sanding Drums Social Media Subfloor Prep

Archive

  • August 2020
  • July 2020
  • July 2019
  • December 2017
  • November 2017
  • October 2017
  • September 2017
  • August 2017
  • July 2017
  • June 2017
  • May 2017
  • April 2017
  • March 2017
  • February 2017
  • January 2017
  • December 2016
  • November 2016
  • October 2016
  • September 2016
  • August 2016
  • July 2016
  • June 2016
  • May 2016

Maximize jobsite efficiency. Boost your bottom line.

Earn Lägler Certification

Signup to look, listen + learn through the

Lägler N.A. Newsletter

About Lägler North America

Lägler North America, a division of Palo Duro Hardwoods, is the North American distributor of machines and parts manufactured by Eugen Lägler GmbH in Germany. We are North America’s machine repair center, and offer Lägler’s one-day Premium Sanding Technology (PST®) certification course.

Latest News

Lägler N.A. Is Social May 11, 2016

Lägler North America is building a community via its social pages. Connect with us on Instagram, Facebook, and Twitter to see photos and videos, to learn trade tips, hear about opportunities and more.  

Stay Informed

Click to download the latest Lägler Direkt Newsletter

Download

Copyright © 2020 Lägler North America. All Rights Reserved.

  • Terms & Conditions
  • Shipping & Return Policies
  • Privacy Policy

Scroll to top