• Facebook
  • Instagram
  • Mail
  • Youtube
Call 1-800-8-HUMMEL
  • 0Shopping Cart
Lägler North America
  • Machines
    • SURFACE
      • HUMMEL
      • SUPERHUMMEL
    • FINE SANDING
      • TRIO
      • SINGLE
    • EDGE/STAIRS/CORNER
      • FLIP
      • ELAN
      • UNICO
  • Machine Parts
    • HUMMEL
    • SUPERHUMMEL
    • TRIO
    • FLIP
    • ELAN
    • SINGLE
    • UNICO
  • ABRASIVES
    • Buy Abrasives
  • Blog
  • PST®
  • Newsletter
    • Lägler Direkt Archive
    • Subscribe | Email Newsletter
  • Warranty
  • Contact
    • Info Request Form
    • Submit Photo | #LaglerOfTheDay
  • News & Events
  • Fly & Sand 2021
  • Menu Menu
You are here: Home1 / Blog2 / Abrasives

Posts

Lägler Premium Abrasives

July 18, 2019/in Lägler /by webmaster

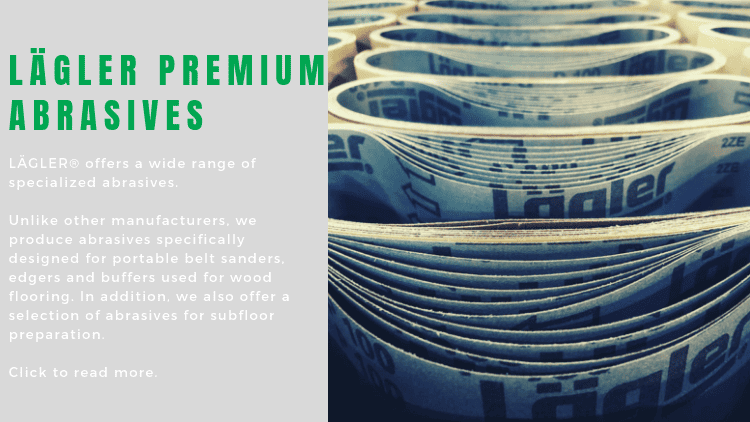
Most abrasives are produced for other industries or for stationary belt sanding machines. These machines are mainly used to sand raw wood at a set speed, RPM and pressure. Those abrasives are then converted to sand hardwood flooring.

Our approach is different.

We know that our customers face challenges with raw wood, factory prefinished wood, on-site refinished wood and endless types of finish. Our machines offer variation in pressure settings and individual machine RPM, as well as personalized walking speed, which affects the sanding pattern. For this very reason, only the best abrasives could be paired with our machines. The LÄGLER® team tirelessly researched to find the right backing, minerals for abrasive grain, coating bond and base bond for our abrasives to get consistently premium results for premium floors.

Abrasives Composition

Choosing the right abrasive is one of the most important decisions in achieving a premium surface. Proper matching of the backing, bond and abrasive grain is particularly important for a high quality abrasive.

Backing serves as the base for the abrasive grains and the bonding system.There are generally two backing variations- textile and paper. The greater the loading caused by the sanding process, the more resistant the backing needs to be. The bond fixes the abrasive grain to the backing. A distinction is made between the base bond, which anchors the grain on the backing, and the coating bond, which connects and stabilizes the grains together. Depending on the area of application of the abrasive, softer or harder bonds are used. Generally in the wood sector, synthetic resins are used as bonds, which have a very high resistance to heat.

Abrasive grain consists of hard cutting materials that ensure material removal. The size and dispersion of the individual abrasive grains, as well as the type of cutting material, play a critical role.

Abrasive Minerals

Aluminum Oxide (Red/Brown)

Aluminum oxide, also known as corundum, is hard and has a high temperature resistance. Due to its hardness, as machining time increases the cubic grain becomes increasingly round and relatively blunt. This process happens fairly quick, resulting in a shorter service life.

Zirconium Corundum/Zirconia (Blue)

Zirconium corundum is very tough and is also extremely temperature resistant. This gives it a very long service life, which in turn minimizes costs. Zirconium corundum has a self-sharpening effect owing to its microcrystalline structure. Due to this structure, during the sanding process small parts break out of the grain again and again. This results in new cutting edges which keep the grain sharp for longer periods. The microcrystalline wear ensures aggressive sanding and lasting sharpness, which in turn extends the entire service life of the abrasive.

Silicon Carbide (Black)

Silicon carbide abrasive grains are wedge shaped and pointed. They are sharp edged and very hard, making them extremely aggressive. Therefore, silicon carbide is used in the wood sector mainly for very coarse grit sanding. In fine sanding, silicon carbide is almost exclusively used for sanding screens. Since silicon carbide is relatively brittle, the individual grains wear away faster than other minerals.

Abrasive Dispersion

Abrasive dispersion affects the sanding pattern through the cutting and removal process.

The grain is usually applied with an electrostatic scattering process in such a way that the respective tips are all aligned upwards. This ensures a high initial cutting performance. In the production of abrasives, the respective grain size can be dispersed in different densities: open, semi-open or
closed dispersion. Abrasives with an open dispersion achieve a high abrasion rate, but exhibit a certain aggressiveness that can have a negative effect on the sanding pattern. In order to avoid the high, punctuated aggressiveness of the open dispersion and the associated sanding marks, the  grains are placed close together on the abrasive. This means that the aggressiveness is no longer localized but instead evenly distributed over the entire abrasive surface.

In order to meet constantly growing customer demands, LÄGLER® prefers closed dispersion in the production of abrasives, especially on medium and finer grits. This ensures optimal aggressiveness while simultaneously leading to a uniform sanding pattern.

Want to try LÄGLER® premium abrasives for yourself? Click here to purchase.


https://www.laglernorthamerica.com/wp-content/uploads/2020/02/lÄgler-premium-abrasives-1.png 422 750 webmaster https://www.laglernorthamerica.com/wp-content/uploads/2020/02/logo2-300x90.png webmaster2019-07-18 00:30:362020-05-08 14:49:25Lägler Premium Abrasives

Sanding With A Big Machine

August 15, 2017/in Lägler /by webmaster

A lot of floor sanding pros probably are confident in their “how to sand with a big machine” knowledge. Many of you should be. Yet here we are talking
about it, so hang with us …

We talk with flooring pros everyday about basic techniques and why they are the best way to go. In Lägler PST® training, when contractors and distributors
call us (800-8-HUMMEL, if you need it), at NWFA Expo,
answering questions via social media DMs – everywhere.

So, it’s worth double-checking your know-how and, at the least, you can send the new guy on your crew to this post and the many others we’ve put up on
the Lägler North America blog.

To help, here’s a list of the big machine blog articles we’ve posted in the past year:

  • How to Test Floor Flatness Using the Drum Lever
  • Big Machine Sanding Direction, Speed + Pressure
  • Big Machine Sanding Path Displacement
  • 6 Things You Need to Know About Sanding Drums
  • Sanding Drums: Lägler vs. After-Market
  • Leveling Your HUMMEL Wheels
  • Why To Sand at Angles + Left to Right
  • How to Remove the HUMMEL Motor
  • How to Replace A HUMMEL Sanding Drum
  • Four Reasons Not to Wire Brush with a HUMMEL

If you have a copy of the Lägler sanding manual,
that’s the good stuff we base blog posts like this one on.

http://www.laegler.com/en/downloads.html

Choosing the Starting Abrasive Grit

We know when you start a job and get the big machine on the floor, you’re ready to rip. But how do you decide what grit abrasive to start with?

That decision right there – what grit to start with – can make or break efficiency on the job. It can lead to spending more time and money than you want,
if you don’t nail it.

If you start with too coarse an abrasive, you’re cutting deeper scratches that will take more effort to remove. If you go too fine, you’re creating more
work for yourself to go over it again.

Q: How do you know what grit you to start with?

A: Test sanding

Make your best guess of what grit belt to put on the drum to start the test, but go as fine a grit as you think will work. If the first grit you try isn’t
the one, move to the next grit you think is best. Testing doesn’t take long to do, and not nearly as long as the alternatives. It will save you headaches.

Always sand with as coarse a grit as necessary and as fine a grit as possible.

Below are two images from the Lägler manual, “Sanding of Wooden Floors.”

The first one shows how to approach grit sequence when using a multi-disc sander in your lineup.

The second one shows grit sequence when using the conventional setup, that is without using a multi-disc machine.

Learn more about best methods for using a big machine, multi-disc sander and edger. Read the Lägler N.A. blog and subscribe to the Lägler N.A. monthly email newsletter.


How to Choose the Right Grit Abrasive When Sanding Wood Floors | Lagler North America Blog


How to Sand Wood Floors Using the Lagler Method | Lagler North America Blog

https://www.laglernorthamerica.com/wp-content/uploads/2020/02/SandingBigMachine.jpg 422 750 webmaster https://www.laglernorthamerica.com/wp-content/uploads/2020/02/logo2-300x90.png webmaster2017-08-15 04:37:562020-02-26 04:43:22Sanding With A Big Machine

Abrasives: Cost Vs. Value of Quality

July 4, 2017/in Lägler /by webmaster

There are two approaches to floor sanding: guesswork and science.

Guesswork creates variables and challenges in sanding jobs that aren’t there. It causes the professional to change his or her approach from job to job,
species to species, and floor pattern to pattern. It produces results that vary.

The science of sanding is a proven process a professional can learn and use on each job, regardless of species, board widths, and installation pattern.
It produces consistent, quality results.

Quality is everything, if you’re trying to build a strong business on good work. That goes for your skills, machines, customer service, abrasives and the
other details. If you’re off-target in just one of those key areas, word on the street will bite you in the dust bag, whether you know it or not.

We talk about training and boosting your skills often on this blog, especially about Lägler’s Premium Sanding Technology (PST) class. Of course, we get into machine quality every day, too, talking about the standards Lägler holds itself to or just by posting photos of
Lägler’s craftsmen on Instagram quietly going about the business of hand-building and testing its machines.

It’s time to talk more about the ripple effect of choosing quality, especially with abrasives.

Free Online Download -- Lägler Sanding Manual

Cost vs. Value of Quality

Quality abrasives play a super-important role. Like with anything, you get what you pay for. Pay for cheap products, get cheap results.

You probably tell homeowners that. And you often see the problems caused by hacks, right? A homeowner calls you in to fix the disaster a “professional”
made of their floor. It was the low bidder they’d hired for the initial job, focusing only on the short-term pain of the money they were spending.
Now they are losing sleep, stressing the expense and headaches of the shoddy work they got from the contractor from hell.

They are painfully figuring out they’ve got to pay you what they should have stepped up to pay in the first place, just to fix the mess. That’s on top
of the money they already spent and the worry it caused them. Cheap quickly turned into way more expensive.

The same goes for any business that relies on quality ingredients to put out quality products or services it sells. A restaurant that goes cheap to save
a buck is short-sighted. It loses business in the long run because it’s worried about the cost of, say, a case of burger patties. The owner of that
restaurant probably isn’t connecting bad Yelp reviews to one purchase like which meat to buy.

But it isn’t just the meat. It’s the domino effect of that mindset that leads to going cheap on one thing after another. That restaurant owner doesn’t
invest in the other ingredients, either. Or replace the dirty or torn seats in the joint, or keep its restrooms clean, or care all that much when a
jaded employee doesn’t give customers a hello or smile or quality experience. Downward spiral.

For a true flooring pro – a craftsman – pride in quality work is at the top of the list. The good kind of word on the street makes the rounds and builds
the business like it’s got its own motor. Do good work, get good work.

Floor Sanding Abrasives: Cost vs. Value Quality

Floor Sanding Abrasives: The Nitty Gritty

The materials used in making abrasives affect sanding rates and how many square feet of life a professional gets out of them. Inexpensively produced abrasives
have shorter service life and need more frequent changing. The minerals used in inexpensive abrasives do not perform as aggressively, leading to more
time spent in the sanding process.

In the end, the additional costs of buying, storing, and transporting a larger quantity of lower-quality abrasives, plus having to spend more time sanding
with them makes investing in quality upfront a better value. (Sounds like that thrifty homeowner in the example above, right?)

In fact, the science of sanding means little without using the right abrasives for the right situations. A highly skilled race-car driver who has a fine-tuned
car can do little with it if the wrong tires are on it.

For wood floor sanding abrasives, the minerals, underlayment and adhesive are difference-makers. The types of underlayment (paper or cloth) and minerals
(silicon carbide, ceramic, aluminum oxide, and zirconia) needed depend on the intended use.

Grit Sequence for Success

Grit sequence is a key factor in the floor sanding process. It’s essential to follow the steps, like shifting properly through a race car’s gears. The
driver doesn’t get ahead by skipping gears. Instead, he bogs down his momentum.

Unlike in a car, proper grit sequence allows for skipping one grit, but only one. If a professional jumps two or more grits in the sequence, the scratches
from the previous grit will not be adequately removed. It will cost more effort, time, and abrasives to redo the work.

The first sanding step should be done with as coarse a grit as necessary, but as fine a grit as possible. That’s where the variable enters this science
of sanding. The professional must use his experience to recognize if a floor’s condition calls for an especially coarse grit to start.

For example, if it shows severe cupping or is coated with thick lacquer. The starting grit will help to determine the ending grit to be used. Everything
in between follows the steps of the process.

The science of sanding can be learned. A sanding professional can bank on its predictable, craftsman-quality results. No guesswork needed. Clients might
think it’s magic. It’s OK to leave them guessing.

The Bottom Line

Quality customers know when they are dealing with quality professionals. When they hire someone to sand and refinish their floor, they are investing a
good chunk into their home. They want to feel great about that. They want to know what they get back for their trust in you will be worth a grit when
the job is done.

Choosing quality is everything.

Learn more about the best ways to boost your floor sanding game. Learn it from Karl Lägler, the man who wrote the book on that game, by downloading the
free “Sanding of Wooden Floors” manual online from Lägler.

Related Blog Posts

How to Minimize Sanding Efforts + Maximize Business Profits

How to Subfloor Prep with a Multi-Disc Sander or Buffer

Big Machine Sanding Path Displacement

https://www.laglernorthamerica.com/wp-content/uploads/2020/02/Abrasives-Cost-vs-Value.jpg 422 750 webmaster https://www.laglernorthamerica.com/wp-content/uploads/2020/02/logo2-300x90.png webmaster2017-07-04 00:08:002020-02-29 00:12:29Abrasives: Cost Vs. Value of Quality

How to Minimize Sanding Efforts + Maximize Profits

May 23, 2017/in Lägler /by webmaster
By Karl Lägler

A goal for every contractor’s business should be to minimize effort and time on-site while maximizing quality results and profits. Wood floor sanding is
hard work, but that doesn’t mean it can’t be smart work, too.

With a few smart changes to conventional wisdom, hard work can become easier and it can produce better results. The keys to success lie in the mix of sanding
machines, abrasives and grit sequences used on the job.

Conventional vs. New-School Sanding Methods

Maximum flatness should be the focus on every sanding job. The quality of machines a contractor uses matters, but sanding machines no more make a floor
than a camera makes a photograph or a race car wins a race. The person using the right machines for the job, and with the right knowledge, skill and
touch, is the real difference-maker.

Conventional sanding methods mean using a big machine and edger. A buffer sometimes is used for fine sanding. With this method, the big machine is used
for sanding 90 percent of a room’s field, and it is where 75 percent of the sanding time is spent. The edger does the rest of the heavy lifting.

The new-school sanding method adds a multidisc sander to take flatness to a new level. The multidisc can be used for fine sanding but, unlike a buffer,
packs enough bite to carry some of the big machine and edger’s workloads, too.

Using a multidisc sander shifts how much energy and time a sanding professional spends on each machine. It accounts for 40 percent of sanding time on a
typical job. It reduces time spent on a big machine by 33 percent, and time spent on an edger by 60 percent. That leads to less wear and tear on the
body of the professional.

A multidisc can be run in all directions. It reduces risk of common issues like chatter and dishout. It also handles multispecies floors much better than
the big machine.

The industry’s leading craftsmen are turning to the multidisc as a game-changer, a machine they can use to set their floors apart from their competition’s.

Quality Abrasives are Unsung Heroes

Quality abrasives are crucial role players on any sanding job. If the abrasives are not up to standard, the sanding results also will be less satisfying
than expected, no matter the quality of machines being used.

The materials used in making abrasives affect sanding rates and how many square feet of life a professional gets out of them. Inexpensively produced abrasives
have shorter service life and need more frequent changing. The minerals used in inexpensive abrasives do not perform as aggressively, leading to more
time spent in the sanding process.

Wood Floor Sanding Abrasive Composition | Lägler North America Blog

Synthetic bonds are primarily used in today’s abrasives. They offer higher temperature stability, higher abrasion resistance, and better adhesion to the
abrasive grit and underlayment than previous bindings.

Zirconia and ceramic abrasives offer advantages compared to silicon carbide and aluminum oxide (corundum) abrasives. Ceramic and zirconia have higher sanding
rates and longer service life that equals less frequent changing. Their longer service life requires less inventory be kept on hand, and less storage
space be used in the trailer, van or shop.

Zirconia abrasives are more expensive than silicon carbide and aluminum oxide, but due to its advantages, it offers a better cost-per-square-foot value.

Proper Grit Sequence Saves Time and Money

Start a sanding job with as coarse a grit as necessary, but as fine a grit as possible. It’s important to correctly choose the starting grit and to follow
the correct grit sequence, or lost time and money will add up while trying to correct sanding mistakes.

Coarse abrasives are more expensive than fine abrasives. For floors that require an exceptionally coarse start, such as 16 or 24 grit, save money by using
abrasives with less expensive minerals. Use silicon carbide sanding discs on the edger, multidisc and buffer, and aluminum oxide belts on the big machine.

Save higher-quality abrasives (zirconia) for intermediate sanding steps. That is from grits 36 to 80 on the big machine, and as high as 150 on the edger
and multidisc. Silicon carbide sanding screens work well on a multidisc sander and buffer, starting at 60 grit.

Proper Wood Floor Sanding Grit Sequence | Lägler North America Blog

No more than one grit should be skipped when using a big machine or edger. When fine sanding with a multidisc sander, do not skip any grit numbers. Fine
grits remove a low volume of wood material from the previous sanding step, and a skipped grit leaves marks too coarse to adequately be removed.

Correct selection of the grit sequence is even more important for oiled surfaces than for finished floors. That’s especially worth paying attention to
since, in recent years, natural oils have become more popular with homeowners. Homeowners also are showing increasing interest in interior design and
open-space floorplans that allow larger amounts of natural light.

That highlights the need for sanding professionals who can produce the flattest, most flawless floors. Being capable of producing top-tier results while
minimizing energy, time and costs of materials on the job is essential to a contractor’s success.

Note: A version of this post appears in the June/July 2017 issue of Hardwood Floors Magazine. 


Karleugen Lägler is director of Lägler GmbH. With 50 years in the floor sander manufacturing company, he is the world’s leading floor sanding expert. Lägler GmbH offers free downloads of its “Sanding of Wooden Floors” manual in six languages at laegler.com.


Related Blog Posts

Are You a ‘Hidden Champion’ of Wood Flooring?

How to Mount the TRIO V-Belt

Lägler Certification: What Is Lagler PST®?

https://www.laglernorthamerica.com/wp-content/uploads/2020/02/Karl-MaxProfits-750px.jpg 422 750 webmaster https://www.laglernorthamerica.com/wp-content/uploads/2020/02/logo2-300x90.png webmaster2017-05-23 00:20:102020-02-29 00:26:27How to Minimize Sanding Efforts + Maximize Profits

The Showdown: TRIO vs. Multi-Disc Attachments

February 28, 2017/in Lägler /by webmaster

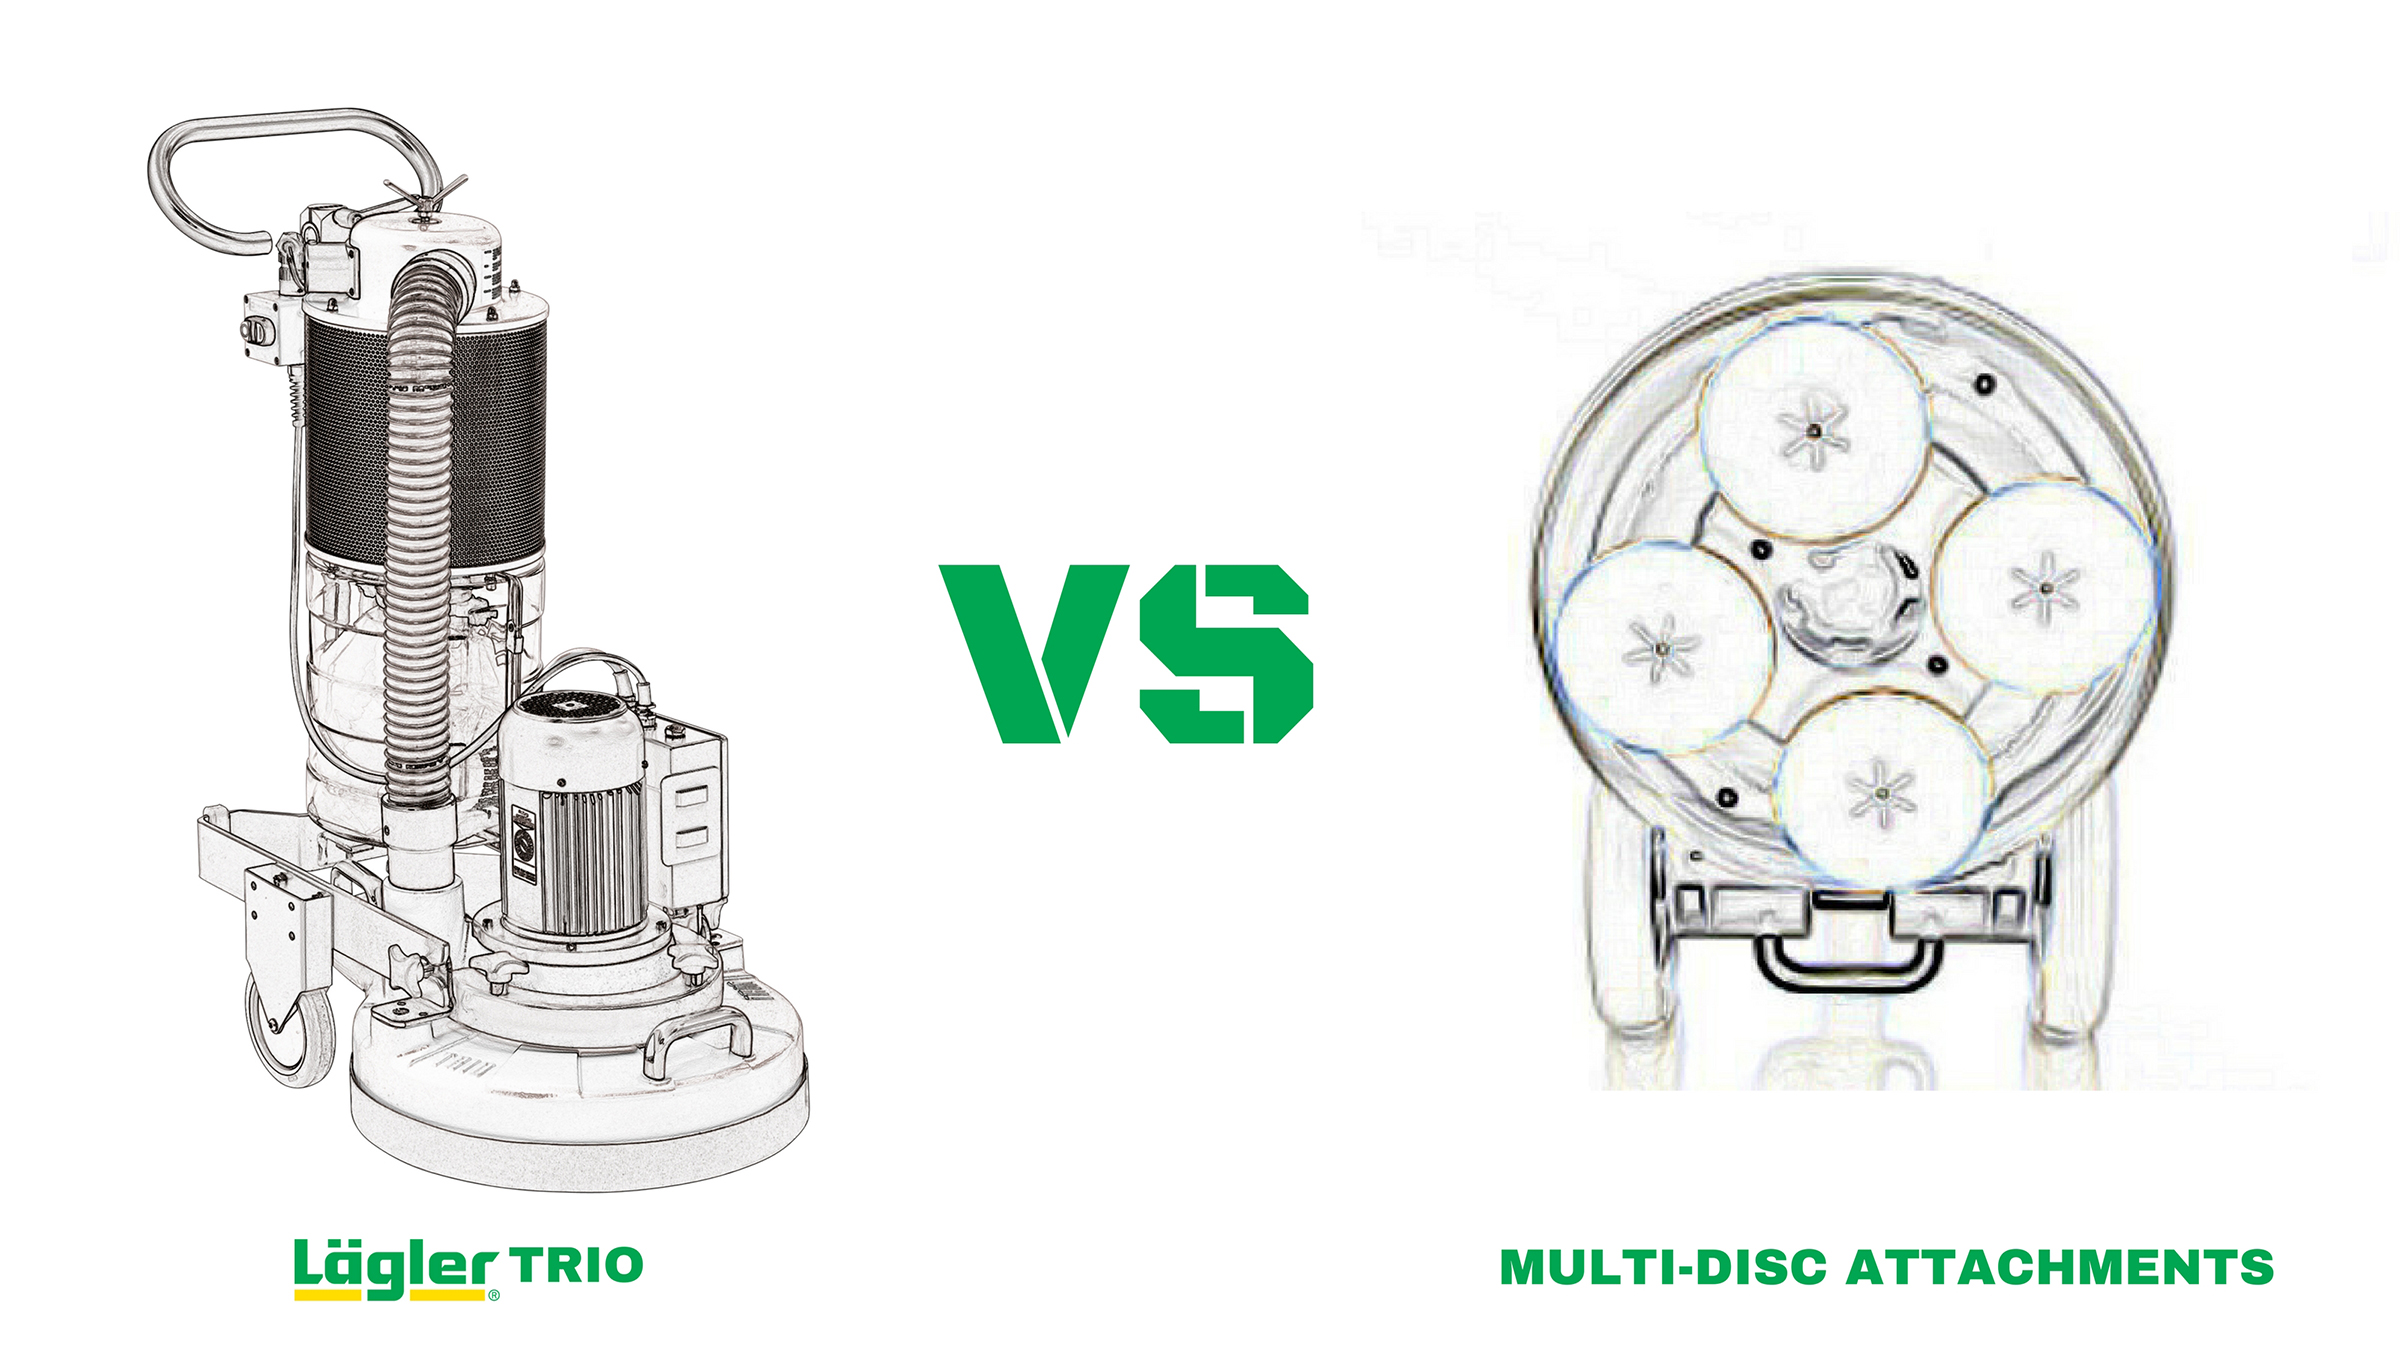
Lägler engineers took on a special “Coke vs. Pepsi” kind of project in 2015. They spent more than eight months testing to see if the TRIO really held its
own against competitors’ multi-disc attachments, and then analyzing their test results.

After all, it’s useless to hide from truth and blindly follow bias for the company, especially if there’s no substance to it. You’d know the difference
just like we would.

Obviously, the engineers had expected their designs – and massive investment in the machine since it was invented and put out on the market in 1993 – to
be everything they’d planned. But since the TRIO entered the market as a one-of-a-kind fine sanding machine, competitors have come out with their own
ideas to counter the TRIO, all options that are more affordable to make and for contractors to buy.

Affordable is good. Lägler’s take is that investing in quality is better – and more affordable in the long run.

Competition is good, too. It pushes our games higher, right?

So, Lägler’s engineers setup their lab experiment to learn for themselves the truth about the TRIO and its competition. They used Lägler’s training facilities
and put each of the machines through the same precise test, using Lägler’s Premium Sanding Technology (PST®) hands-on certification process.

Lägler GmbH in Germany

Lägler GmbH factory and PST training facilities in Germany

Why Conduct Multi-Disc Sanding Test?

The trend in wood flooring in recent years has been to achieve a natural surface appearance. Also, the demand for ever-higher surface quality is in
part due to design trends that open up living spaces, use larger windows and improve overall lighting.

People are seeing their wood floors, and appreciating them in ways they often didn’t before. They are choosing to have wood floors as a key
design element in their homes with expectations their floors are something to be showed off.

The TRIO was designed for this fine sanding need.

Single-disc machines are not designed or intended for fine sanding, not even Lägler’s SINGLE.
To achieve perfect surface quality a significantly longer amount of time is required, if using a single-disc sander. Due to the large sanding disc,
the pressure and abrasion are much less.

Manufacturers of single-disc machines recognized these problems. Several of them started offering multi-disc plates as an optional attachment.

Test Drive a TRIO at Lägler PST Certification Training

Comparison of Multi-Disc Concepts

Lägler set up a real-world job site to test the differences between its TRIO, a dedicated multi-disc sander, and two single-disc machines converted
for multi-disc sanding with attachments. Each was made by a different manufacturer. The engineers compared the three machines using Lägler’s PST® method on a 108-square-foot floor (10 m²) at Lägler.

The two single-disc machines in this test (Machines A + B) were equipped with four-disc attachments, in which the individual inflexible mounted sanding
discs were driven by an outer gear ring. The time required for each sanding step was recorded.

The individual times in the image below show Machines A and B needed more time than the TRIO, especially when fine sanding. With Machine A, in particular,
time added up, in part, because it was necessary to sand some areas twice to remove visible scratches from the first attempt.

TRIO vs Multi-Disc Attachments Sanding Times

The key difference-maker – and, frankly, part of the reason why the TRIO was designed the way it was nearly 25 years ago – is the TRIO’s independently
flexible sanding plates. Each of the TRIO’s three discs adjusts to the floor independently, maintaining contact with the surface and sanding uneven
spots to be flat.

The inflexible suspended discs of the four-disc sanding attachments did not adjust themselves to the floor, allowing for uneven surfaces to either
remain uneven or call for additional cuts.

Overall, looking at the chart above, the TRIO achieves a time savings of approximately 25 percent compared to Machine A and about 18 percent compared
to Machine B. The TRIO also produced the flattest floor, due to its flexibility.

Measuring + Comparing Abrasion

To determine the amount of material removed, the wood dust from each sanding machine was weighed after each sanding step. The area used for this test
was 388 square feet (36 m²) of oak mosaic flooring at Lägler.

For the TRIO, the plastic dust bag was removed from the machine’s integrated dust containment cylinder and weighed. For the multi-disc machines, separate
containment systems were needed and the dust was removed from the vacuum bags to be weighed.

The chart below shows the size of abrasives for each machine, the types of machines and disc suspension, and the wattage for each. The image also compares
the machines’ levels of success across the wide range of grits: 40-60-80-100-120. The results of how much material was removed from the floor highlights
the sanding pressure and capabilities of each machine.

TRIO vs Multi-Disc Attachments Sanding Grits

Comparing Abrasives

When comparing the success of sanding, testing the sanding machines is only one part. The machine is important for the surface finish, while the abrasive
material determines the actual removal rate.

To compare Lägler’s zirconium-based abrasives against another manufacturer’s zircon-mix abrasives, the Lägler engineers took the TRIO out of this part
of the test. Only the two converted single-disc machines were used. The test area again was 388 square feet (36 m²) of oak mosaic flooring.

The abrasives with the higher zirconium content removed up to 20 percent more material than the zircon mix, depending on the grit and machine used.

Comparing Abrasives: TRIO vs Multi-Disc Attachments

Truth in Testing

The truth is what it is. Luckily, for Lägler, no bias is needed to appreciate that truth. Sure, had the results not come out so favorable for the TRIO,
talking publicly about it wouldn’t be the point just yet. Instead, the focus would have been on improving the machine to make sure it gives sand-and-finish
pros the long-lasting quality they need.

The real point for Lägler, as always, is to produce the best quality floor sanding machines on the planet.

Learn More, Earn More

Learn more about the Lägler TRIO and get hands-on experience
in PST certification training.

Plan for one day of PST in Denver (or the U.K. or Germany), and take an extra day for yourself to go skiing, fishing, brewery hopping, or whatever.

Read up – “What Is Lägler PST?”
– and book your class.

Other ways to keep up are:

  • Lägler N.A.’s blog
  • Lägler N.A.’s monthly email newsletter
  • Lägler N.A.’s Instagram, Facebook and YouTube pages
  • Lägler GmbH’s sanding techniques manual, available online in several languages 


https://www.laglernorthamerica.com/wp-content/uploads/2020/02/TRIO-vs-Multi-Disc-Attachments.jpg 1350 2400 webmaster https://www.laglernorthamerica.com/wp-content/uploads/2020/02/logo2-300x90.png webmaster2017-02-28 01:04:092020-02-29 01:10:18The Showdown: TRIO vs. Multi-Disc Attachments

How to Use the Lägler FLIP Corner Attachment

October 5, 2016/in Lägler /by webmaster

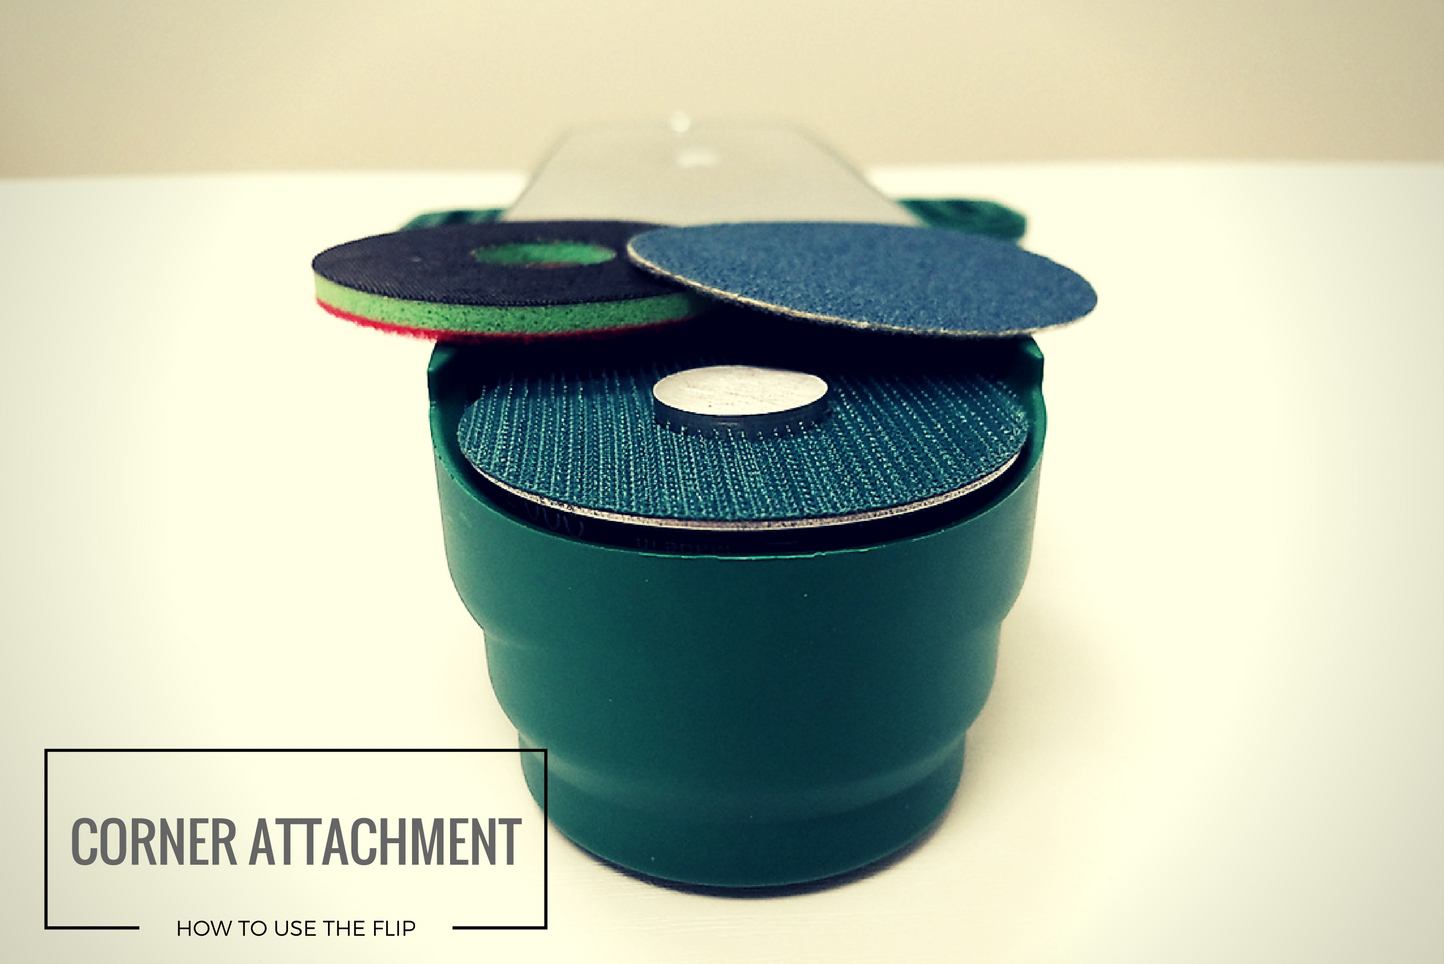
Flexibility of tools on the job stands out. And the Lägler FLIP, with its corner attachment, can be one of the difference-makers on the job site.

If you use a FLIP, you know the short attachment well, and maybe the long one. You run the FLIP clockwise with those, following the machine’s designed
rotation (arrow on top of the attachment reminds you the disc is turning to the right). With the short and long attachments, you can cover the edges
of rooms, get under cabinets and radiators, and handle stairs.

But how do you handle small or narrow spots, like around pipes, or between spindles/balusters of a railing on stairs, or the corners? Do you scrape? Sand
by hand?

The corner attachment is designed to help you knock out those tight spots with ease and speed. (Watch a quick video example of the FLIP being used between the spindles from Rende Flooring’s @callmetito on Instagram.)

In fact, with its smaller 2 3/8” (60 mm) sanding plate diameter, the FLIP’s rotation cranks at a speed that makes it even more aggressive than its larger
counterparts, making corners quick-hit work. The disc diameter for the short and long attachments is more than
double the size at almost 6″ (150 mm). The RPM when using the corner attachment is 9,300 compared to 3,720 RPM when using the short or long attachments.

Because of that, this is the number one tip for using the FLIP corner attachment to take away from this blog post: Sand counter-clockwise.

That will help you to control the hyper-aggression that naturally comes with a smaller disc’s rotation speed, and reduce the heat that speed and increased
friction cause.

But there is more we recommend you keep in mind.

3 More Things to Know When Using the FLIP Corner Attachment

> Set the FLIP’s wheels at the same position as when using the short attachment

> Use a flexible foam hook-and-loop donut between the sanding plate and the abrasive

> Use the finest grit the situation allows

When changing the abrasive, if the disc and donut on the machine are hot after use, let them cool before pulling the abrasive off the donut. Otherwise,
pulling on the abrasive can lead to the foam donut separating and needing to be replaced.

Bonus tip: Have a spare donut setup with the next grit you need ready to go. That way, you can pull the used abrasive and donut off the
sanding plate as one piece, and set it to the side to cool before removing the disc from the donut. With your new abrasive disc already set to go on
your second donut, you’re ready to put it on the corner attachment and keep on moving.

Related FLIP Parts

Corner Attachment, Complete: P1253 from
Lägler North America; 335.01.00.100 (Global manufacturer number)

“Foam Donut”/Flexible Velcro Ring, Corner: P1262;
335.02.13.105

Abrasives for FLIP Corner Attachment: CFLIP40,
CFLIP60, CFLIP80,
CFLIP100

Related Blog Posts

How to Adjust Lägler FLIP Sanding Pressure

How to Replace Lägler FLIP Carbon Brushes

How to Remove the Lägler HUMMEL Motor

https://www.laglernorthamerica.com/wp-content/uploads/2020/02/FLIP-CornerAttachment-HED.jpg 964 1444 webmaster https://www.laglernorthamerica.com/wp-content/uploads/2020/02/logo2-300x90.png webmaster2016-10-05 18:46:332020-02-29 18:48:35How to Use the Lägler FLIP Corner Attachment

Lägler TRIO: Sanding Disc Arrows + Abrasives

September 21, 2016/in Lägler /by webmaster

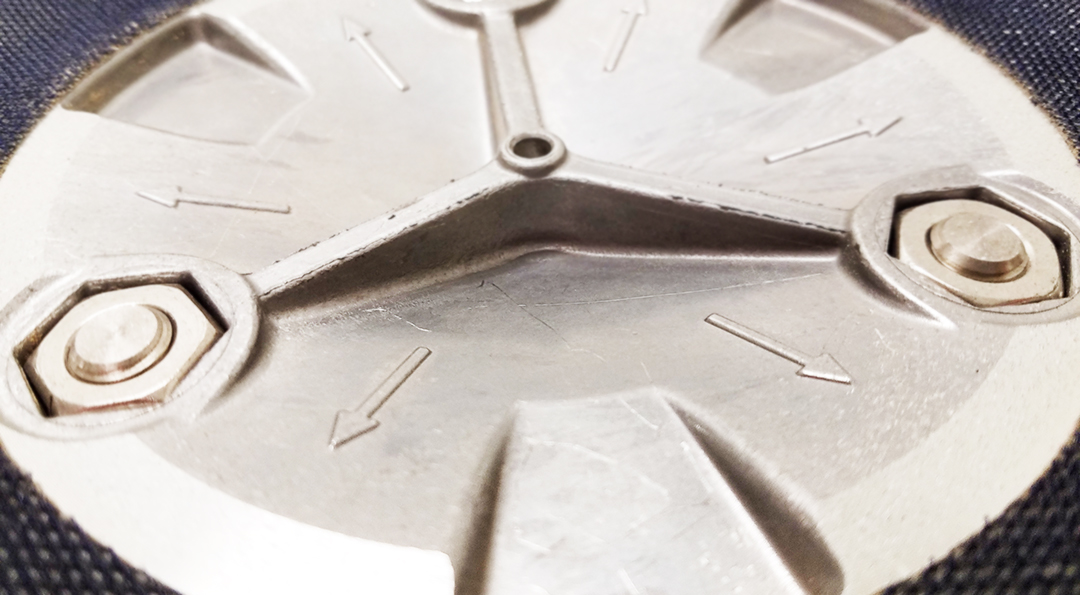
Have you noticed the six arrows on the bottom of a Lägler TRIO sanding disc?

We point them out during our Premium Sanding Technology training (PST® certification). A lot of times, the guys hadn’t noticed
them before. The arrows are subtle and built into the aluminum disc, but they have a purpose.

Look and feel around the outer surface of the sanding disc, noticing the alternating solid and hollow sections under the hook-and-loop backing ring. Where
the arrows point are the solid sections, the six areas of the sanding disc that make contact with the sanding surface.

#LaglerTip > Extend the life of abrasives when using the TRIO: When the paper is worn, pull it off and turn it slightly to line up the unworn parts of the paper with the arrows/solid sections of the disc, and refasten to continue sanding.

TRIO Sanding Disc Innovations

We recently talked about Lägler’s quality-or-nothing approach on this blog (Read: “4 Reasons Not to Use a Wire-Brush Sanding Drum with a HUMMEL”).

That means when a machine concept is new – for example the HUMMEL in ’69 and the TRIO in ’93 – it rolls out the gate ready for the long haul.

Lägler innovations to its existing machines are small refinements that might often go unnoticed, because the core product was slowly developed to be on
point before anyone in the field got their hands on it.

With the TRIO, one of those small improvements was with the sanding disc. Originally, the disc was a solid plastic plate. A few years after the TRIO’s
release, the aluminum disc was produced with its alternating solid and hollow sections. That change enables more aggressive cutting.

TRIO sanding disc with foam ring/donut (red, green and black), topped by sand paper.

Sanding with the Lägler TRIO: Hard Plate ­+ Donut

The recommended standard hook-and-loop sanding setup with the TRIO builds from the sanding disc surface like this: self-adhesive backing ring, foam ring/donut,
and then the abrasive.

A common-enough mistake is to sand with only the self-adhesive backing ring. That won’t help the floor or your machine. Remember to put the abrasive on
before sanding.

Hard plating takes the foam donut out from between the backing ring and the sand paper. That gives you around 10 percent more aggressive cutting for exceptionally
uneven flooring. But we recommend using the foam donut.

Screening with the Lägler TRIO

When screening, remember to take off the foam ring. If you don’t, it will cause unnecessary wear on the ring, and you’ll need to replace it sooner than
expected.

#LaglerTip > Always screen with the same grit as the last sand paper used.

The standard setup for screening is to use a maroon pad between the backing ring on the disc and the screen. Make sure to use the plastic white pin to
hold on the screen. The pins are sold individually. When buying a set for the TRIO, remember to order three.

Related Blog Posts

How to Clean the TRIO Filter

How to Change the TRIO Tooth Belt

How to Dismantle + Reassemble the TRIO Filter Unit

Related Lägler Parts

Self-Adhesive Backing Ring: P955 from Lägler North America; 900.02.12.305 (Global manufacturer number)

Foam Ring: P954; 900.02.13.205

Sanding Disc Complete / Universal Disc: P953: 900.02.10.200

Plastic Screen Pin: P950; 900.02.23.205

https://www.laglernorthamerica.com/wp-content/uploads/2020/02/TRIOarrows.jpg 595 1080 webmaster https://www.laglernorthamerica.com/wp-content/uploads/2020/02/logo2-300x90.png webmaster2016-09-21 18:49:192020-02-29 18:51:19Lägler TRIO: Sanding Disc Arrows + Abrasives

Recent Posts

  • November 16 – 20: Lägler and Loba-Wakol Essential Systems Course, DenverAugust 21, 2020
  • Versatility and Team GreenAugust 18, 2020
  • Precision and Team GreenAugust 18, 2020
  • Durability and Team GreenAugust 18, 2020
  • Tradition and Team GreenAugust 18, 2020
  • The Versatility of LÄGLERAugust 12, 2020
  • The Precision of LÄGLERAugust 12, 2020
  • The Durability of LÄGLERAugust 12, 2020
  • The Tradition of LÄGLERAugust 11, 2020
  • October 19 – 23: Lägler and Loba-Wakol Essential Systems Course North CarolinaAugust 11, 2020

Tags

Abrasives Contractor Education Featured Item Fly-and-Sand How-To How-To Video How to sand a wood floor Lagler Sanding Manual Lägler Certification Training Lägler FLIP Lägler History Lägler HUMMEL Lägler Parts Lägler TRIO Machine Maintenance Marketing Premium Sanding Premium Sanding Technology PST Sanding Drums Social Media Subfloor Prep

Archive

  • August 2020
  • July 2020
  • July 2019
  • December 2017
  • November 2017
  • October 2017
  • September 2017
  • August 2017
  • July 2017
  • June 2017
  • May 2017
  • April 2017
  • March 2017
  • February 2017
  • January 2017
  • December 2016
  • November 2016
  • October 2016
  • September 2016
  • August 2016
  • July 2016
  • June 2016
  • May 2016

Maximize jobsite efficiency. Boost your bottom line.

Earn Lägler Certification

Signup to look, listen + learn through the

Lägler N.A. Newsletter

About Lägler North America

Lägler North America, a division of Palo Duro Hardwoods, is the North American distributor of machines and parts manufactured by Eugen Lägler GmbH in Germany. We are North America’s machine repair center, and offer Lägler’s one-day Premium Sanding Technology (PST®) certification course.

Latest News

Lägler N.A. Is Social May 11, 2016

Lägler North America is building a community via its social pages. Connect with us on Instagram, Facebook, and Twitter to see photos and videos, to learn trade tips, hear about opportunities and more.  

Stay Informed

Click to download the latest Lägler Direkt Newsletter

Download

Copyright © 2020 Lägler North America. All Rights Reserved.

  • Terms & Conditions
  • Shipping & Return Policies
  • Privacy Policy

Scroll to top