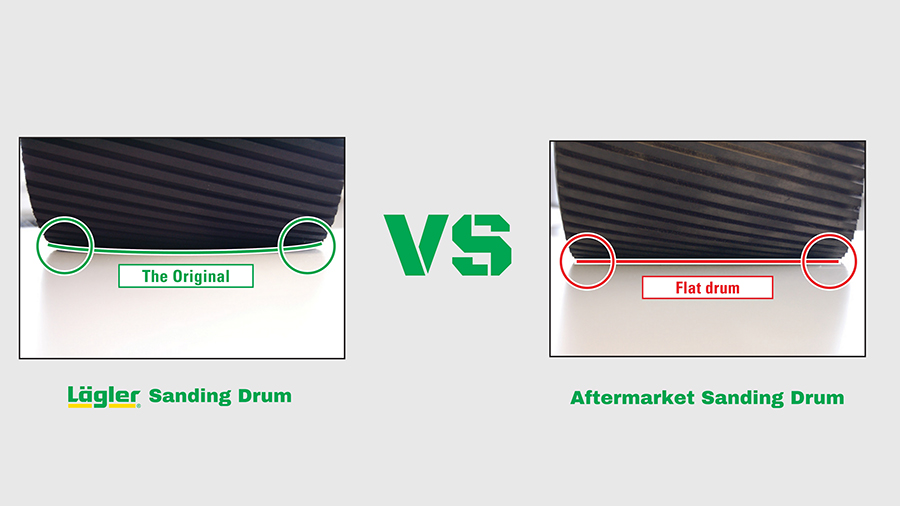
Besides getting awesome Instagram shots on the job, of course, getting the floor flat is the most important part of sanding wood floors.
But that’s harder to get just right if you don’t take a few minutes to figure out the flatness situation before you get started. You’ve got to know what’s
out of whack with the floor so you can game plan how to make it the level of flat you – and the homeowner — want.
We know you know the feel of unevenness when you’re sanding, and sometimes it’s easy enough to see. But taking some minutes to mark out the uneven spots
will make the job easier.
Here’s a simple flatness test you can do with your big machine, before you start sanding.
Check Floor Flatness Using Your Drum Lever
Use these quick and easy steps to help you mark out high and low spots of uneven wood flooring. It will make those areas easier to see when you’re sanding.
1. Put a fine-grit, used abrasive belt on your drum.
2. Make sure your machine is turned off.
3. Lower the drum to the floor.
4. Roll the big machine at an angle across the boards, paying attention to the drum lever’s movement. If the lever moves up, the floor is rising. If it
moves down, the floor is sloping downward.
5. When the drum lever moves more than a little bit up or down, mark the area as high or low with a pencil.
If you do that to the whole room, you’ll be able to step back when you’re done marking out the spots and see the game plan laid out in front of you. High
here, low there. Low right over here, high over there.
These kinds of prep steps save you hassles later in the process. By doing everything you can to knock the floor flat upfront with your big machine, the
fine sanding steps will go much better. If not, the unevenness will continue through each step, making you have to work harder all the along the way.
Want a chance to improve on a practice floor with Lägler at your side? Call us to set a date for you and your crew to get Lägler certified: 800-848-6635
(800-8-HUMMEL).
https://www.laglernorthamerica.com/wp-content/uploads/2020/02/TestFlatness-title.JPG422750webmasterhttps://www.laglernorthamerica.com/wp-content/uploads/2020/02/logo2-300x90.pngwebmaster2017-08-01 23:51:172020-02-28 23:51:44How to Test Floor Flatness with a Big Machine
Sanding wood floors is a science. Knowing that science is what sets you apart from DIY homeowners who want to save a buck and try their luck.
In fact, when a lifestyle blogger reached out to us a few days ago wanting some tips for an article on “refurbishing” wood floors, this was our answer:
Hire a professional. Then we laid out some truth on what it takes to be good at sanding floors, how someone who is inexperienced is virtually certain
to jack up his/her floors. Hire. A. Professional.
That said, even pros aren’t gifted at birth with knowing the science it takes to perfect a floor. Learning is a process that never ends.
For example …
1. We see photos on Instagram everyday showing people running big machines. Some are moving left to right across the room. Some are moving right to left.
Some run parallel to the straight-laid boards, and others cut at a slight angle across them.
Do you know … What’s the best way to sand a wood floor: moving from left or right, and parallel or at an angle? What might be exceptions to the rules?
2.Your big machine has variable pressure settings. For the Lägler HUMMEL, there are three – coarse, middle and fine – that can be chosen by use of a simple
lever. Other big machine models have their own adjustment mechanisms.
Do you know … Which big machine pressure setting should you use for what situation, and when?
3.Then there’s speed. How slow or fast you walk when using the big machine relates to the pressure setting and abrasive grit you’re using. How hard or
soft the species of wood you’re sanding has an impact, too.
Do you know … How fast (or slow) should you dance with your big machine? And what speed with what grit abrasives?
Sanding Direction: Left to Right vs. Right to Left
The HUMMEL’s eight-inch sanding drum is positioned at the right edge of the machine. The lateral wheel that trails the drum always rolls on the freshly
sanded surface.
Because the drum is on the right side of the HUMMEL, the left wheel runs on whatever surface – sanded or not yet sanded – the left side of the HUMMEL passes
over. Forward and backward.
By sanding left to right across the field of the room, all wheels of the HUMMEL will run on the same sanded surface. The machine will be level and you’ll
get optimal flatness as a result, avoiding waves. This benefit carries out in a domino effect for each sanding step in the process.
The exception to the rule is in tight or awkward spaces where common sense tells you to throw a change-up.
Big Machine Sanding Angle
If you sand with the direction of straight-laid floor boards, you are maintaining what has happened to that floor over time. You’re giving it a new look,
no doubt. But the flatness …
When you sand at an angle, you are:
Cutting across imperfections from floor movement, damage and neglect
Avoiding the vibration of loose boards that cause chatter
Avoiding waves rolling down the length of the boards
Until recently, Lägler recommended in its sanding manual to sand at an angle except for the final pass.
When sanding at an angle, at first, the scratch pattern will be more noticeable than when you cut with the direction of the floor boards. But as you sand
with increasingly finer grits and, especially, if you use a quality multi-disc sander in the process, you will remove those scratches.
Lägler now recommends to sand at an angle for all passes with the big machine.
The exception to this rule is when dealing with cupped boards of a straight-laid floor. On the first run across the floor, knock those
edges down with a head-on attack. Then go to sanding at a slight angle.
Adjusting Big Machine Sanding Pressure
Sanding pressures with the big machine are tied to abrasive grits. The finer the grit, the less drum pressure you should use.
The wood species matters, too. Softer woods should be sanded with less pressure, so not to cut too deeply into the floor.
The chart above, from Lägler’s “Sanding of Wooden Floors” manual, lays out grits related to pressure settings. Clear cut. Common sense.
When you have an extra-rough floor or one that’s damaged or coated with a hundred years of nasty, get mean with that first run. If you’re using 16 grit,
you know it makes sense to put on the coarse drum pressure to make the most of it.
Big Machine Walking Speed
To minimize sanding marks and save time in the process, pace yourself. Not too fast, not too slow. No matter how many years you have at the lever, this
relationship has to move at a steady pace. Keep in mind the grit and drum pressure. Overall, consistency is king.
For softer species, a little quicker walking speed will keep you from cutting too deeply into the floor. Or maybe it’s just that you need a slower speed
for harder species. You’re the pro on the job. If you’re getting worse scratches than you want, change the music you’re groovin’ to and adjust your
dance moves.
This won’t surprise you, given Lägler is a German manufacturer, but the company focuses a lot on efficiency.
Lägler cares about that in its production processes, and we care about helping sanding professionals be the most efficient they can be on the job. Knowing how
to get the most out of their machines – whatever brand they are – in the smartest way (least effort) will pay you back every day.
Efficiency when sanding floors saves wear on your body, your abrasives and machines. It saves you time. And all that saves you money and lets you move
on to the next job sooner.
What is Sanding Path Displacement?
One technique for being more efficient when sanding with the big machine is to find the right line for your sanding path displacement, and be consistent
with it.
A sanding path is the forward and reverse sanding motion on the same path without displacement of the sanding drum, meaning that forward and reverse path
is exactly over the top of itself in both directions.
Sanding drum displacement refers to how far over you move from one forward-reverse path to the next. (That should almost always mean moving left to right across the room.)
The ideal amount of sanding path displacement is 50 percent, meaning each time you start the forward sanding motion you will be sanding over half the previous
sanding path’s width. Another way to look at it is you move to the right half the sanding drum’s width.
We follow that 50 percent rule because it helps us to avoid visible differences from path to path. If you’re using a Lägler sanding drum, its slightly
spherical shape also prevents edge lines from the drum being cut into the floor.
A lower amount of sanding path displacement causes a higher stripping rate. If your sanding path is only 25 percent, then you are only moving to the right
one-quarter of the drum’s width. In that case, you are sanding 75 percent of what you sanded during the previous path.
Increasing the sanding path displacement reduces the number of paths across a room, but there is a consequence (see the drawing below that highlights the
double-overlap at the outer edges of the drum).
Because at the outer edges, the outer 25 percent of the drum on each side, the floor gets sanded twice as much as the rest of the floor. Higher displacement
reduces the evenness of the wood floor.
Again, the ideal sanding path displacement is 50 percent.
Along with efficiency being a key to success in sanding floors and business, consistency is important. If you are not consistent with your sanding path
displacement, then you will not produce consistent sanding results. That will lead to inconsistent results with final outcomes of jobs.
That will affect your business overall. And that will affect our business. We’re in this together.
Get hands-on training on a practice floor, with sanding path displacement (and so much more). Call Lägler North America to schedule one-day training and
Lägler Premium Sanding Technology (PST®) certification in Denver. You can get a one-on-one session or bring your crew (up to five in a class).
Have you ever compared a decades-old Lägler HUMMEL and a new one, and wondered what’s changed? We get it. At first glance, they look a lot alike. Two things:
1. Don’t change what ain’t broken …
2. … unless you can make it even better.
For Lägler, better happens in micro-innovations, the little refinements that become possible with new technologies and materials. And, improvements happen
with feedback from all you pros using the machines on floors around the world.
Why Lägler Micro-Innovates
Why does Lägler micro-innovate instead of putting out a whole new belt sander beast every so many years? Stop us if you’ve heard this one. The answer is
consistency, for Lägler and for you. (We’ve mentioned consistent quality many times on this blog and social media as a key to success.)
We assume you would like to keep your big machine running, and not feel like you have to replace it to stay on top of your game.
If you have a HUMMEL (and maintain it properly), or if you talk with someone who does, how many HUMMELs have they had to replace over the years?
A better question is: How many decades have they used their HUMMEL, grinding floors on a daily basis, and not had to replace it?
Like we say, “You buy a new HUMMEL because your business is growing up, not because it’s breaking down.”
Lägler assures compatibility of new parts with existing machines. All new parts work with older models. That’s why the overall look of
Lägler machines has been consistent, despite all the technical refinements every key part of it has received along the way.
Micro-innovations enable you to never be cut offfrom the parts you need to keep your machine running just like you need
it, for as long as you need it.
A few examples of Lägler micro-innovations are below.
Lägler Parts Compatibility Through Micro-Innovations
Lägler HUMMEL’s Lateral Wheels
Micro-innovations mean new-and-improved parts function on older machine models, like the new lateral wheels shown above with a 1983 HUMMEL.
The original lateral wheel design for the HUMMEL had a sheet-metal side wall. The old wheels had considerably more components, too.
The synthetic wheel facing was grouted onto the wheel hub, making it difficult to change out the wheel.
Today’s lateral wheel (P147/P149W),
which is made of lower-wear material is more durable and less likely to leave wheel marks on the floor. It also can be replaced easily without needing
to disassemble the whole wheel unit.
Why this helps you? One step is all it takes now to take off a worn lateral wheel and be able to replace it with a new one: Remove the
one screw and washer set.
Bonus Tip: Lägler recommends cleaning your wheels before every sanding job, and to consider keeping an older set of wheels to put on the
HUMMEL for first passes on tough finish removal. Swap out the wheels again in less than a minute, and you’re set for smooth final cuts.
Lägler HUMMEL’s Upper Roller Unit
The Lägler HUMMEL upper roller unit is one example of micro-innovation at the company. The current version is on the left.
The upper roller unit originally
was steel. Since 1990, it’s been aluminum.
This material change makes production easier. It takes welding out of the process. The aluminum body of the unit can be made in one cast.
Why this helps you? The aluminum upper roller enables more precise belt control and better tracking adjustment.
Lägler HUMMEL’s Fan
The Lägler HUMMEL fan insert has been refined over the years. For example, on the early 1990s fan in the photo above (right), the space between the blades
is solid aluminum. The current model (left) benefits from a micro-innovation designed to remove some of that material.
In the beginning, the fan blades were mounted with tongue-and-groove joints. Now, fans are cast as one piece.
The blades originally were symmetrical. They were reworked in 1990, increasing airflow by using an asymmetrical blade design. The cavity between the blades
was increased during a 1997 design upgrade. (P169, Fan Insert Complete)
How these micro-innovations help you? The lifespan of the fan blades increased significantly. Production processes became easier. Overall
quality got better.
All in All: Lägler Micro-Innovations Save You Money
Got a 50-year-old HUMMEL? No problem. Older HUMMEL sanders can be upgraded with the current versions of all parts. Your HUMMEL, no matter its age, will
not be obsolete.
Save money. Don’t replace the sander. Just maintain, replace parts, as needed, and grind on. Then, pass your Lägler down to the next generation when you
retire.
https://www.laglernorthamerica.com/wp-content/uploads/2020/02/Micro-Innovations-Title.jpg506900webmasterhttps://www.laglernorthamerica.com/wp-content/uploads/2020/02/logo2-300x90.pngwebmaster2017-04-25 00:31:012020-02-29 00:37:12Lägler Micro-Innovations Make the Difference
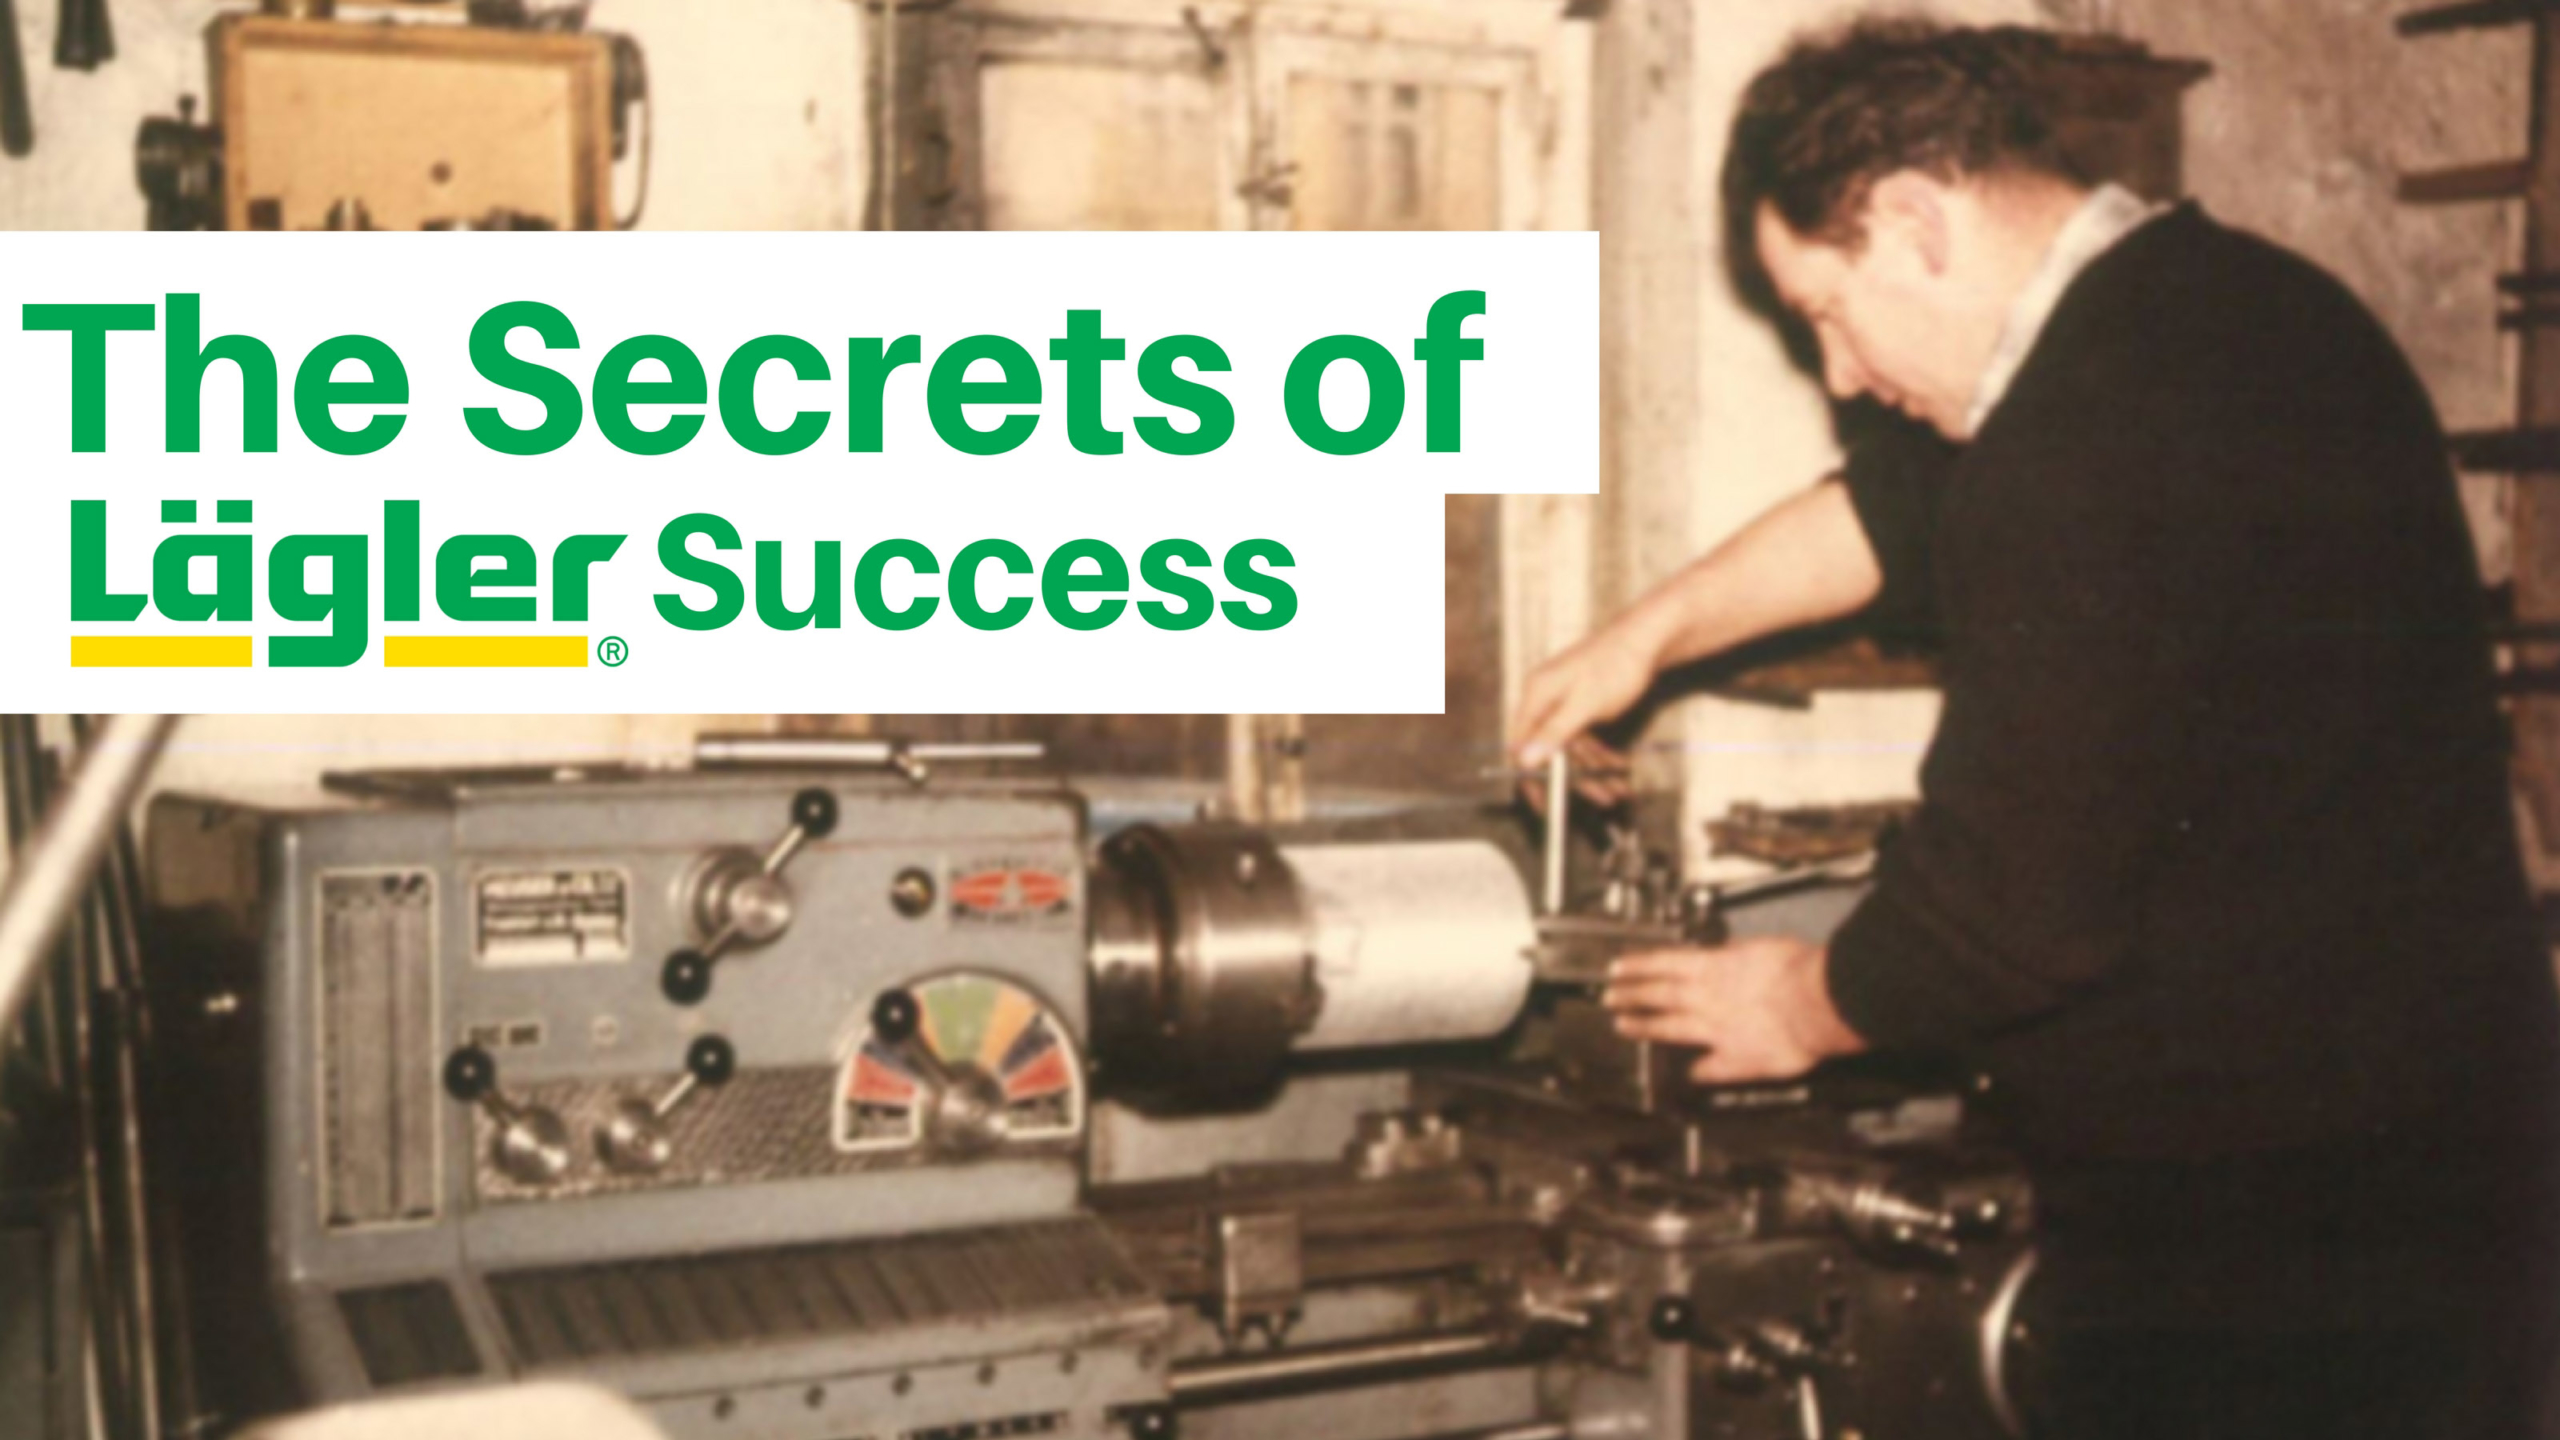
It’s story time. And while what you’re about to read might seem embellished or, parts of it, even flat-out fictional, what we say here is true. Every word.
At the heart of this story is consistency. It’s no secret that the company is known for putting out the same quality in its machines, decade after decade.
So, that’s where we begin.
Consistent. Quality.
You know consistency in business can be difficult to achieve for long periods of time, or sometimes even from one day to the next. For example, how well
are you able to mix up a particular stain color the same every time? That’s hard enough to do, even when you write down exactly how you did it the
first time.
Imagine being a machine manufacturer that changes ownership, its sources for materials, its production processes, has high employee turnover, and can’t
replicate precise training from one employee to the next. And imagine being a company that doesn’t.
Yeah, we’re about to toot Lägler GmbH’s horn, right here. You’ll see why long before the end of this blog post.
Eugen Lägler founded Lägler GmbH in 1956, in Frauenzimmern, Germany. His son, Karleugen, has directed the company since 2007.
Why Lägler Quality Stands So Tall
There are many reasons why Lägler machines are known for reliable performance. Here are a few back-bone reasons:
One Lägler Ownership. One family has owned Lägler since it was founded in 1956. We’re pretty sure no other sanding machine manufacturer
on the planet can claim that. That means there have been no hiccups, from owner to the next, in the driving purpose of the company. That purpose is
top-shelf quality that gives sanding and refinishing pros everywhere exactly the performance and floor results they expect, day in and day out.
Eugen Lägler built the company that has become the globally recognized brand it is in the wood flooring industry. In 2007, his son, Karleugen Lägler, took
the leadership reins. Many of you, especially those who have won the Fly + Sand lottery,
know him as Karl.
Karl grew up in the company. As a boy, not much older than a toddler, he helped build the family house next door to the factory, carrying buckets for his
dad. As a young adult, he studied engineering and learned the ins and outs of the company. He knows the details of every machine model that wears the
Lägler logo and colors in 142 countries – and the best ways to get the most out of them on the job.
Nailed-Down Production Processes. Lägler maintains the quality and consistency in its processes by documenting every step of every employee’s
role. Everything and every person has a purpose in the company. But there still is flexibility and adaptability (more on that in next section).
Lägler gets little outside help for fabricating its machines and parts. For example, SUPERHUMMEL drum cores are made on-site, starting with melting aluminum
bricks into insanely hot liquid that is poured into a mold that was designed and built on-site. Many custom tools for custom manufacturing even have
been designed and fabricated on-site.
Process and precision. With everything and everyone.
Employees’ Unrivaled Skill, Adaptability + Longevity. Do you remember the NFL offensive triple-threat Kordell Stewart? He started his
pro career in the mid-1990s, and mostly played for the Steelers. He was called “Slash,” because he could play multiple positions. He largely played
at quarterback, but could split out as a receiver, and was one of greatest rushers of all time from the QB position, too. Quarterback/Receiver/Rusher.
Slash.
All Lägler employees could be called Slash. They dive deep in their experience in one specific job role, but they are cross-trained in multiple skills,
and cover each other’s stations when needed, too.
Germany, in general, handles its education and training differently than we do in the U.S. Have you seen the videos and Facebook posts lately talking about
restoring pride and training for hands-on trades in America? There’s a great example of pride and success in skilled labor in Germany, and at Lägler.
Three-year-long apprenticeships are where it happens at Lägler. Three years of learning every detail across multiple jobs. Then, maybe you get hired on
permanently.
That’s how Lägler’s factory is filled with highly skilled craftsmen who year after year are the reigning world champs of their job. Because, really, no
one in the world knows that job better than the guy who is doing it. (Watch our three-minute “Icon Builders” video on YouTube to learn more about the guys who have years’, even decades’, of experience building thousands and thousands of HUMMELs.)
After all, Lägler employees aren’t messing with Legos. No one walks in off the street – or even the home crew out of Lägler North America in Denver – and
starts putting together Lägler machines. That’s why a guy there can walk out the building on his last day before retirement, having made his mark on
50,000 HUMMELs that are still running on job sites all over the world, and know he made a difference.
Confidence in Lägler
So, yeah. We’re proud to be your Lägler home base in North America, and to know the legacy we’re part of. And we think this story is worth sharing. No
reason to keep it a secret.
The fact is, no other floor sanding machine manufacturer on Earth can duplicate Lägler. No company can duplicate the story, the ownership, the processes,
the skilled craftsmanship, the quality.
That makes Lägler a unicorn in the industry, verified by its ISO 9001 certification. ISO 9001 is the international standard that verifies Lägler’s strict
adherence to seven “quality management principles”: customer focus, leadership, engagement of people, process approach, improvement, evidence-based
decision making, and relationship management.
If you want a chance to see the Lägler factory, to get to meet the guys in the Icon Builders video, and see all this stuff we’re talking about for yourself,
you can attend Lägler PST at Lägler world headquarters in Germany. One way to get that trip paid for by Lägler, is to be one of the lucky winners of
the Fly + Sand lottery.
Share this Lägler story on Instagram, Facebook, and Twitter,
where Lägler friends worldwide help each other. Mention us, so we can follow along with your Lägler life.
HUMMEL owners, tell us: How easy is it to remove and replace your HUMMEL sanding drum? Yeah, easy-easy. DIY in the shop, at your trailer, on the jobsite
floor, right? No need to waste time or money for someone else to do it.
If you haven’t swapped out sanding drums yet, we have a one-minute “How to Replace a HUMMEL Sanding Drum” demo
video on our Lägler North America YouTube channel.
Know Why, How + When to Replace a Sanding Drum
Damaged sanding drums lead to damaged floors. Damaged floors lead to customer complaints, callbacks, re-sanding, and a lot of expense on your part. Needless
to say, it’s far cheaper to pay a little attention to the condition of your drum and replace it, when needed.
When you replace a worn or moderately damaged drum, save it. It’s still of use for first cuts when sanding especially rough floors or decks.
Below are photos of damaged drums and the consequences of continuing to use them when sanding wood floors.
Perpendicular Cuts Through the Drum Rubber
These unwanted cuts in the drum’s rubber come from nails, staples or other sharp objects protruding from the subfloor. Careful subfloor prep avoids this
type damage to a sanding drum.
When sanding with a drum that has this damage, you’ll see “streaks” appear on the floor as you sand. Those lines are raised marks that happen because of
the nail-torn grooves left in the drum not making proper contact with the sanding surface.
A drum with this type of damage needs to be replaced.
Material Embedded in Drum Rubber
Loose nails, staples or other debris can stick into the rubber and hold on for the ride. Obviously, that leads to an uneven drum and sanding result. The
debris can damage the drum and belt abrasive. It also leads to gouging the sanding surface.
You might be able to remove the debris from the rubber without leaving or causing damage to the drum. But we recommend you think twice. The slightest damage
can transfer to the floor and, like we’ve said, that becomes way more costly to you.
The safest move is to replace the sanding drum. But save the old drum for special uses, like using it on extra-rough first cuts. That can spare your new
drum some wear, and allow you to put on the new drum for finer cuts.
Unbalanced Sanding Drum
A drum that is out of balance makes uneven contact with the sanding surface, causing chatter (photo below). Poor balance is common with aftermarket drums.
Lägler balances its drums using a specially designed machine at the factory in Germany. It’s not unlike how a mechanic shop balances your truck’s wheels.
And the weight tolerance in Lägler’s process is extremely tight [Read “Sanding Drums: Lägler vs Aftermarket”
to learn how tight, and other stuff].
An unbalanced sanding drum needs to be replaced.
Aged or Worn Out Sanding Drum
The rubber layers of sanding drums age, stiffen and wear out much like car tires do. The shape and flexibility of the rubber changes over time, regardless
of the amount of use. If you are using a “new” drum that sat for years waiting to get into the game but in reality is six to eight years old, it absolutely
is due for replacement, no ifs, ands or buts. Just like with car tires, there is a shelf life on the rubber’s usefulness.
Old, worn out drums tend to cut harder on the edges. Lägler drums are designed to have a “football” shape that feathers toward the edges and avoids those
hard edge-cut lines in the floor. As a drum loses its shape over time, it fails to retain that design.
How long does a drum last? The sanding drum you are using daily should be changed every three years. If you sand somewhat regularly, but
not daily, Lägler recommends replacement every five years. To minimize problems with your sanding drum and get the most out of its performance, keep
it clean between uses and check its condition on a regular basis.
Plan for regular replacement, just like you would plan for regular maintenance for your truck or van. It’s part of the investment for consistent, top-notch
performance of a machine your business relies on.
Dirty Sanding Drum
Dust and debris collect in the aluminum drum cylinder, throwing the balance off. That causes chatter in the floor.
This is easy to avoid with regular cleaning. At least once every month, remove the drum and vacuum out the cylinder. While you’re doing it, look over the
drum’s condition and tend to any maintenance that’s needed.
Uneven Floor Caused by Knotty Wood
This is not a sanding drum issue, but a situation that can be fixed with the right use of a sanding drum. Most common on pine and softwood, the knots are
harder and do not sand as well, similar to end-grain or inlays of different species.
For these situations, use Lägler’s hard drum (recognized by its reddish-colored rubber). It is less flexible and cuts more aggressively, the way you need
for the knots.
https://www.laglernorthamerica.com/wp-content/uploads/2020/02/DrumDamage-title.jpg5631000webmasterhttps://www.laglernorthamerica.com/wp-content/uploads/2020/02/logo2-300x90.pngwebmaster2017-03-28 00:46:062020-02-29 00:57:476 Things You Need to Know About Sanding Drums
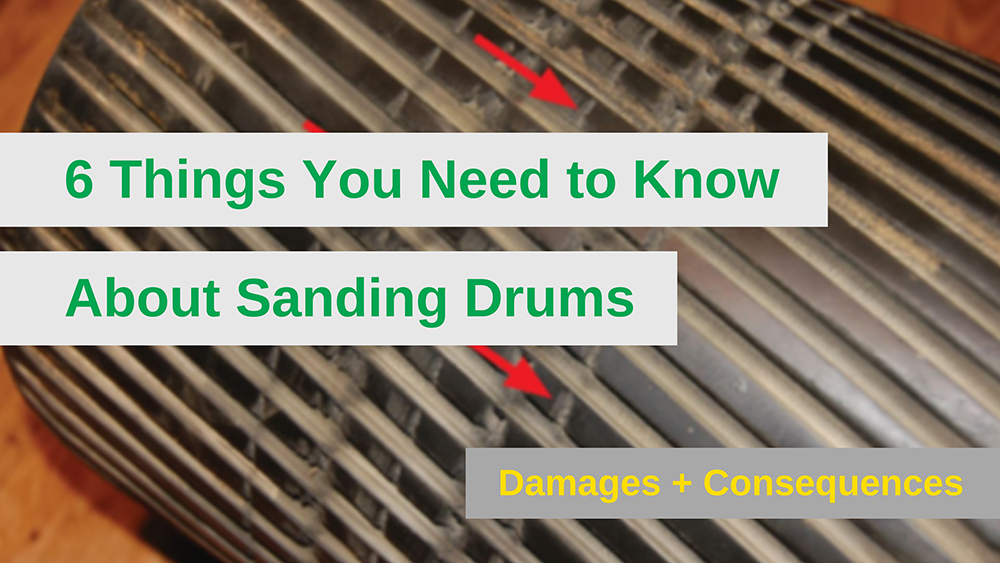
There are a lot of parts to care about with a “big machine” like Lägler’s HUMMEL. But even if you keep it purring, clean and rolling smoothly, it won’t
do you any good if you use a sanding drum that mars the floor with edge marks, waves and chatter.
You can see where we’re headed here, right? We recommend the Lägler sanding drum, of course. But, like everything with Lägler, there is a reason behind
the design. There are reasons we recommend the Lägler drum, and only the Lägler drum.
It simply isn’t the apples-to-apples trade with aftermarket versions like you might think.
In this post, we explain why Lägler recommends not using aftermarket or recycled drums, and how you can know whether a drum you are buying is an authentic
Lägler drum.
The Importance of the Sanding Drum
The quality and condition of your sanding drum is crucial for sanding success. It transfers the machine’s performance to the sand paper, which then impacts
the floor.
If a drum – the aluminum core, weight and outer layers of rubber – is older than four years, visibly worn out or damaged, or the rubber has hardened, it
needs to be replaced. We can promise a drum past its quality of life will give you sanding results your clients will not appreciate.
The “Football” Shape of Lägler Sanding Drums
When looking at a new Lägler sanding drum, it is easy to miss seeing that the drum’s diameter is larger in the middle than it is at the edges. But this
shape is crucial to the quality of a sanded surface. It also is why you do not need to dress a Lägler drum.
Non-Lägler sanding drums have a flat shape, touching the floor from edge to edge of the drum. While overlapping sanding paths, a small change in elevation
occurs. That leads to a flat sanding drum leaving marks where its edges cut the floor.
Lägler removes this risk of edge-cuts with its drums by decreasing the drum’s diameter from the middle to the outside. That slightly oblong shape, kind
of like a football, is exactly what’s needed for feathering at the edges while sanding.
Lägler drums focus sanding pressure evenly in the center portion of the drum, assuming you have leveled your HUMMEL wheels (extremely easy to do; watch
our one-minute video). You will be able to see that by the wear pattern on the abrasive belt.
Known Problems with Aftermarket + Recycled Sanding Drums
The market offers aftermarket and recycled sanding drums that fit on the Lägler HUMMEL, but they are not equal replacements for a Lägler original drum.
They cause damage to floors.
That damage leads to call-backs and more expense on your part as the sanding professional to fix the issues with the floor and to replace the faulty drum
so it doesn’t continue to cause problems.
On occasion, Lägler receives warranty claims for drums, and they are rejected. Virtually all these claims are based on problems that come from using non-Lägler
drum.
Problems that occur with aftermarket and recycled drums are:
Improper balancing, which leads to waves and/or chatter in the floor.
Vibrations caused by waves and chatter transfer throughout the HUMMEL, leading to damage to the machine.
The flat design of aftermarket drums does not provide the same predictable pressure per square inch, causing less-aggressive sanding results.
Flat-shaped drums cut the floor at their edges, leaving marks and causing uneven sanding throughout the project.
Non-Lägler drums often have a damaged or imprecise core; this also leads to damaging the floor during sanding.
4 Visible Signs of Aftermarket Drums
Sanding drums that are not Lägler originals manufactured at Lägler headquarters in Germany have a few tell-tale signs. Here are four clear ways to see
that a sanding drum is an aftermarket drum.
Overlapping rubber layers. There are two layers of rubber on a drum. Aftermarket drums overlap, creating a hardened spot that will cause
vibrations that lead to waves. Lägler drums have rubber layers of even thickness, with the outer layer applied evenly on top of the inner layer, no
overlap.
No “football” shape. Adding to what’s been described in the section about football shape above, the larger contact area of non-Lägler
drums reduces aggression by up to 20 percent.
Worn out bore. Lägler does not reuse old sanding drums. The bore where the drum slides on and off the drum shaft gets worn out. To reuse
a drum, each bore would have to be replaced to be able to guarantee the refurbished drum is properly balanced. The cost of that effort makes recycled
drums too expensive.
Out of balance. Lägler uses special screws as balancing weights on the sanding drum core’s lid. Those weights are new for each drum. Lägler
has perfected its balancing act, keeping each end of the drum within less than 4/100 of an ounce. Sanding drums being recycled for resale need to be
re-balanced because of new rubber being applied, but drums that try to reuse old cores and old weights can’t be properly balanced.
The Bottom Line of Using Aftermarket Sanding Drum on You HUMMEL
The issues laid out above not only lead to poor sanding results, they cause more frequent sanding drum replacements. That costs you more money.
We’re sure you’ve heard, “You get what you pay for.” You probably have said that to a hesitant client or two over the years, too, when they are considering
hiring your competitor with a lower estimate, right?
Think about all we’ve said in this blog post, and it’s easy to understand the importance of a just-right drum to the livelihood of Lägler as a company.
Bad drums lead to bad experiences and bad sanding results with Lägler’s HUMMEL; that would lead to a loss of sanding pros’ confidence in Lägler in
142 countries worldwide. A big deal.
If you have questions about Lägler sanding drums, or anything else Lägler, comment below or call us at 800-8-HUMMEL (800-848-6635) during
weekday business hours.
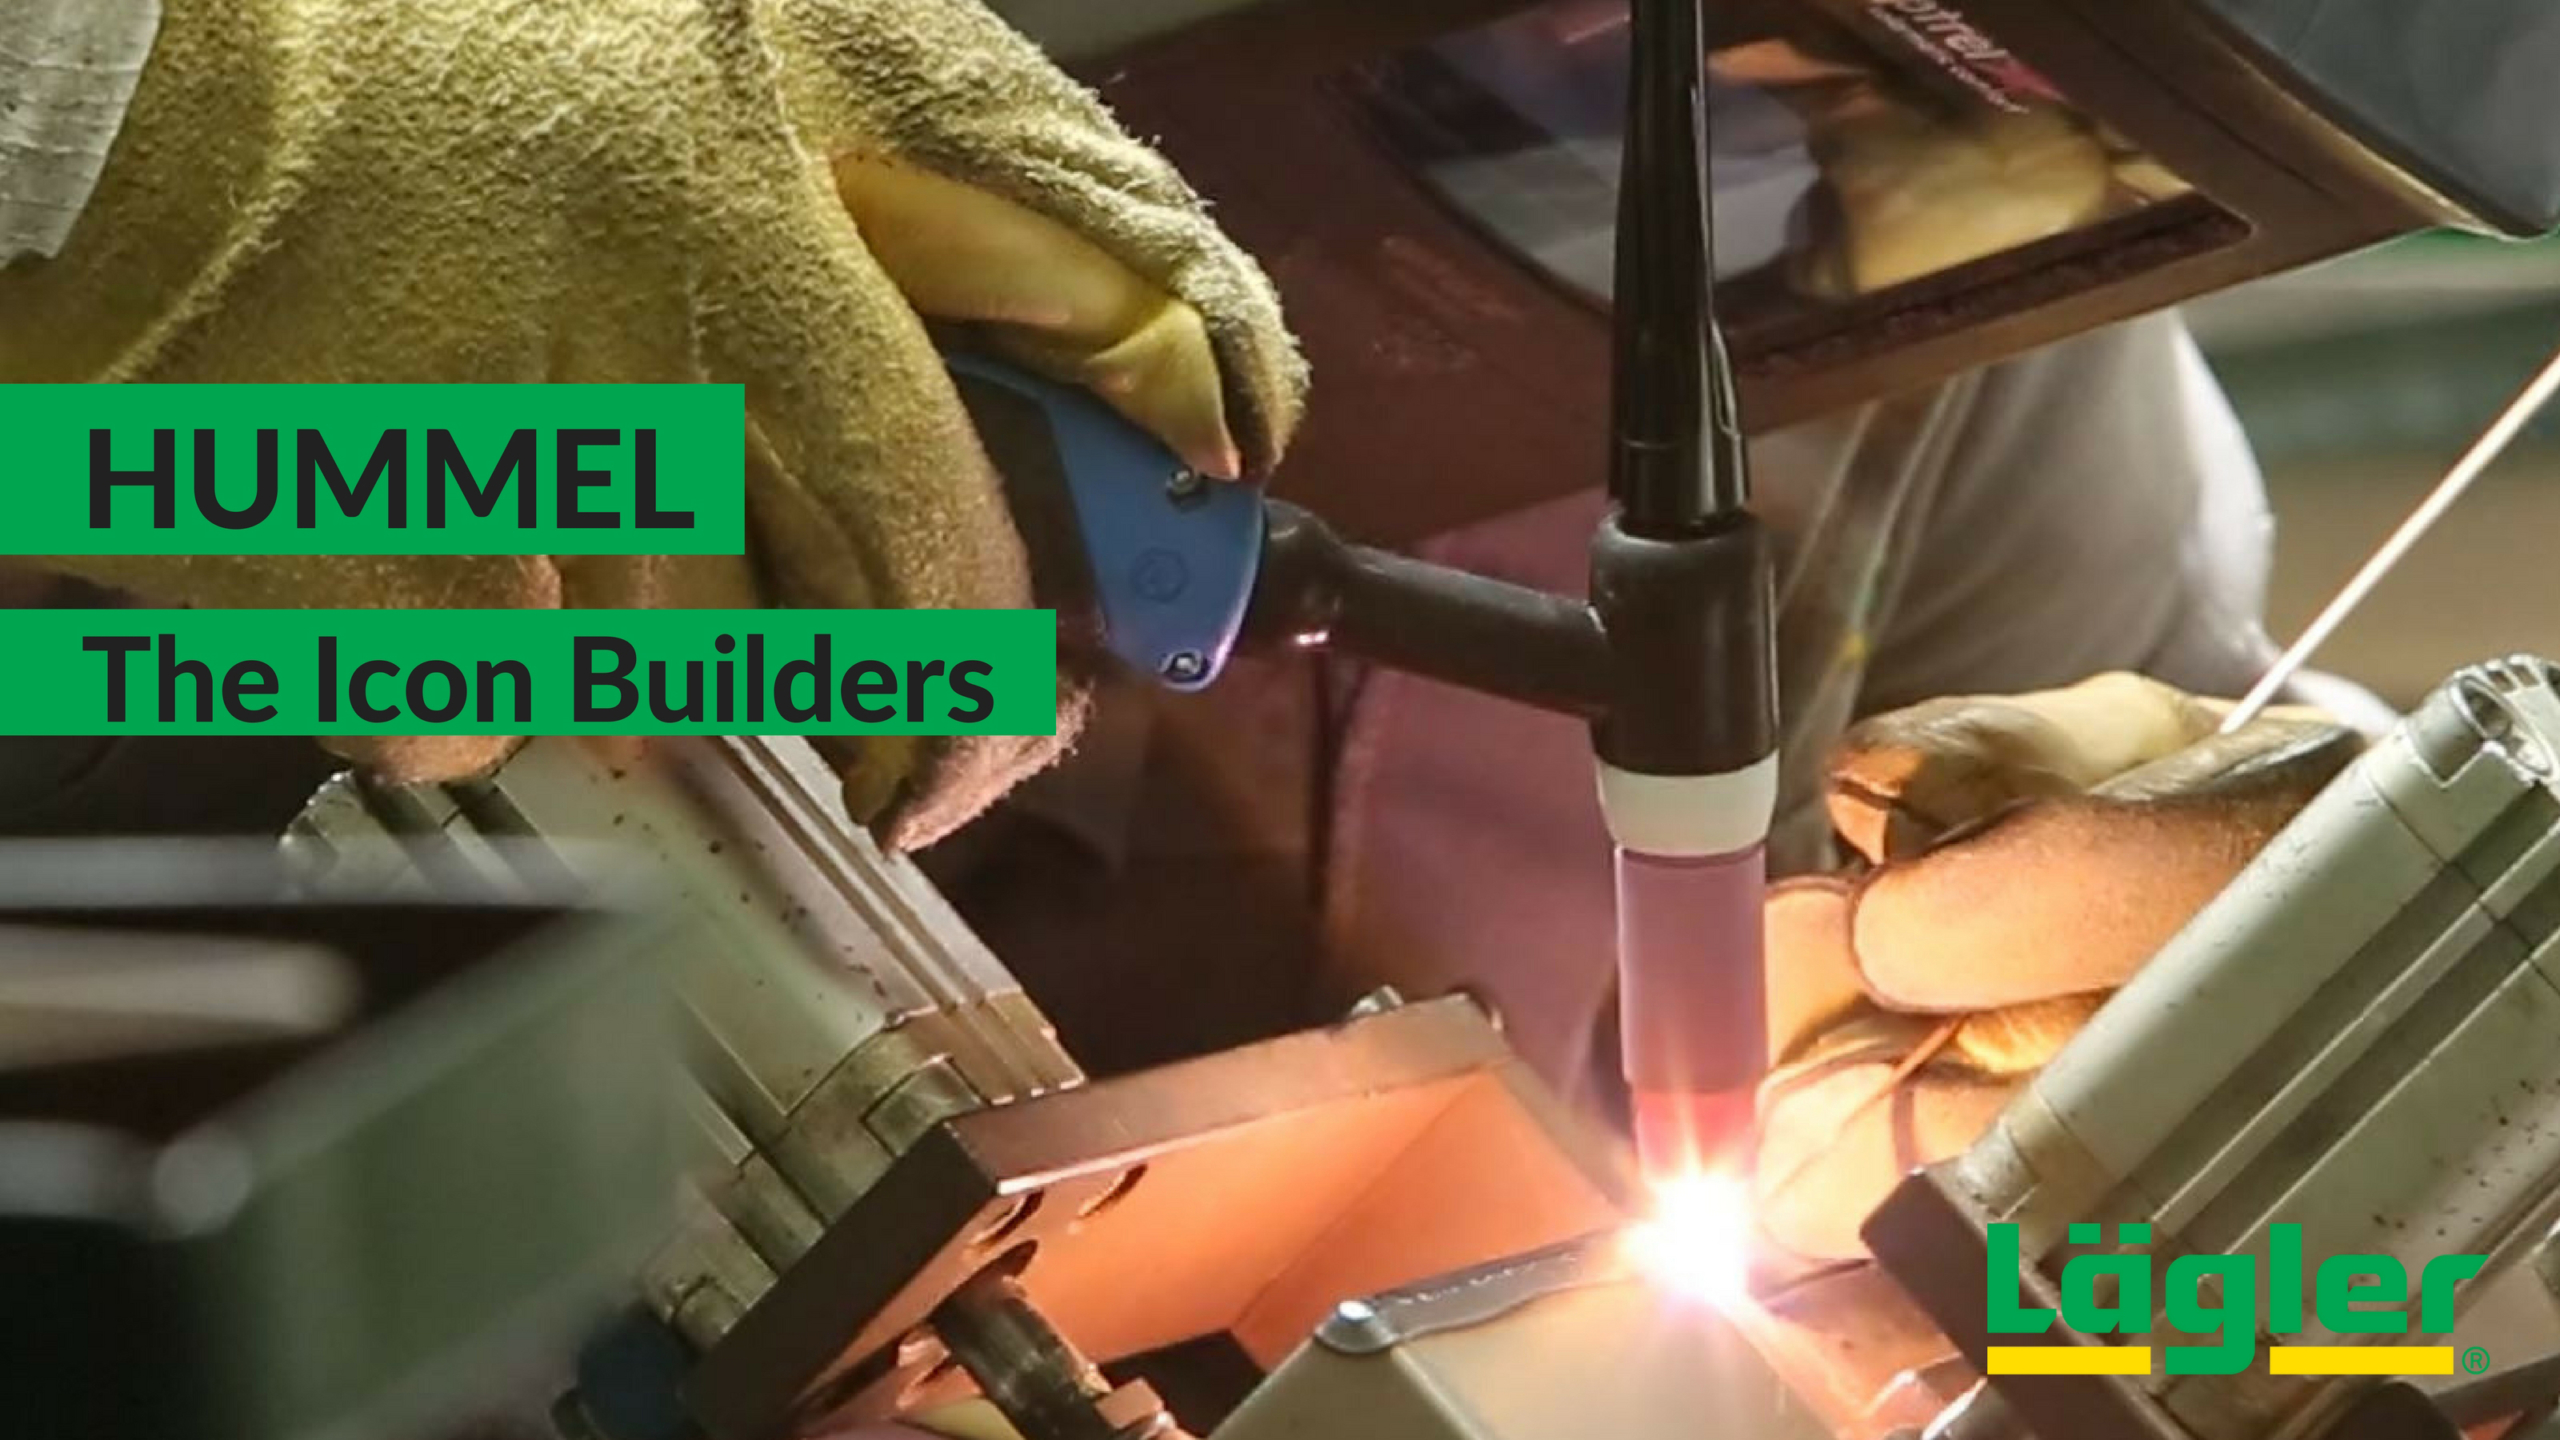
This ain’t Vegas. What happens at the Lägler factory in Germany does not stay in the Lägler factory in Germany. It gets shipped near and far to floor guys
in 142 countries.
Take the HUMMEL.
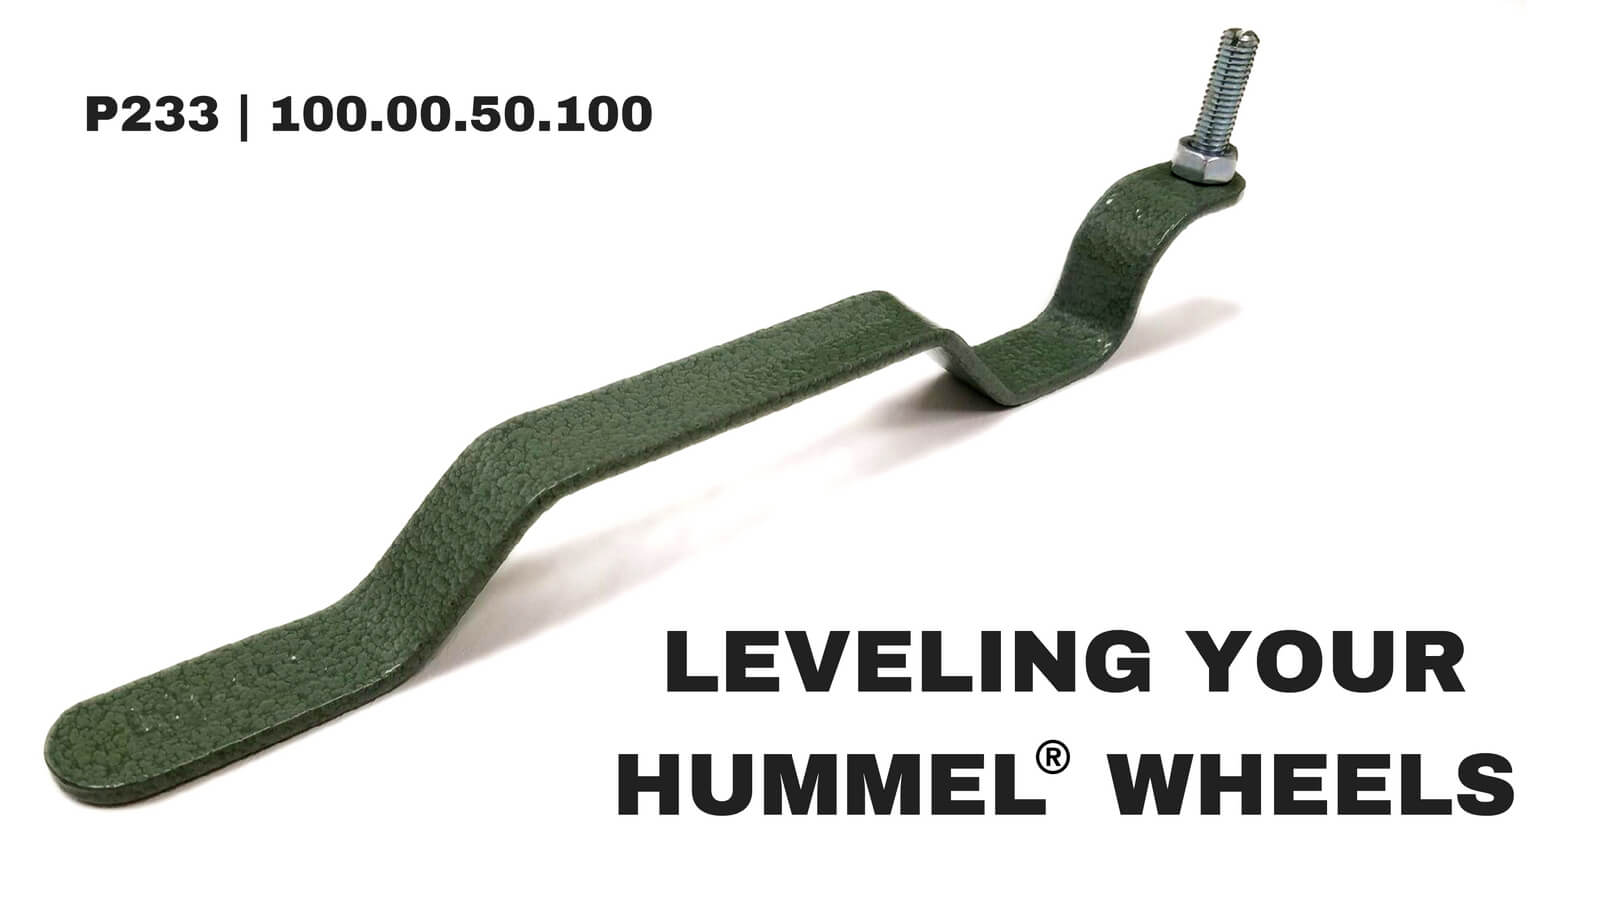
 The icon in floor sanding. The HUMMEL didn’t become the most-recognized “big machine” in the industry overnight. It launched in 1969,
the world’s first belt sander. Many tens of thousands of them are the heart of flooring businesses worldwide today, whether the guy running it gets
paid in dollars, euros, pesos or pounds.
The HUMMEL is the heart of Lägler company, too, which has more than 60 years as a privately owned family business. Founded by Eugen Lägler, the legacy
continues in the hands of his son, Karleugen Lägler.
That explains a lot about the consistent quality of the machines. Steady vision, keeping the HUMMEL on-point with its past while being adaptable for the
future. Got a 40-year-old machine in need of parts? No problem. New parts fit.
Another key to this consistent quality comes from the men on the factory floor. They have a few years to a few decades of experience in the guts of that
one machine. Each man has had a part in sending thousands to tens of thousands of HUMMELs out the door and onto floors.
Start to finish, it’s these Lägler craftsmen that make HUMMEL happen. Fabricating, welding, powder coating, hand assembling, and testing the more than
100 parts assemblies for each machine.
Few parts come from outside the factory and outside the hands of Lägler employees. But those that do are made by partners nearby, following Lägler designs
and using custom tools made in the Lägler tool shop.
This is why the Lägler HUMMEL is recognized by flooring guys worldwide. This is how it earned its rep as an icon of floor sanding. This is why we say,
“Hand Built in Germany. Hand Approved Worldwide.”
Watch the three-minute behind-the-scenes story of these men who make of the HUMMEL.
OK, so you’re on your way into the house, carrying your HUMMEL. It gets dropped. It takes a lot to throw out of whack the wheel setting on your Lägler
HUMMEL® but it can happen in a moment like this. Seeing and fixing the misalignment is super-easy once you’re in the house and ready to
fire up.
Top Two Things You Need to Know
1. How to know your Lägler HUMMEL wheels are not level with each other
2. How to realign the wheels of the Lägler HUMMEL for best sanding
How to Know If Your HUMMEL Wheels Are Aligned
If the wheels are not set at the same height, the machine will lean slightly. That will cause uneven wear on the abrasive that will be obviously visible
on the belt. And an off-center mark will be obvious if you tap a footprint on the floor to test the cut. An uneven machine will leave an uneven mark
on the floor.
When the wheels are set properly, the center of the drum is where the cutting happens, so you will see a symmetrical sanding footprint on the floor and
even wear on the sanding belt. [Note: This is why you should not dress a Lägler drum. It is designed for cutting from the high spot of the drum to
improve sand paper tracking. It also prevents the edges of the paper making contact with the floor and leaving lines.]
The short video above shows the difference between an uneven sanding mark and one that is nicely balanced at the center of the drum.
/_photos/WheelLeveling-drawing.JPG
How to Adjust HUMMEL Wheels for Best Sanding
Like basic maintenance with all Lägler machines, there is a simple Lägler tool for the job. And, if you bought your HUMMEL new, the tool for leveling the
wheels came with the machine. Don’t have the tool? Check with your area Lägler dealer or on our website using these part numbers: P233 (Lägler N.A.) and 100.00.50.100 (manufacturer). You also will need a 13mm wrench for loosening the tension screw of the adjustable wheel (one comes
with buying a new HUMMEL).
The wheel on the belt-guard side is fixed in position with a screw. The wheel on the other side is adjustable, and the tension screw for that is marked
on the machine with a black arrow. Your goal is to move the adjustable wheel up or down as needed to set it at the same height as the position of the
fixed wheel.
The video above is a quick how-to demonstration for setting your HUMMEL wheels at the same height.
2 Tips for Leveling the Wheels of Your HUMMEL
If you are cutting more heavily to the left, the adjustable wheel will need to be lowered toward the floor, taking it a little further down out of the
“wheel well.” (See A and B in drawing below.)
If you are cutting more heavily to the right, or belt-guard, side, the adjustable wheel will need to be raised, sliding it a bit further up into the wheel
well of the machine housing. (See C and D in drawing below.)
Floor sanding professionals in North America can call us at 1-800-8-HUMMEL (1-800-848-6635) for answers to technical and sales questions, and to schedule
PST certification training.
https://www.laglernorthamerica.com/wp-content/uploads/2020/02/LEVELING20YOUR20HUMMEL20WHEELS.jpg9001600webmasterhttps://www.laglernorthamerica.com/wp-content/uploads/2020/02/logo2-300x90.pngwebmaster2017-01-03 01:22:082020-02-29 01:25:37How (and Why) to Level the Wheels of the Lägler HUMMEL®
We’re doing what people do at the end of one year, beginning of another. We look back at what we did well and what we can improve. We always want to keep
doing better.
That runs from machine designs and production at the factory in Germany to customer service, certification training and every way we connect with you pros
online here in North America.
We kicked off a new, mobile-friendly website in 2016. With it came a blog, and we started social media pages on Instagram, Facebook, Twitter and YouTube. We started making videos and answering top questions you have about using and
maintaining Lägler machines.
Added up, you all spent about five work weeks of the year learning from the content on our blog. That’s a great start, and we aim to build on that in the
coming year.
Here’s a recap, highlighting the most popular how-to topics and just plain fun social media posts.
TOP BLOG CONTENT
Lägler Certification: What is Lägler PST?
Our most viewed blog page. Like we say in that post, our training program is about two things:
1. Building relationships with contractors, letting them know we are the true resource about Lägler machines and we’re ready to help.
2. Helping contractors to maximize success with their sanding and finishing businesses.
In this post, we describe the Lägler process that gets you the most out of every floor while taking the least time on the job. Greatest efficiency for
the flattest floors. We tell what the one-day certification course costs and why we offer it at a financial loss to ourselves.
Nothing builds trust like truth and, of course, quality machines you can count on for many years. That’s what we bank on every day.
Not surprisingly, HUMMEL blog posts are a favorite among all our topics. It’s the most popular Lägler machine in North America, and is used by many thousands
across the world.
How to Replace a Lägler HUMMEL Sanding Drum
This post tells the two most important things to know about the HUMMEL drum. It also includes step-by-step instructions.
The video in this post shows proof that the HUMMEL design maintains its nearly 50 years of original engineering while also taking on all the parts that
have been refined along those many years. New parts on, say, a 1983 machine? No problem. Maintain and roll on.
Why You Should Sand Wood Floors at an Angle + Left to Right
We’ve refined our thinking on sanding at an angle. For example, we used to recommend cutting at an angle for the first pass, and then with the direction
of a straight-laid floor for finer grits.
Now, we recommend using at least a slight angle for each pass. It’s all about getting the flattest results.
We also explain why to sand left to right as you move across the field of a room, and why you should not sand right to left, if you want to achieve the
best results.
4 Reasons Not to Use a Wire-Brush Drum with a Lägler HUMMEL
We know the wire-brushed look is especially cool with current trends in wood flooring. But we also know the reasons you don’t want to throw a wire-brush
drum on your HUMMEL for that job.
What did we say about truth above? Truth builds trust, and trust us when we say we are focused on quality floors and offering the best information we have
to you.
Do you have Lägler HUMMEL questions and helpful content ideas? Use the Contact link in the menu heading above to submit your suggestions.
We want to tackle all the information that will be helpful to you in the field with future blog and video posts.
TOP FLIP® BLOG POSTS
The FLIP edger finally is getting its due in North America. The machine was launched in 2001 in Germany, and now is becoming much more widely known and
used here. Search #LaglerFLIP on
Instagram to see photos and videos from some of the guys who are using it — and bragging about it — across the land.
How to Use the Lägler FLIP Corner Attachment
How do you handle room corners, around pipes, and between railing balusters? You could scrape. You could use an orbital sander in some of those spots.
But the FLIP corner attachment is the high-speed tool that knocks it all out the cleanest and quickest.
The FLIP is sold with the short and corner attachments, and this blog post includes tips for using both.
Like everything with Lägler machines, the engineers have lightened the pro’s load on the job. With the FLIP, don’t burn out your shoulders to add a touch
of pressure here or there. Just use as recommended.
This blog post gives step-by-step instructions for making sure the FLIP is cutting as expected. It tells how to set the pressure based on which attachment
you’re using, and in only of seconds of effort on the job.
The CAD drawings in this post also show what goes wrong when you’re edger is running on off-kilter settings like an old sea captain with an uneven peg
leg.
What Lägler FLIP questions and helpful content ideas do you have? Tell us, using the Contact link in the menu heading above. We want to
turn those questions into useful blog and video posts to help everyone #LearnMoreEarnMore.
TOP TRIO BLOG POSTS
What is a surefire way to know when a floor sanding guy doesn’t own a TRIO and hasn’t participated in Lägler’s Premium Sanding Technology (PST®)
certification training? He calls the machine a buffer and thinks it slows down the process.
For those who know better, we’re building our how-to TRIO content. For those who want to test-drive a TRIO and see why so many others swear by it, read,
“What is Lägler PST?”
and get in touch with us.
Lägler TRIO: Sanding Disc Arrows + Abrasives
Let’s veer off the path for a minute. Have you ever noticed on the gas gauge in your truck that arrow next to the little silhouette of the gas pump that
either points left or right? It’s a reminder, showing you on which side of the vehicle your gas tank is when you pull up to the pump at the gas station.
Well, the TRIO has a similar reminder on its three sanding discs. This blog post tells why the arrows cast in the plate are there and how that plays a
part in extending the life of your abrasives.
What are the three things you need to know about cleaning the TRIO filter? What is the one thing you really shouldn’t ever do and, we’re willing to bet,
you or someone on your crew has done?
This post includes a super-short video and the three simple steps you should use to clean your filter in only seconds.
What Lägler TRIO questions and blog/video ideas do you have? The Contact link in the menu heading above is your path to telling us. We
can turn your question – which likely is a common question many others have – into helpful blog content for everyone.
TOP VIDEO CONTENT
We started a YouTube channel this past year. It’s great for embedding videos in our blog posts. If you watch as much on YouTube as you do on TV, like your kids do, look us up and
subscribe.
https://www.laglernorthamerica.com/wp-content/uploads/2020/02/Content-Year-in-Review-scaled.jpg14402560webmasterhttps://www.laglernorthamerica.com/wp-content/uploads/2020/02/logo2-300x90.pngwebmaster2016-12-27 01:25:502020-02-29 01:35:30The Most Popular, Most Helpful Lägler N.A. Content of 2016